A realistic model of an improvised steampunk oxyhydrogen rifle
I started this project back in 2022 with the goal of designing a viable oxyhydrogen rifle.
Inspired by games like the Metro trilogy and the Fallout universe, I decided on an improvised construction while also including my love for the Steampunk-ish brass and wood combo.
The whole firearm keeps a steampunk vibe, combined with simple electronics.
It's my personal style, sort of a post-apocalyptic comeback of steampunk technologies combined with modern, reclaimed, and improvised technologies.
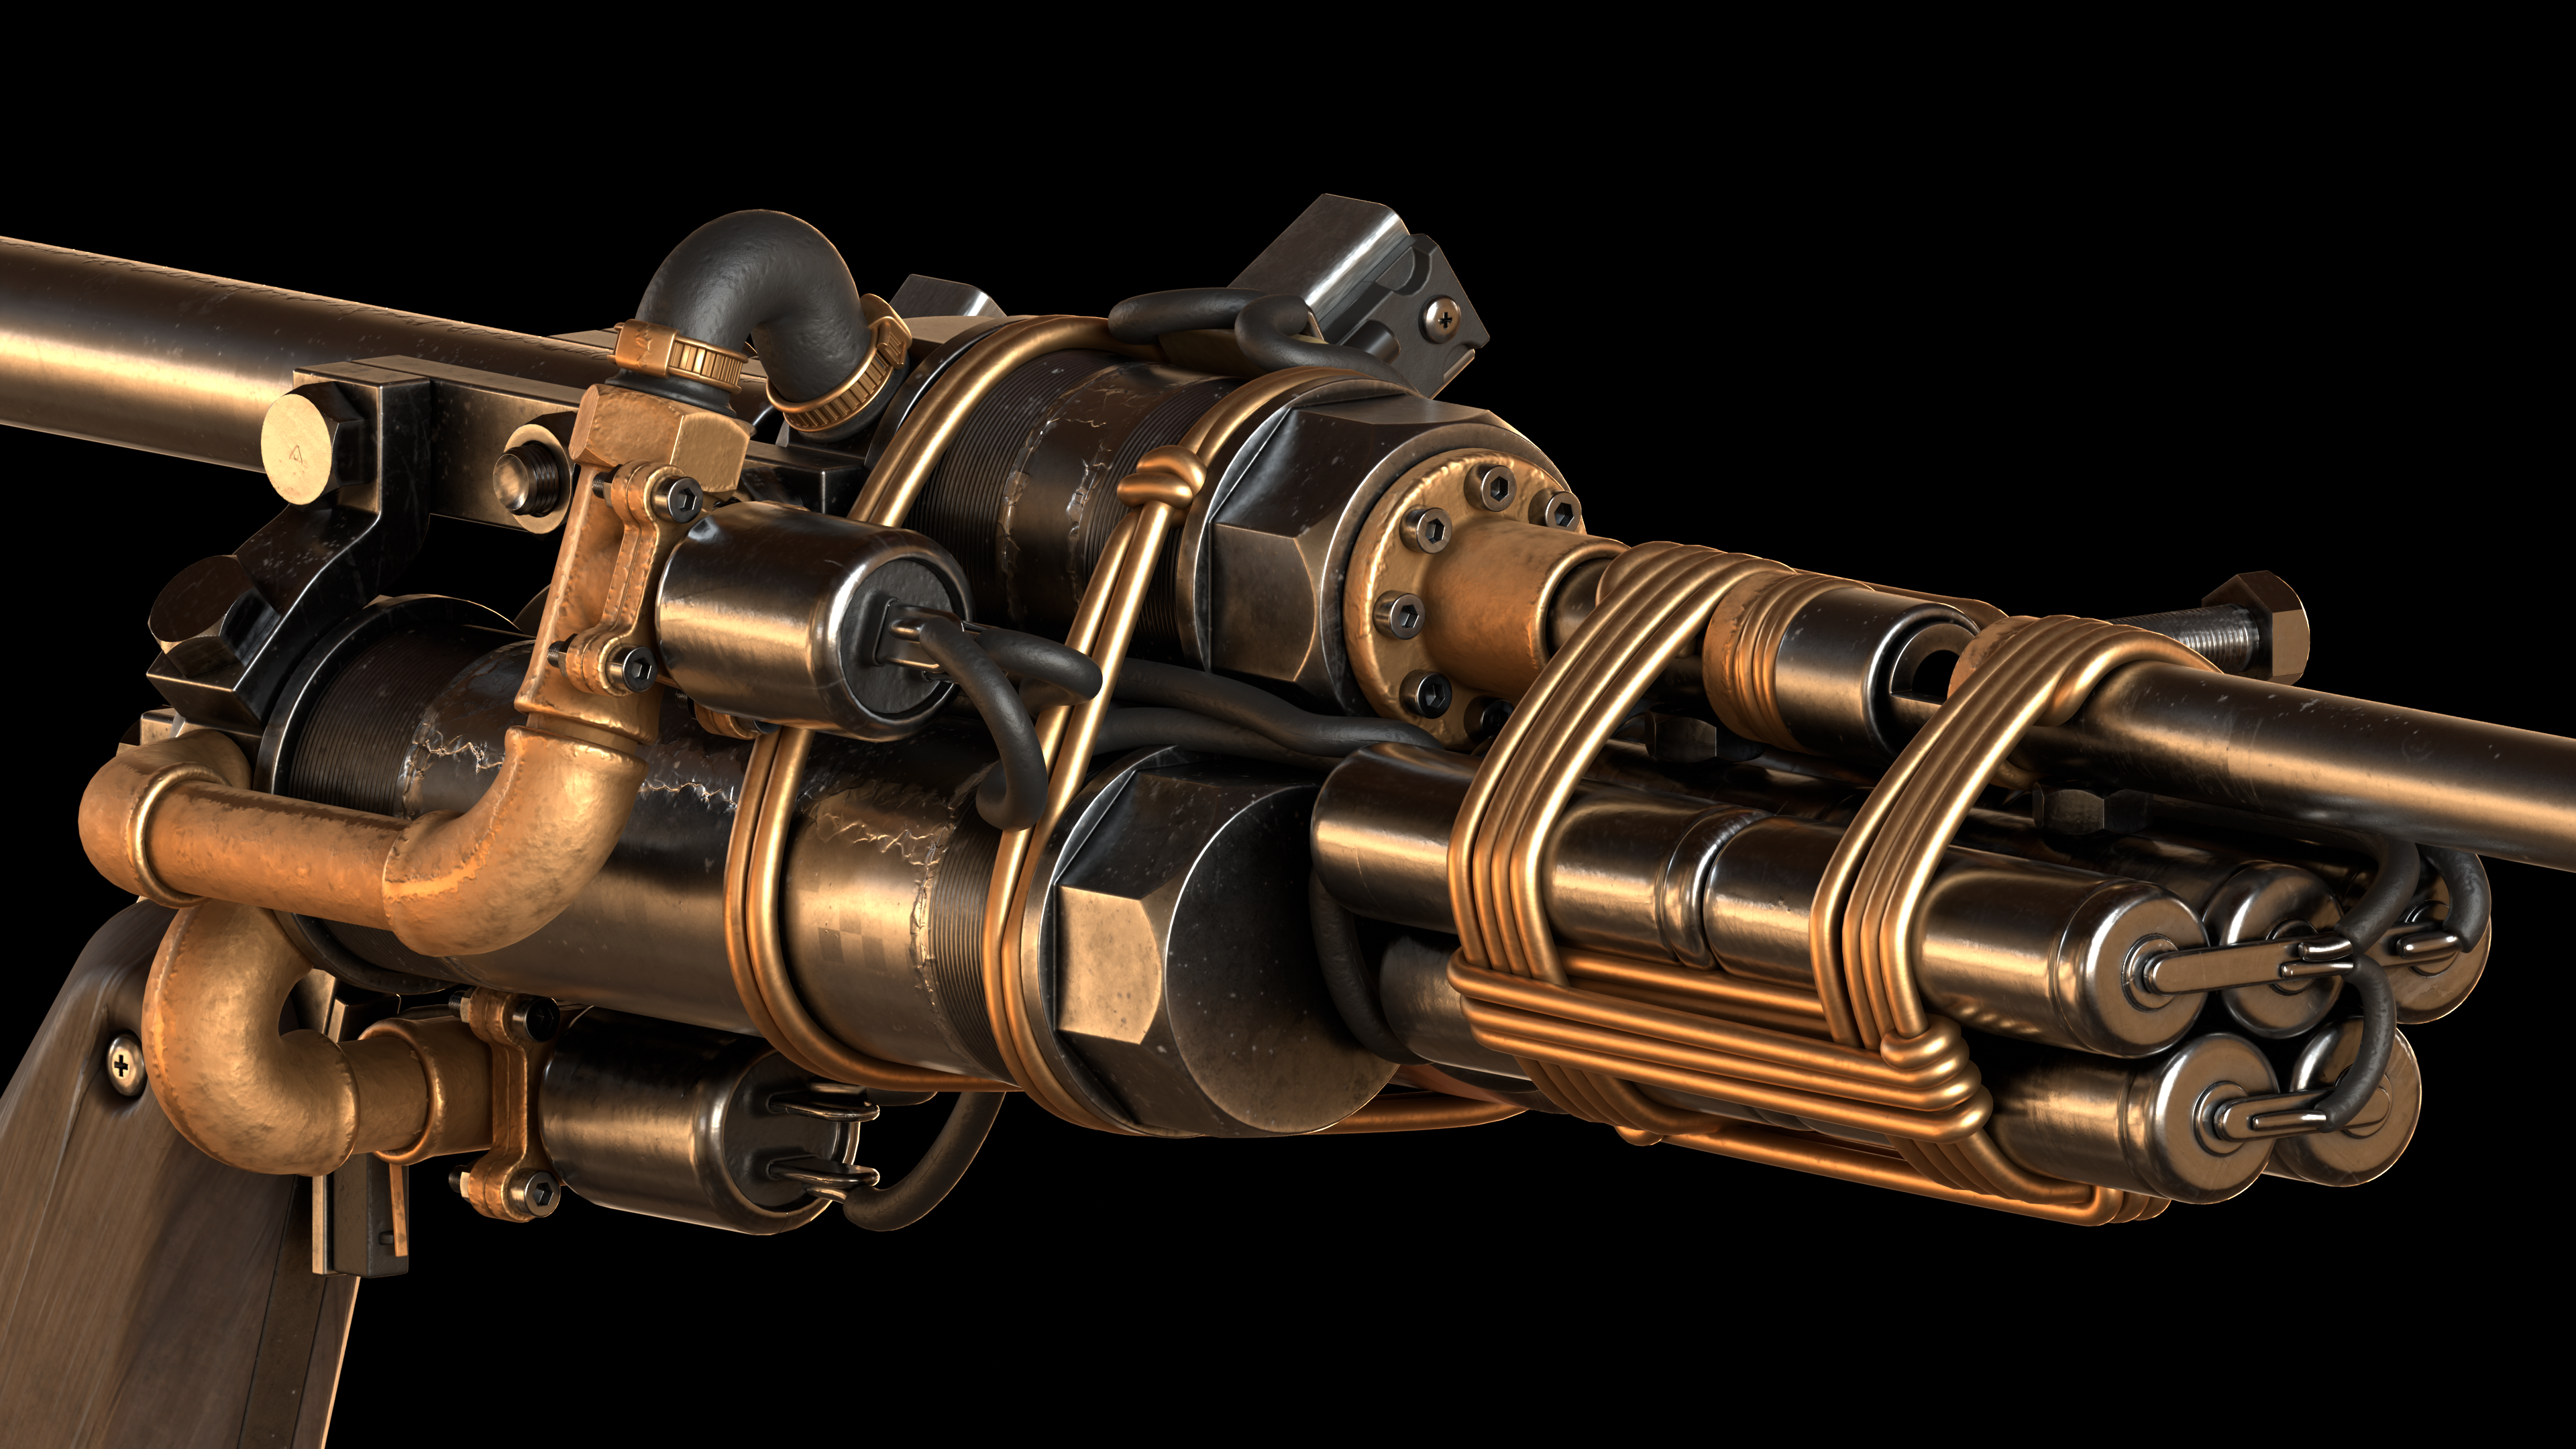
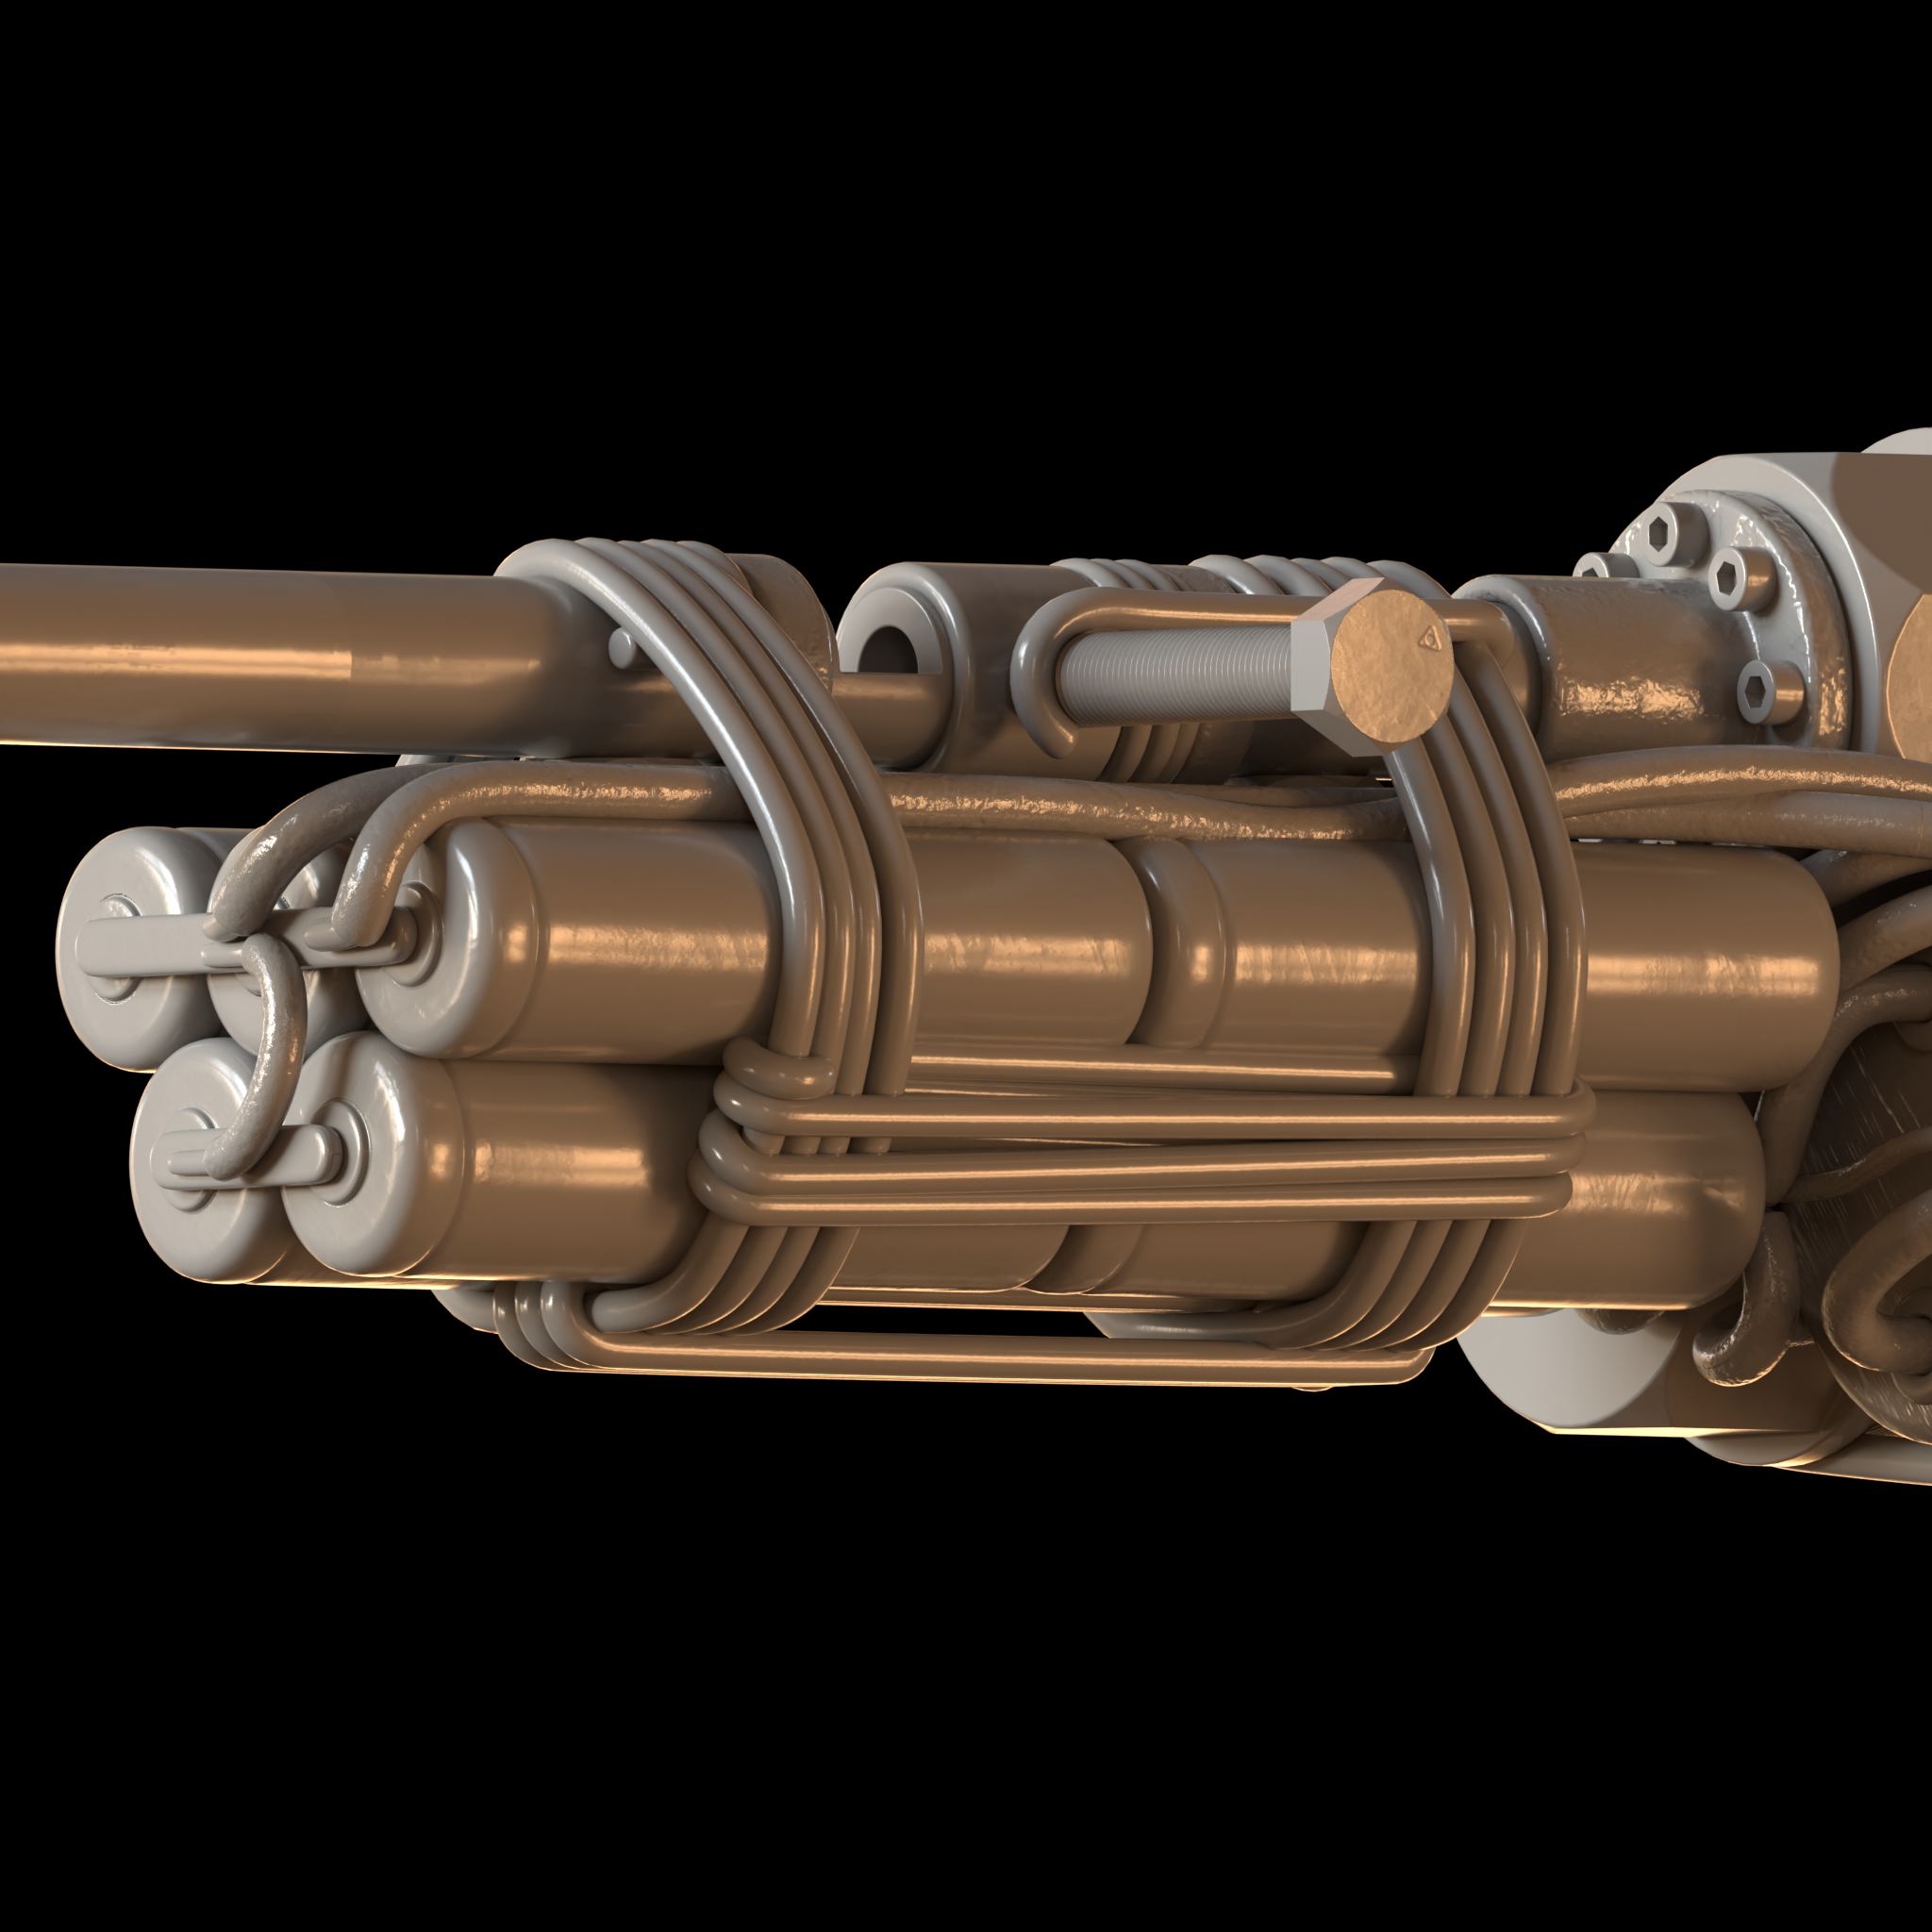
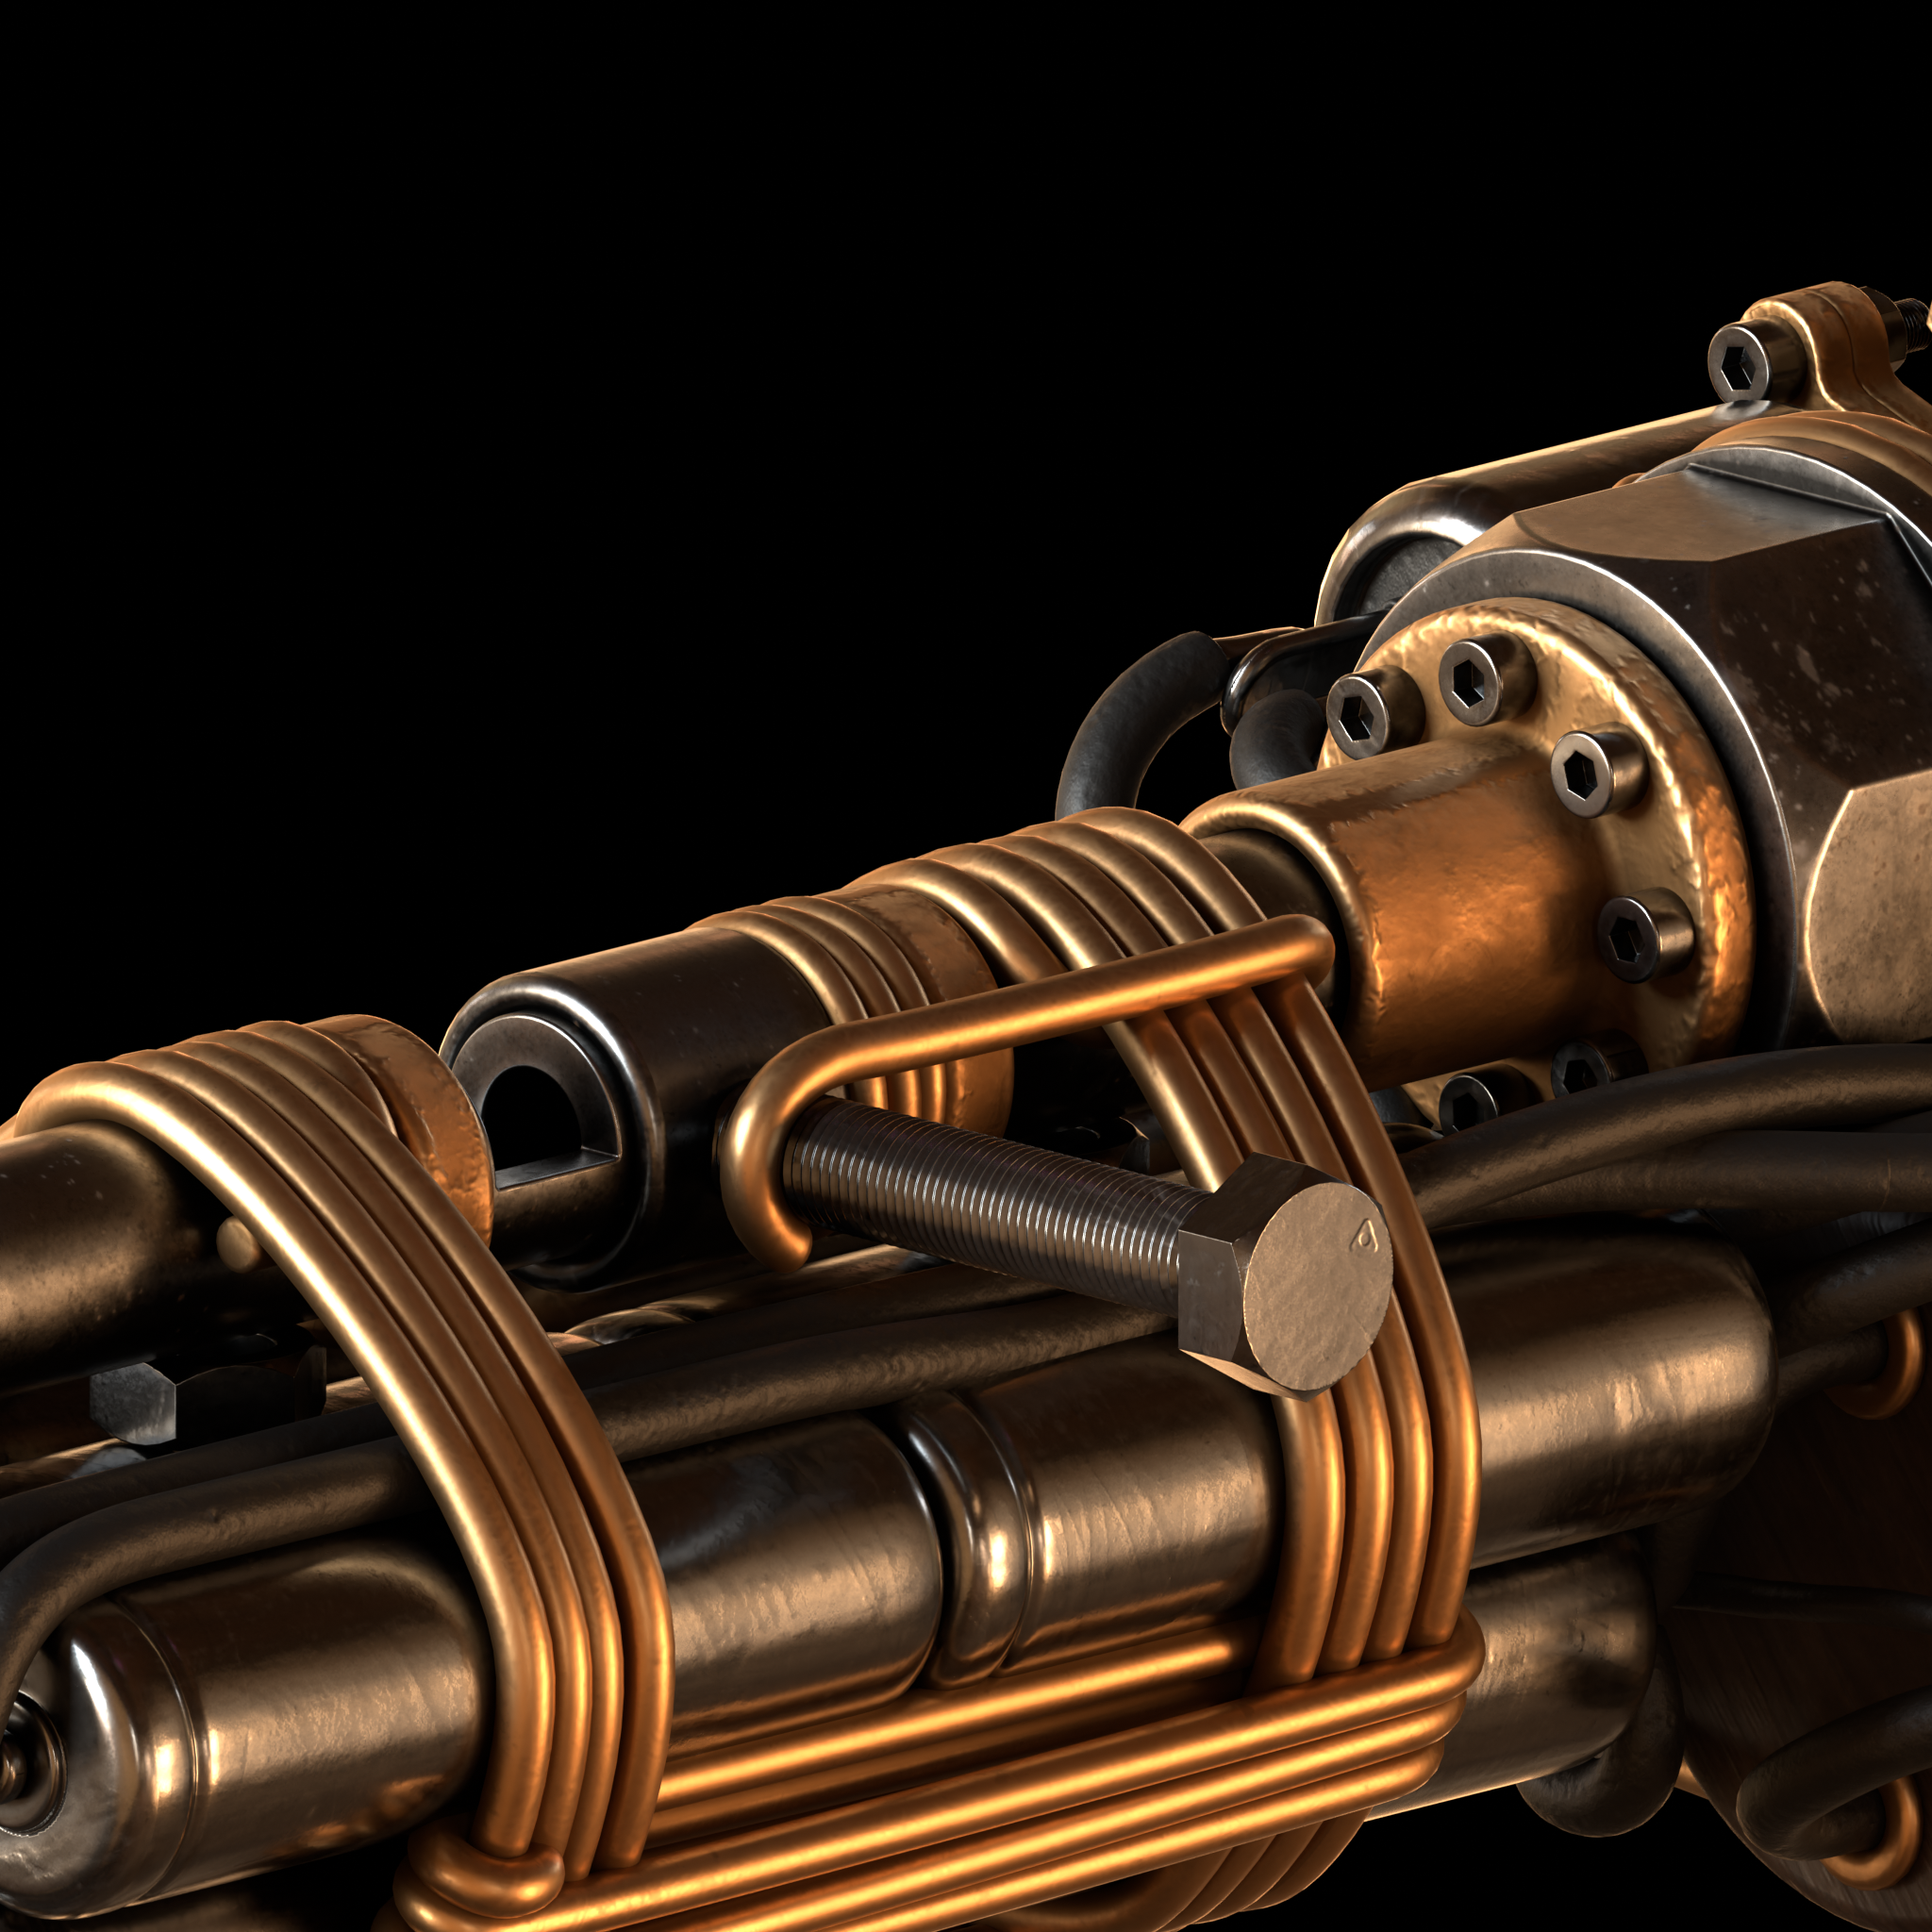
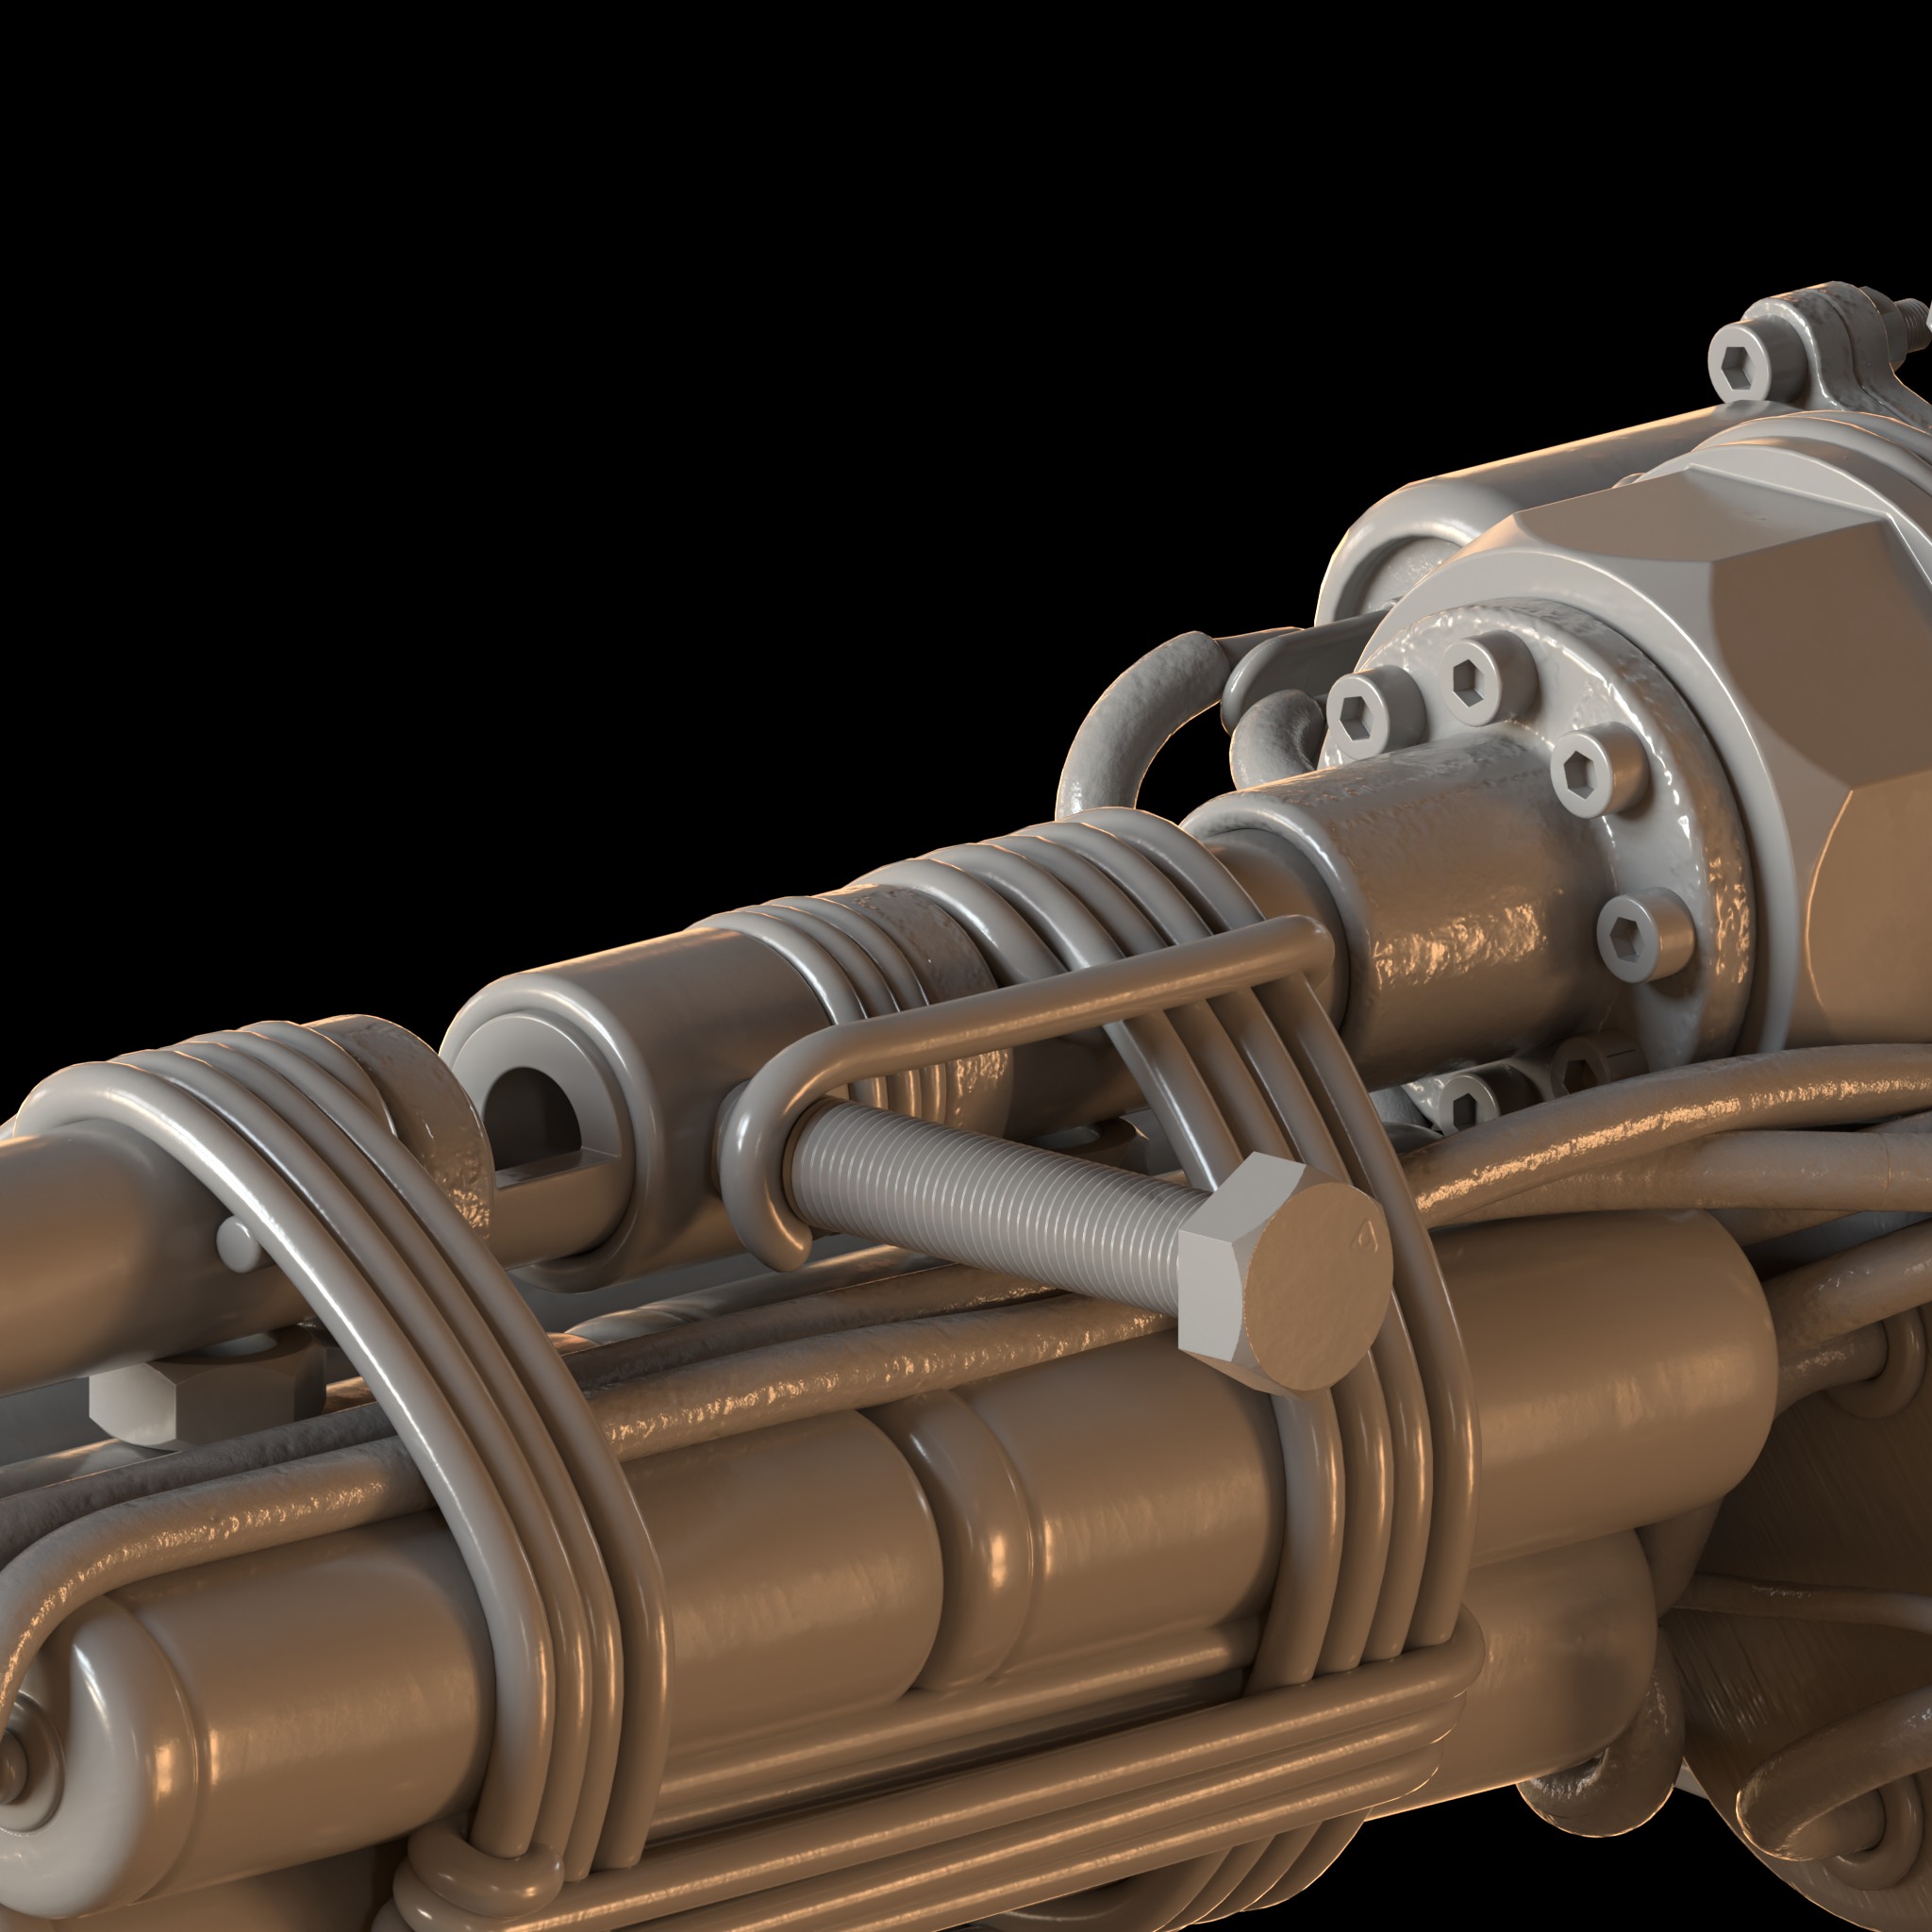
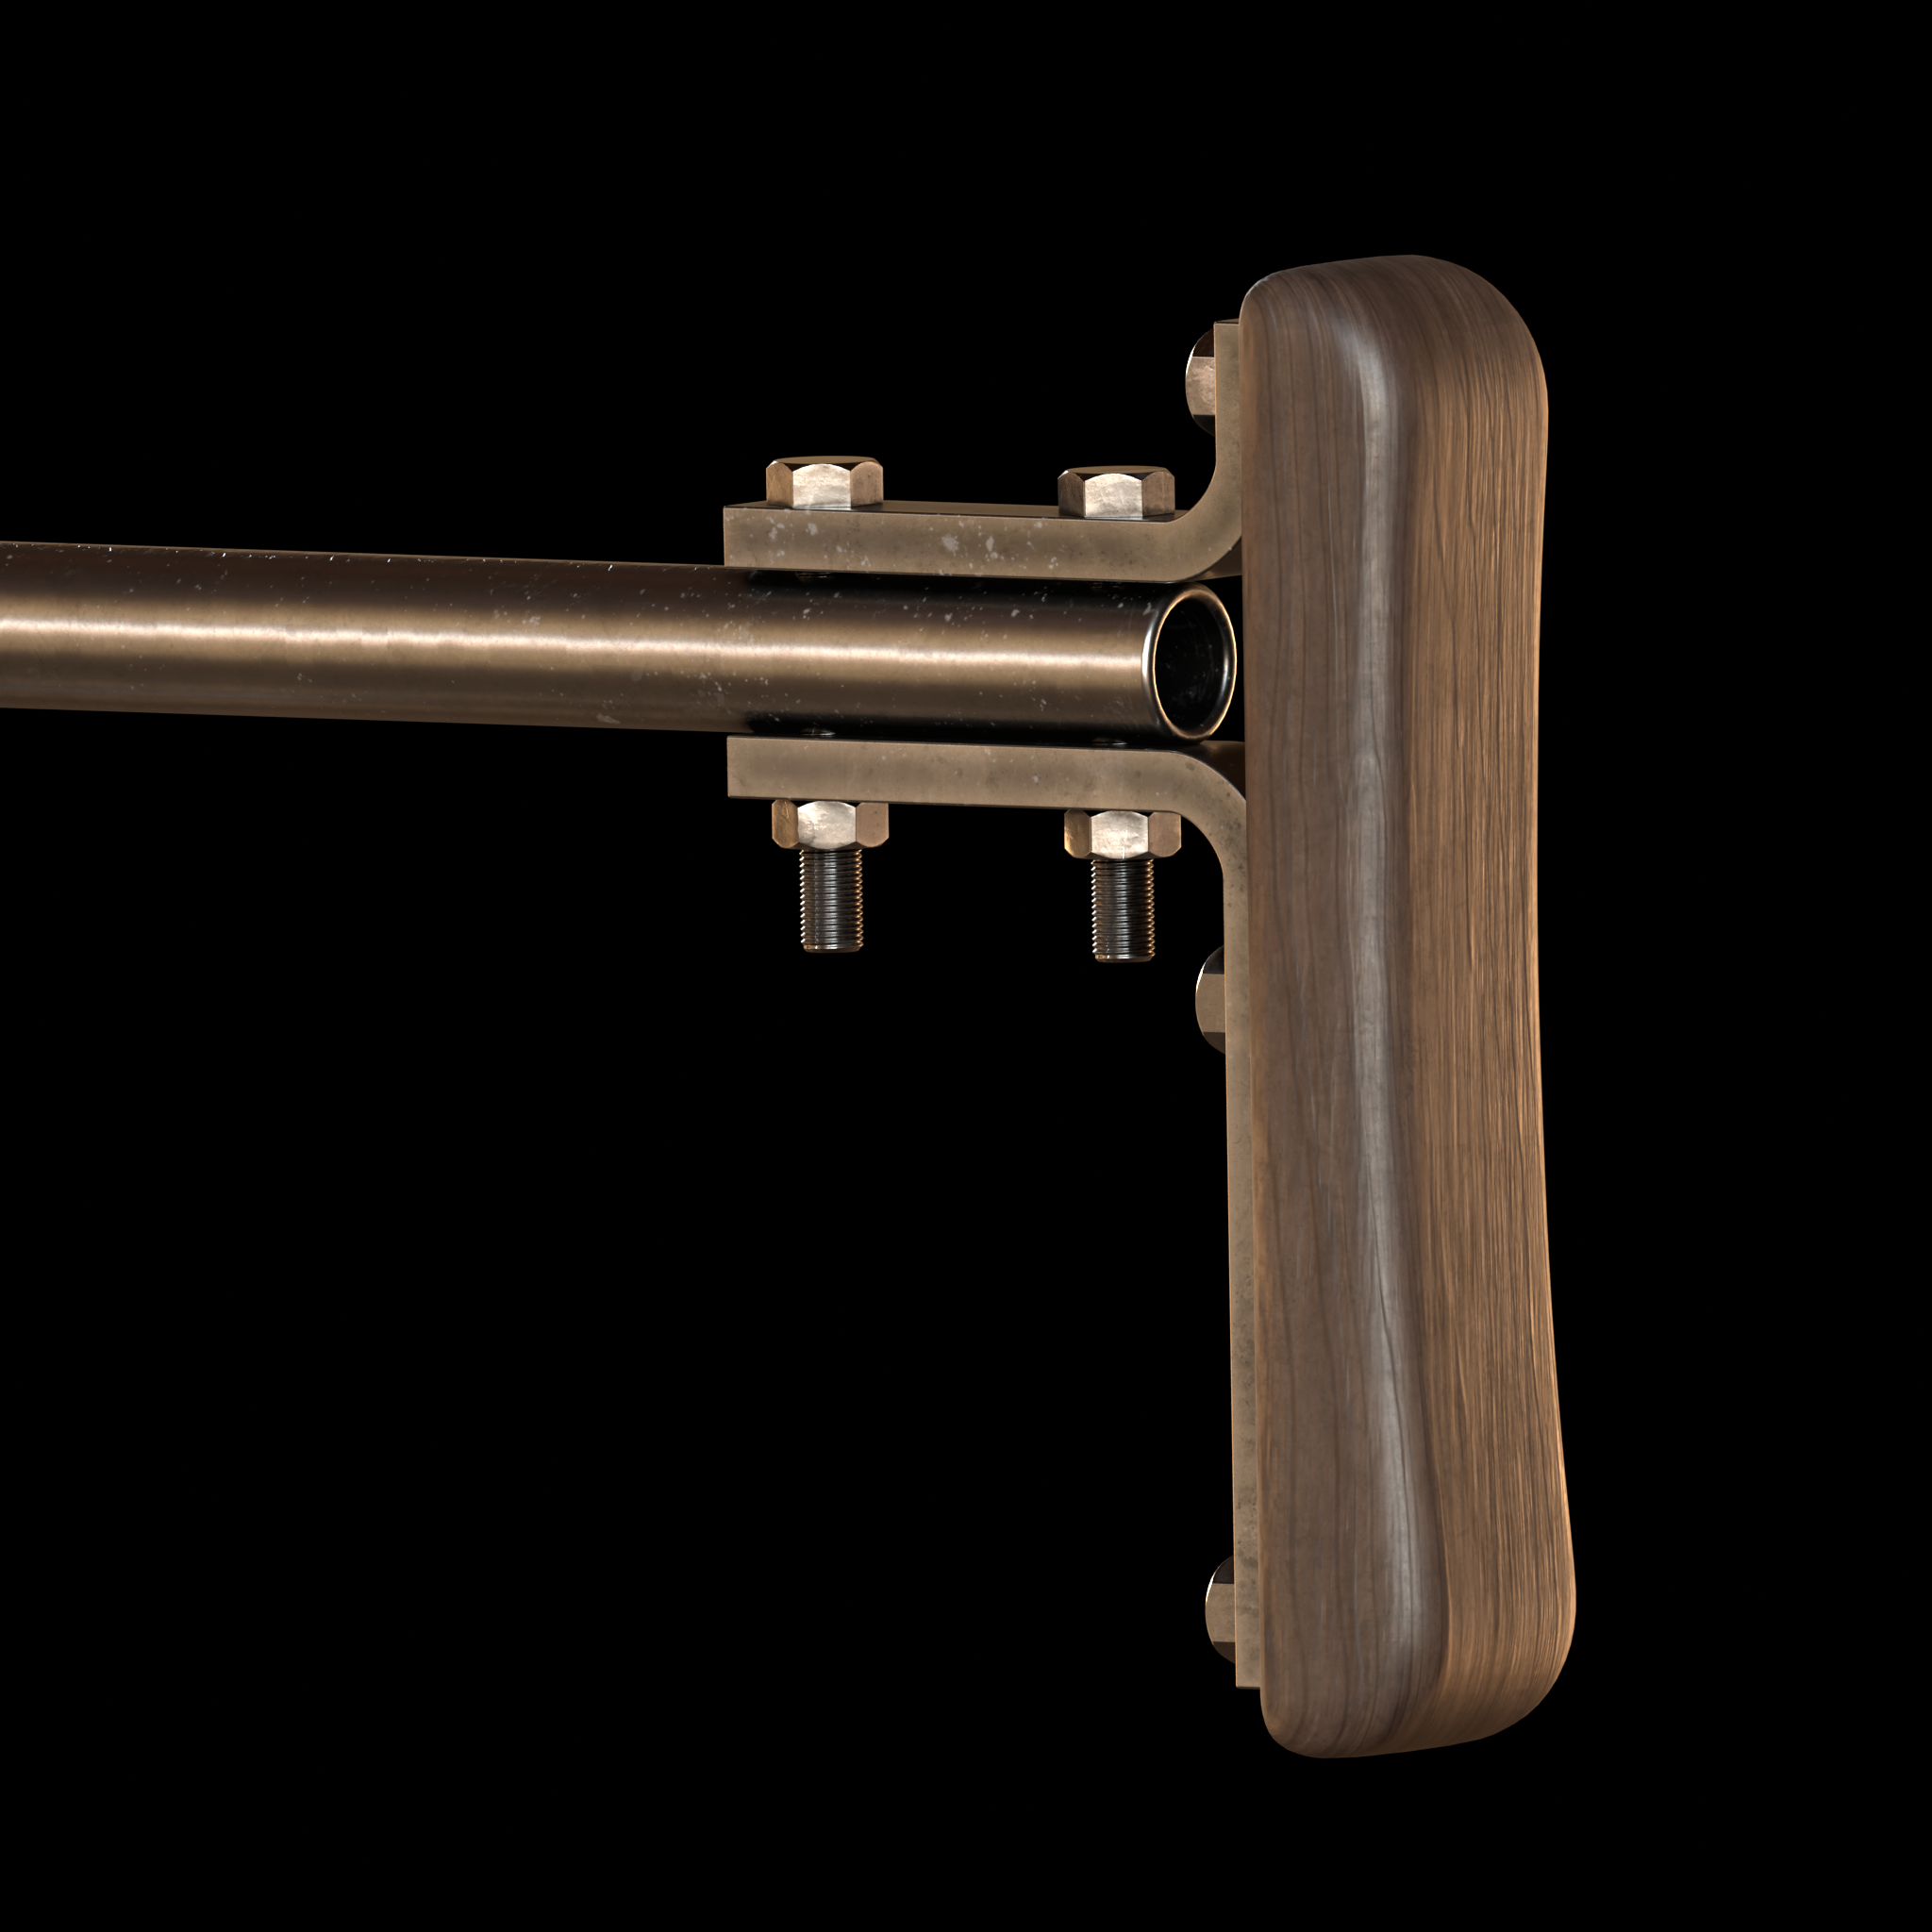
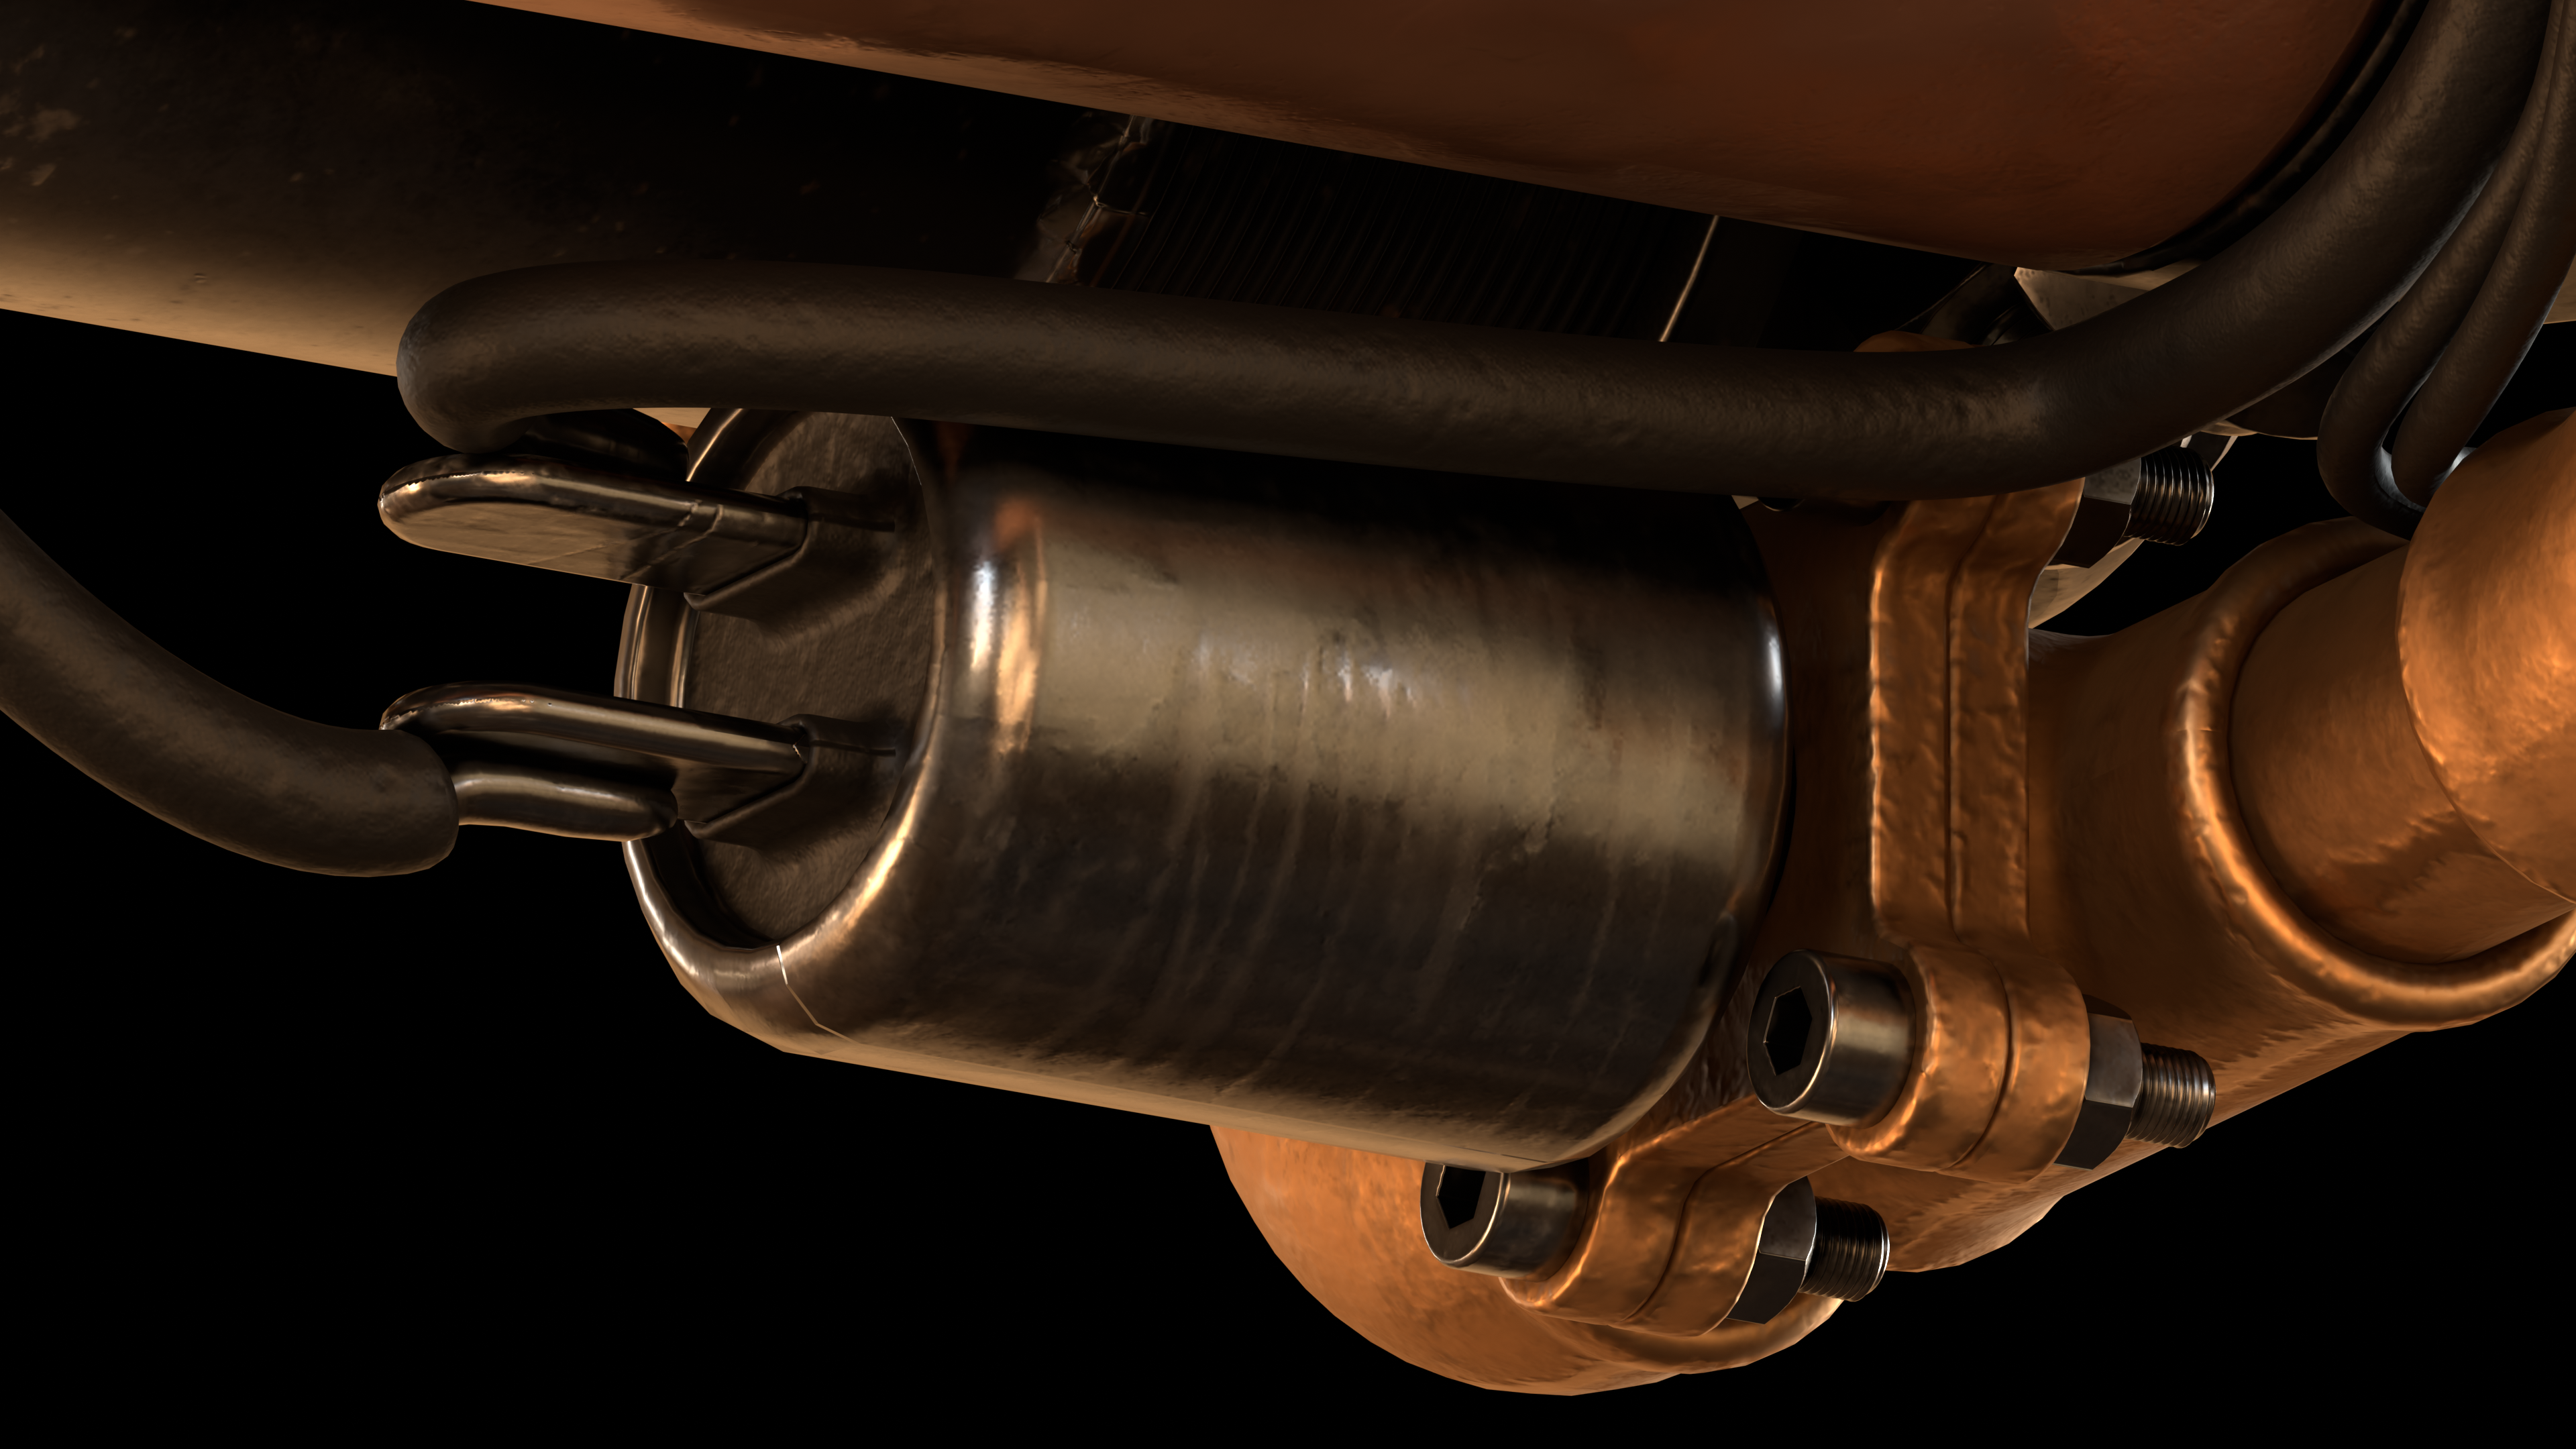
The rifle's main body consists of three tanks, two of them made from threaded steel pipe sealed with steel caps, and one made of hammered copper and capped with a steel cap on one side and a wooden cork on the other.
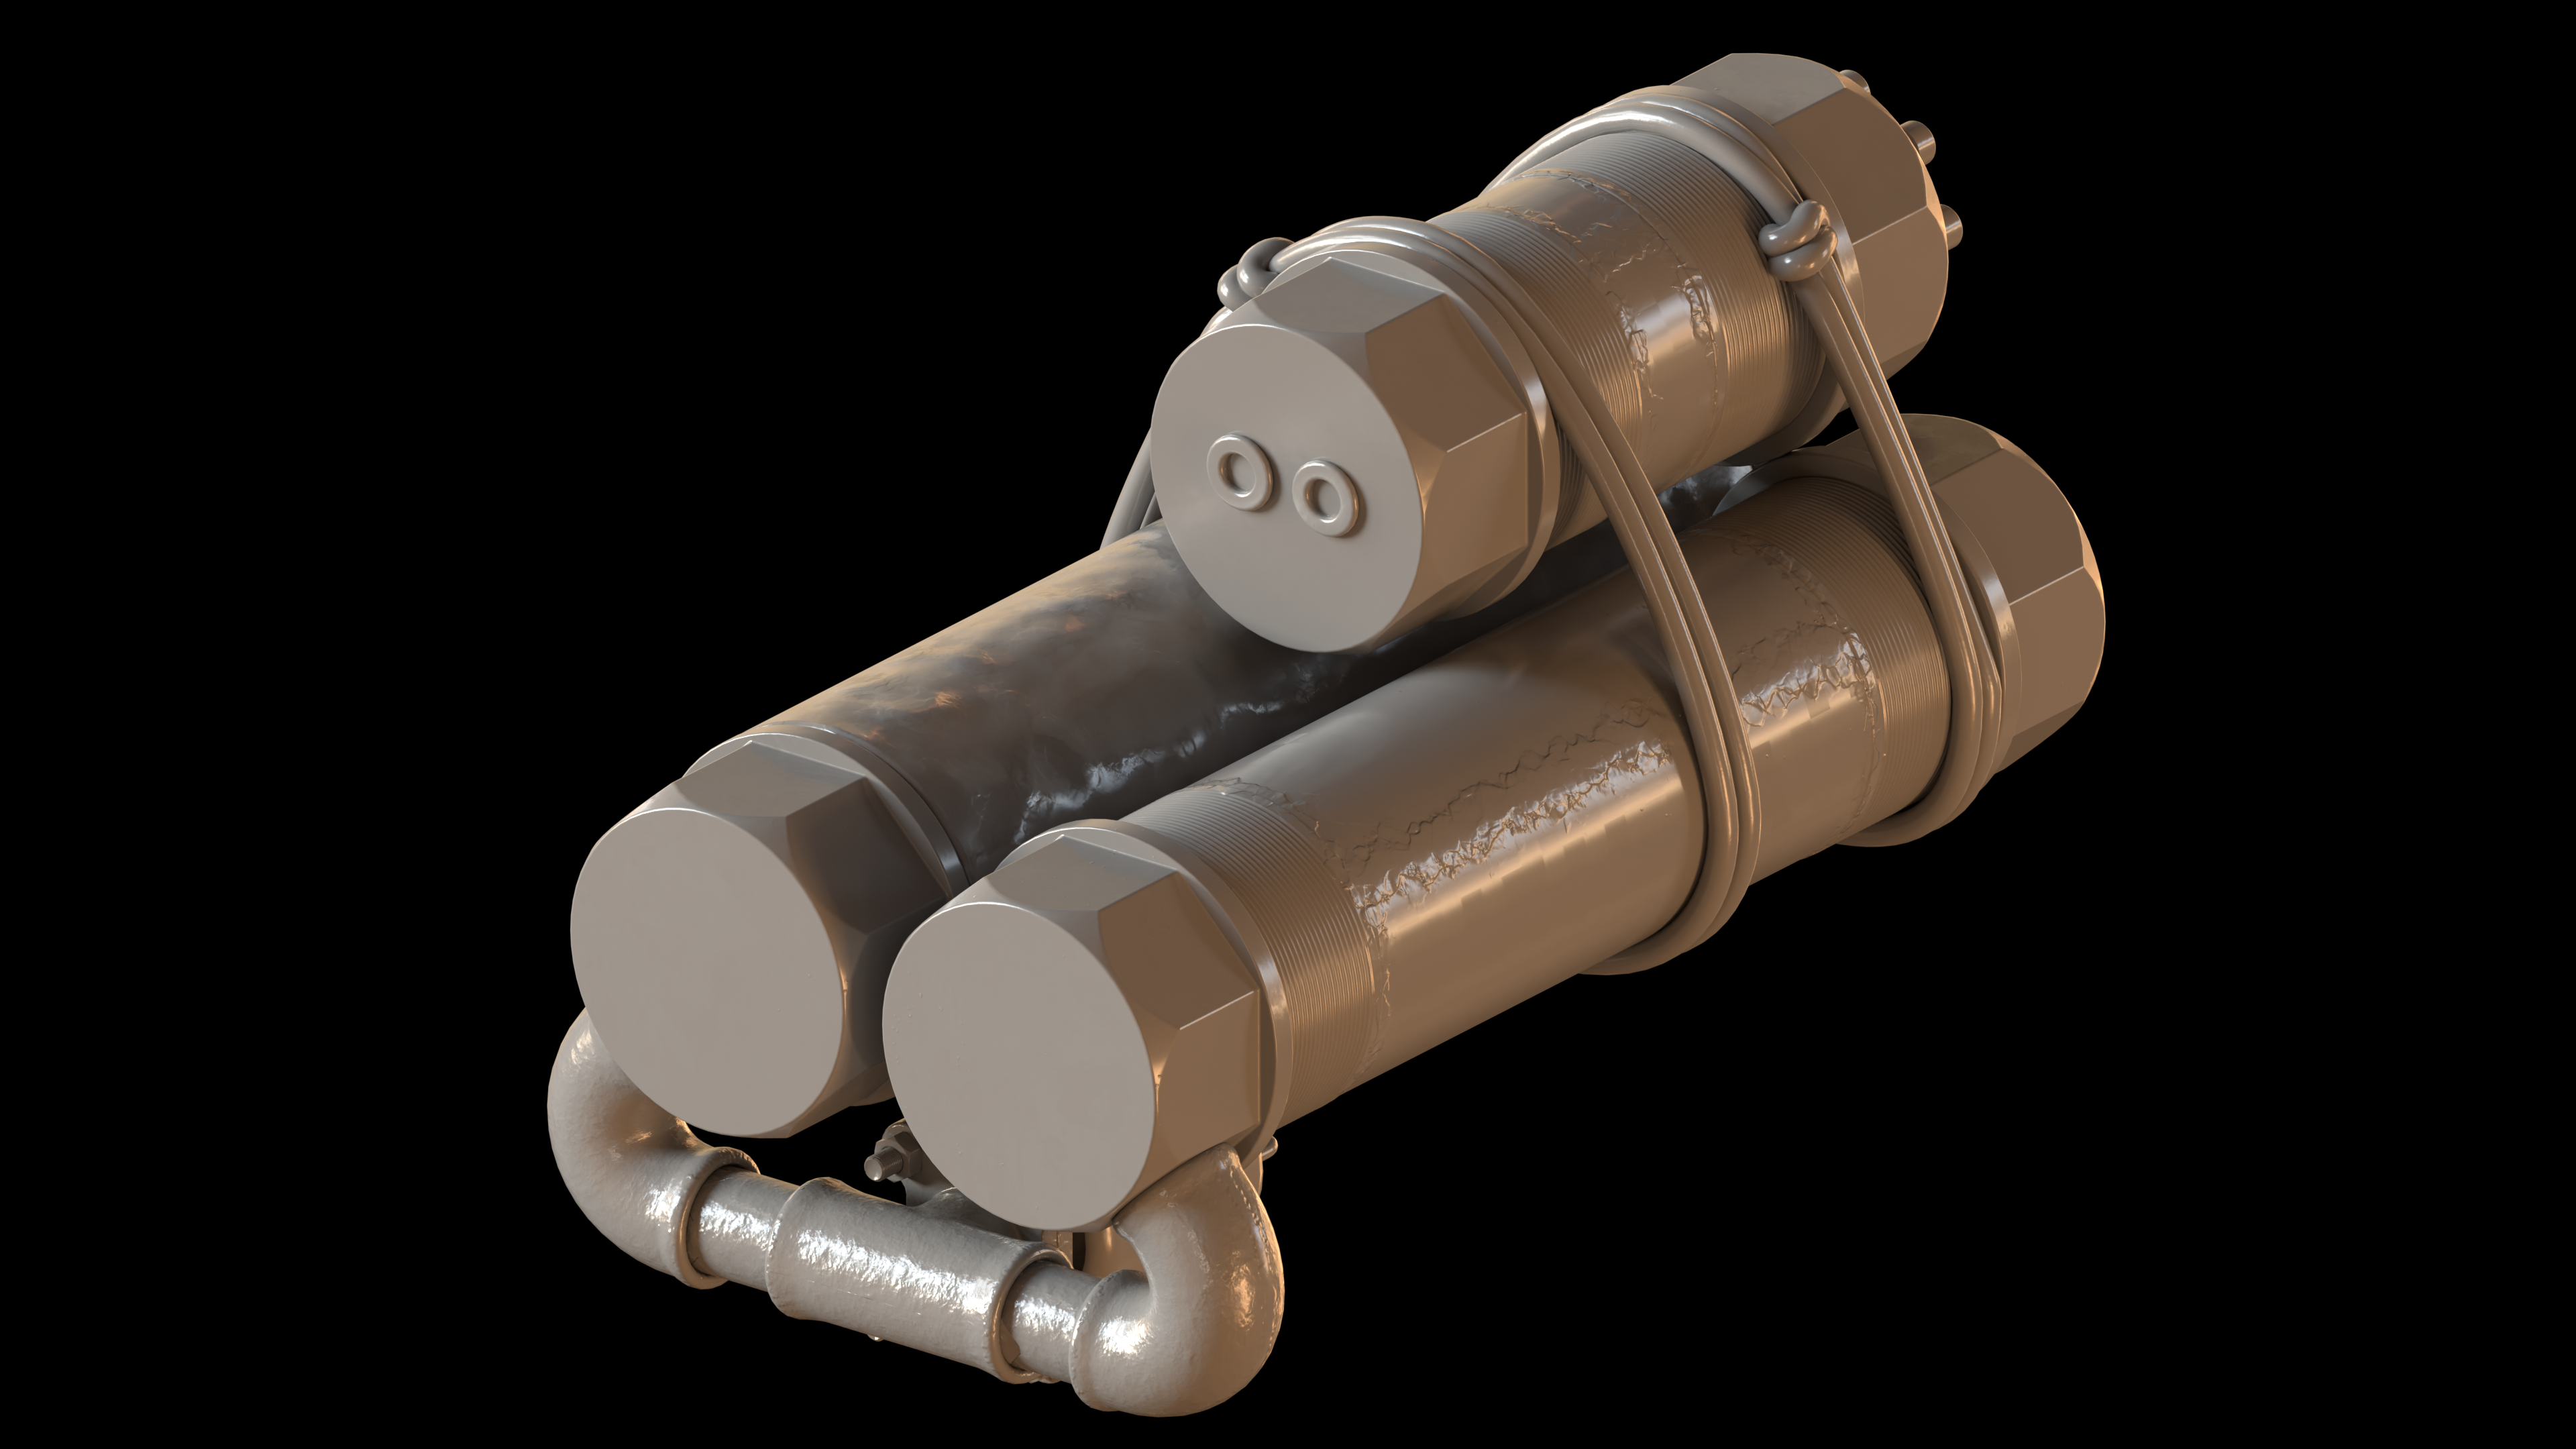
Each of those tanks has its purpose:
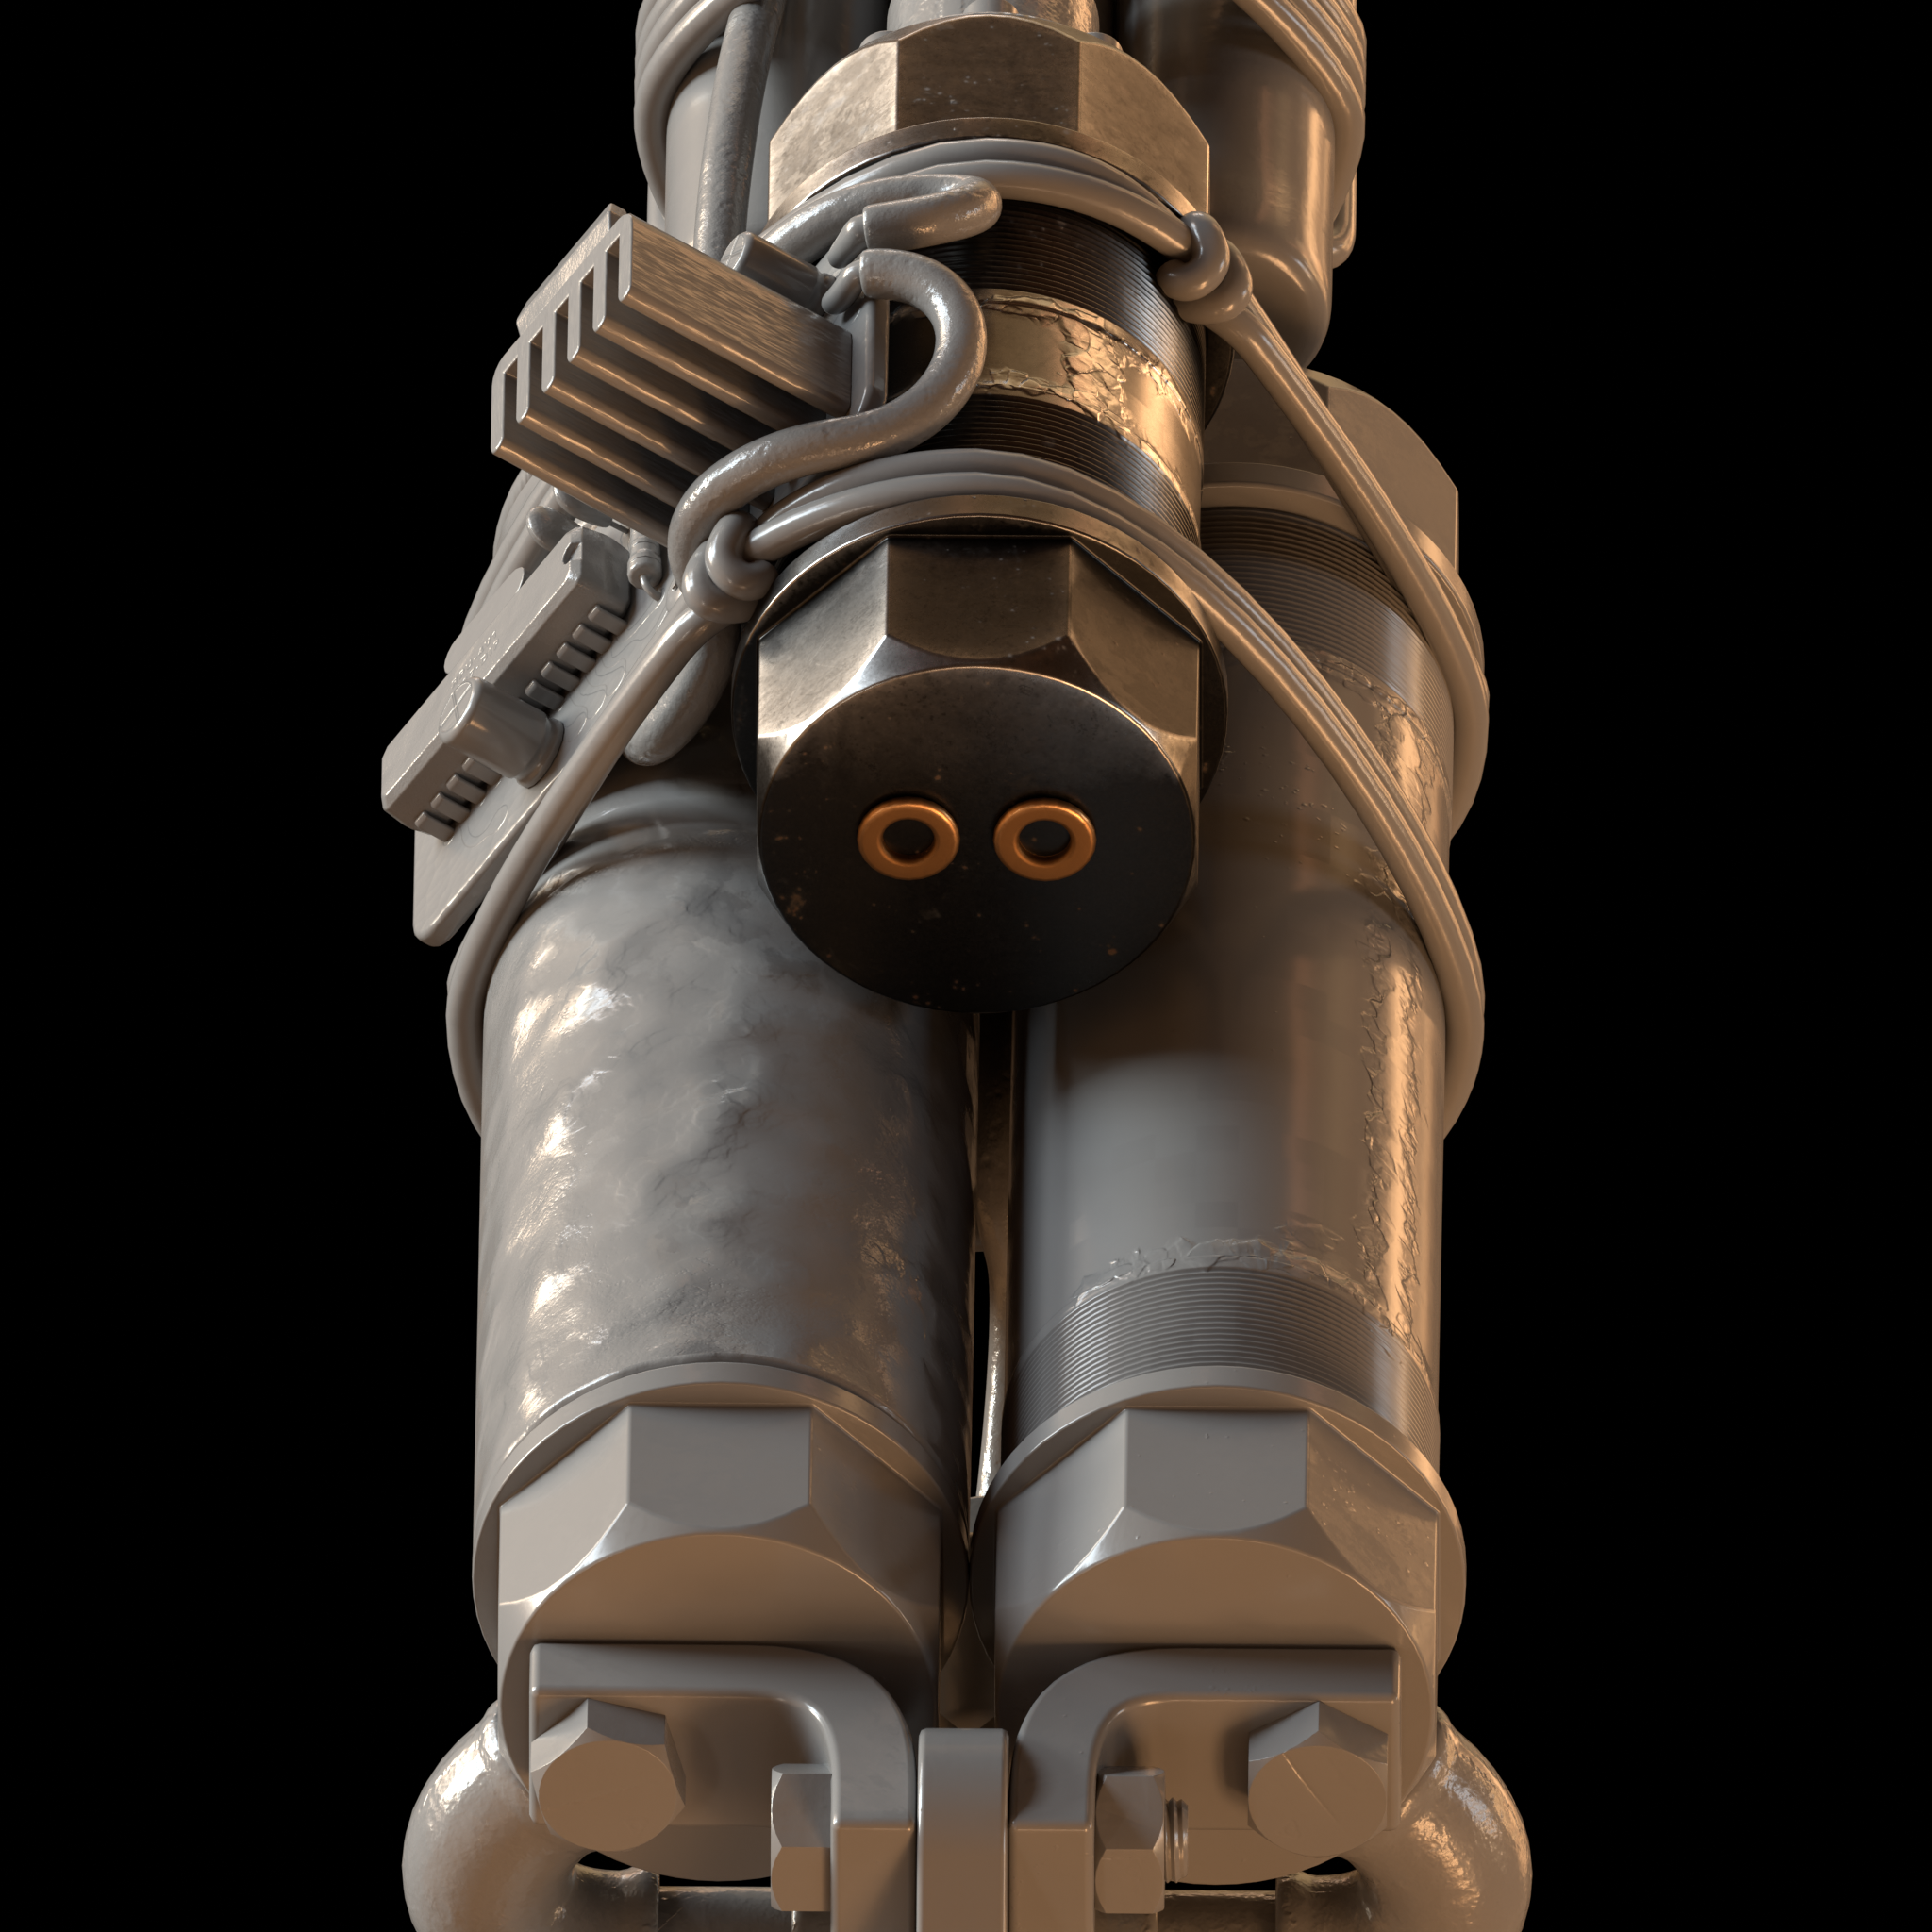
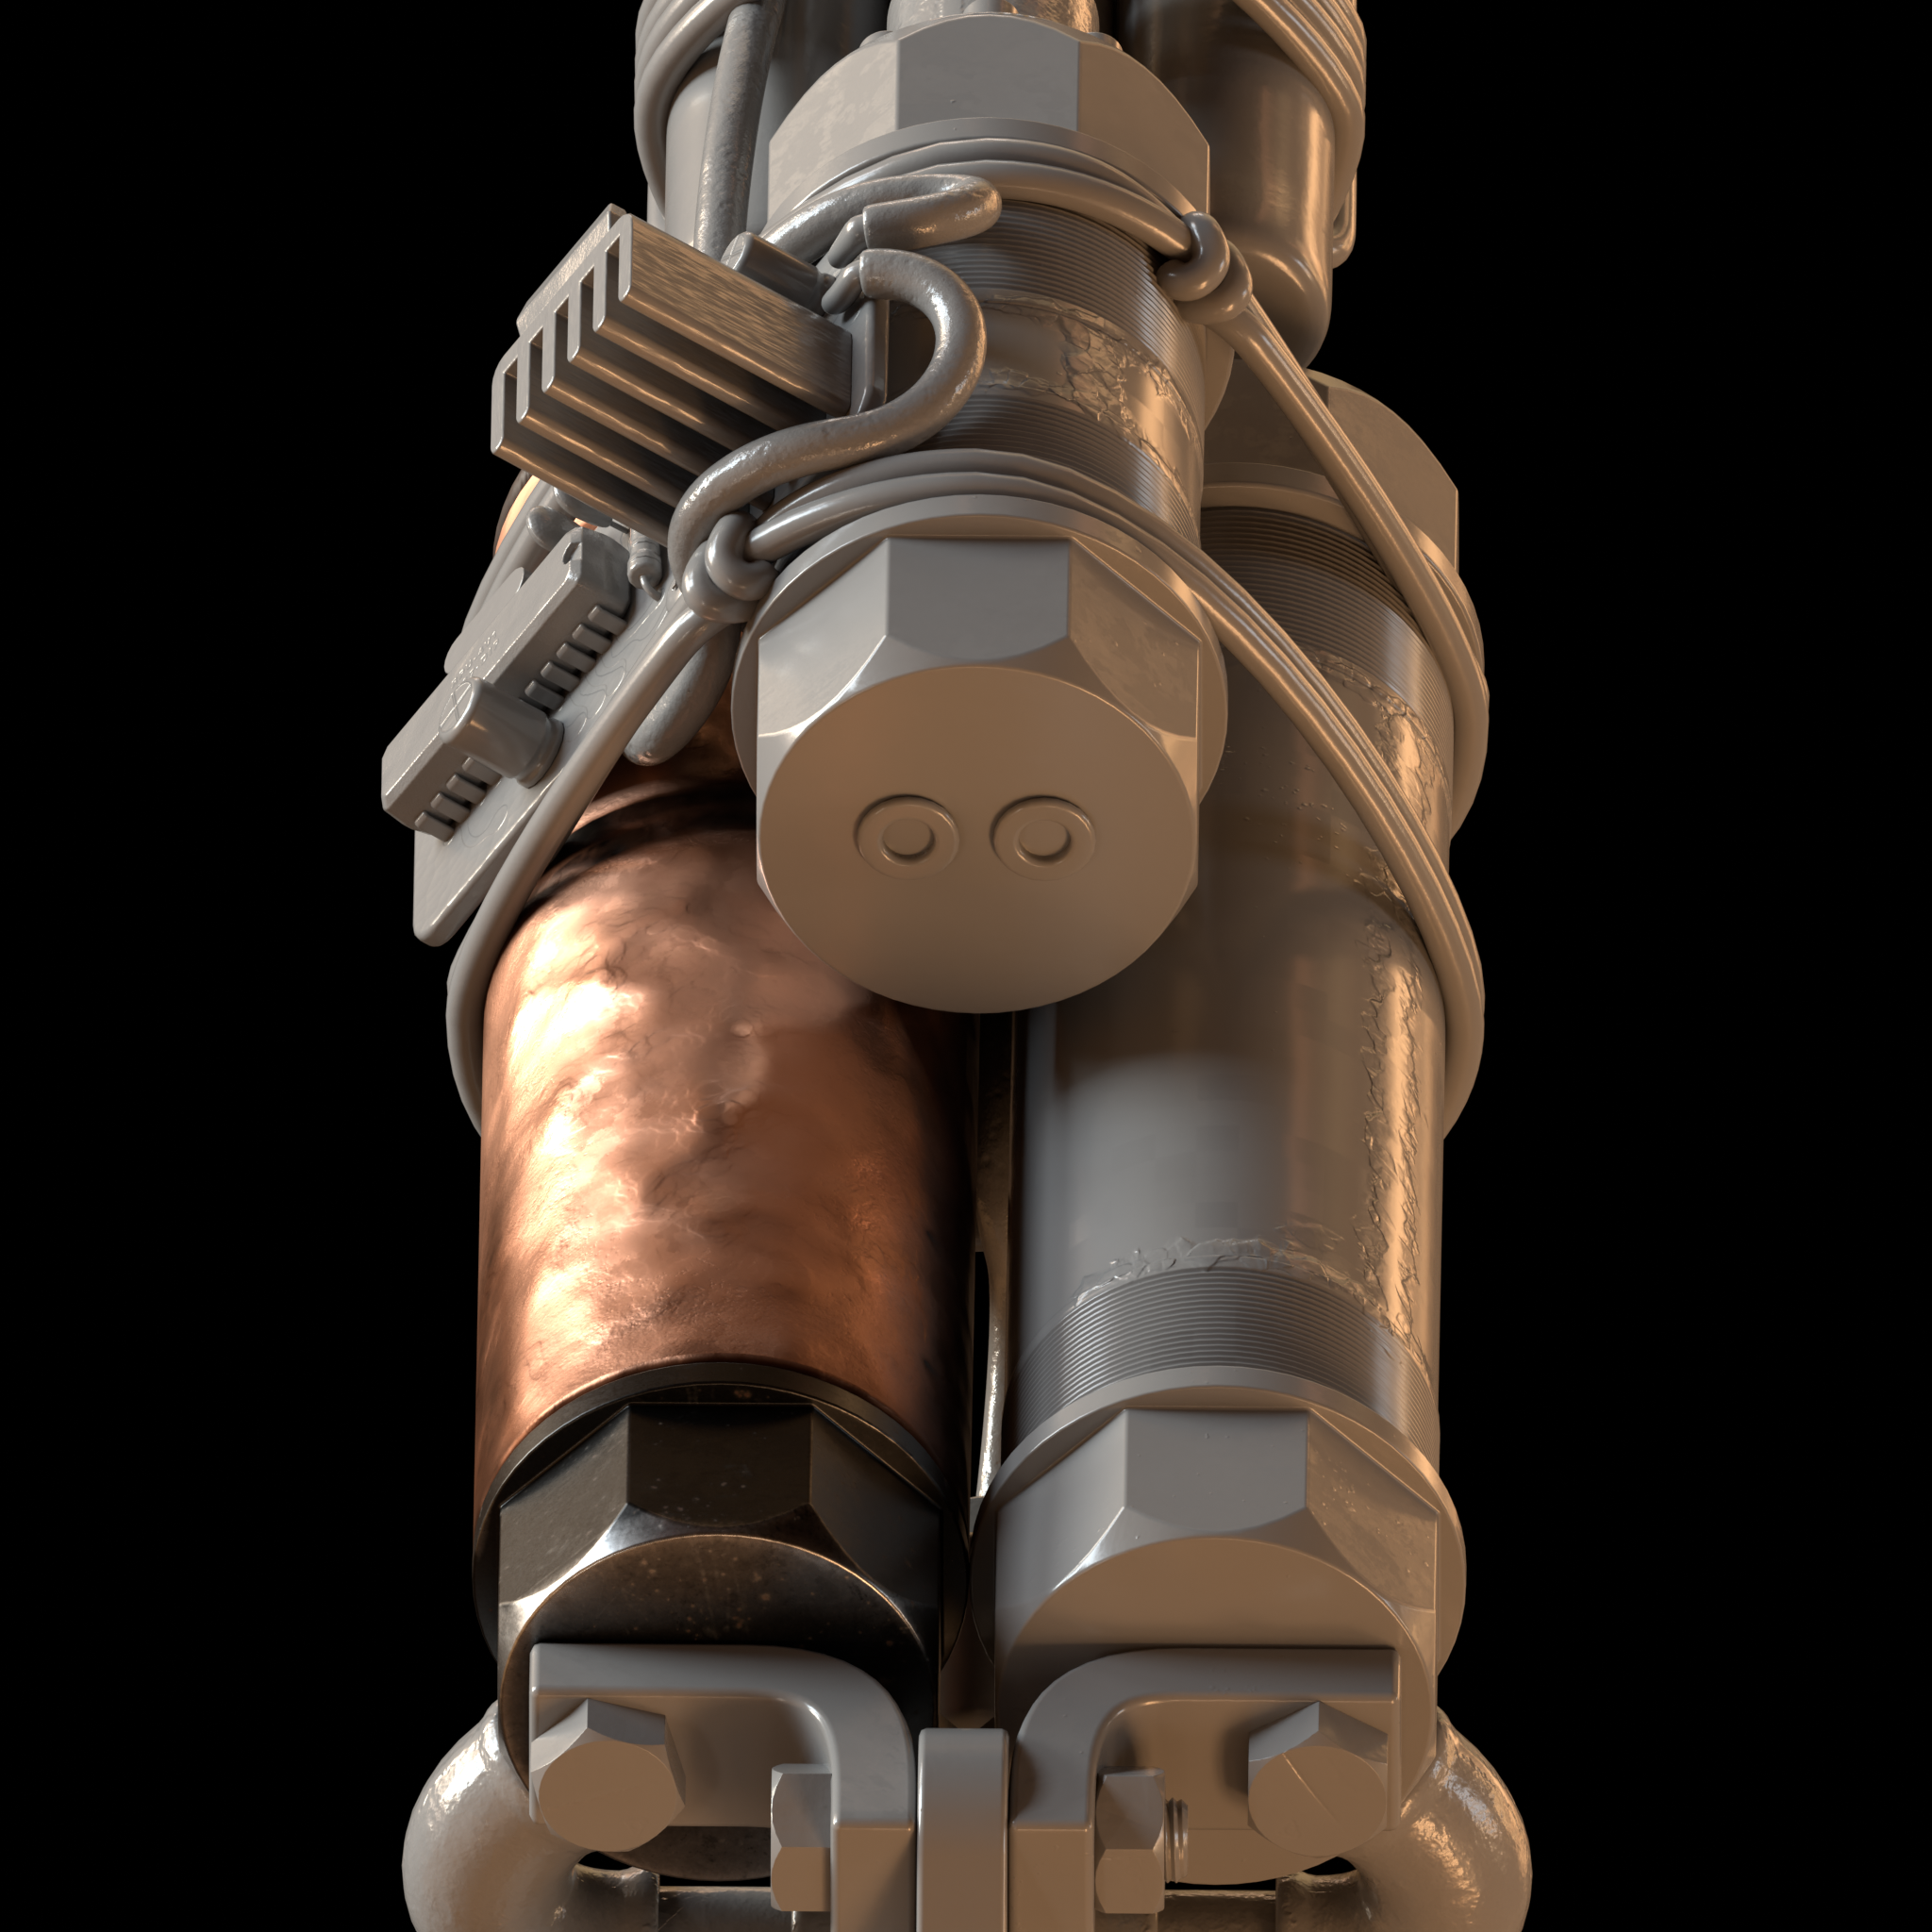
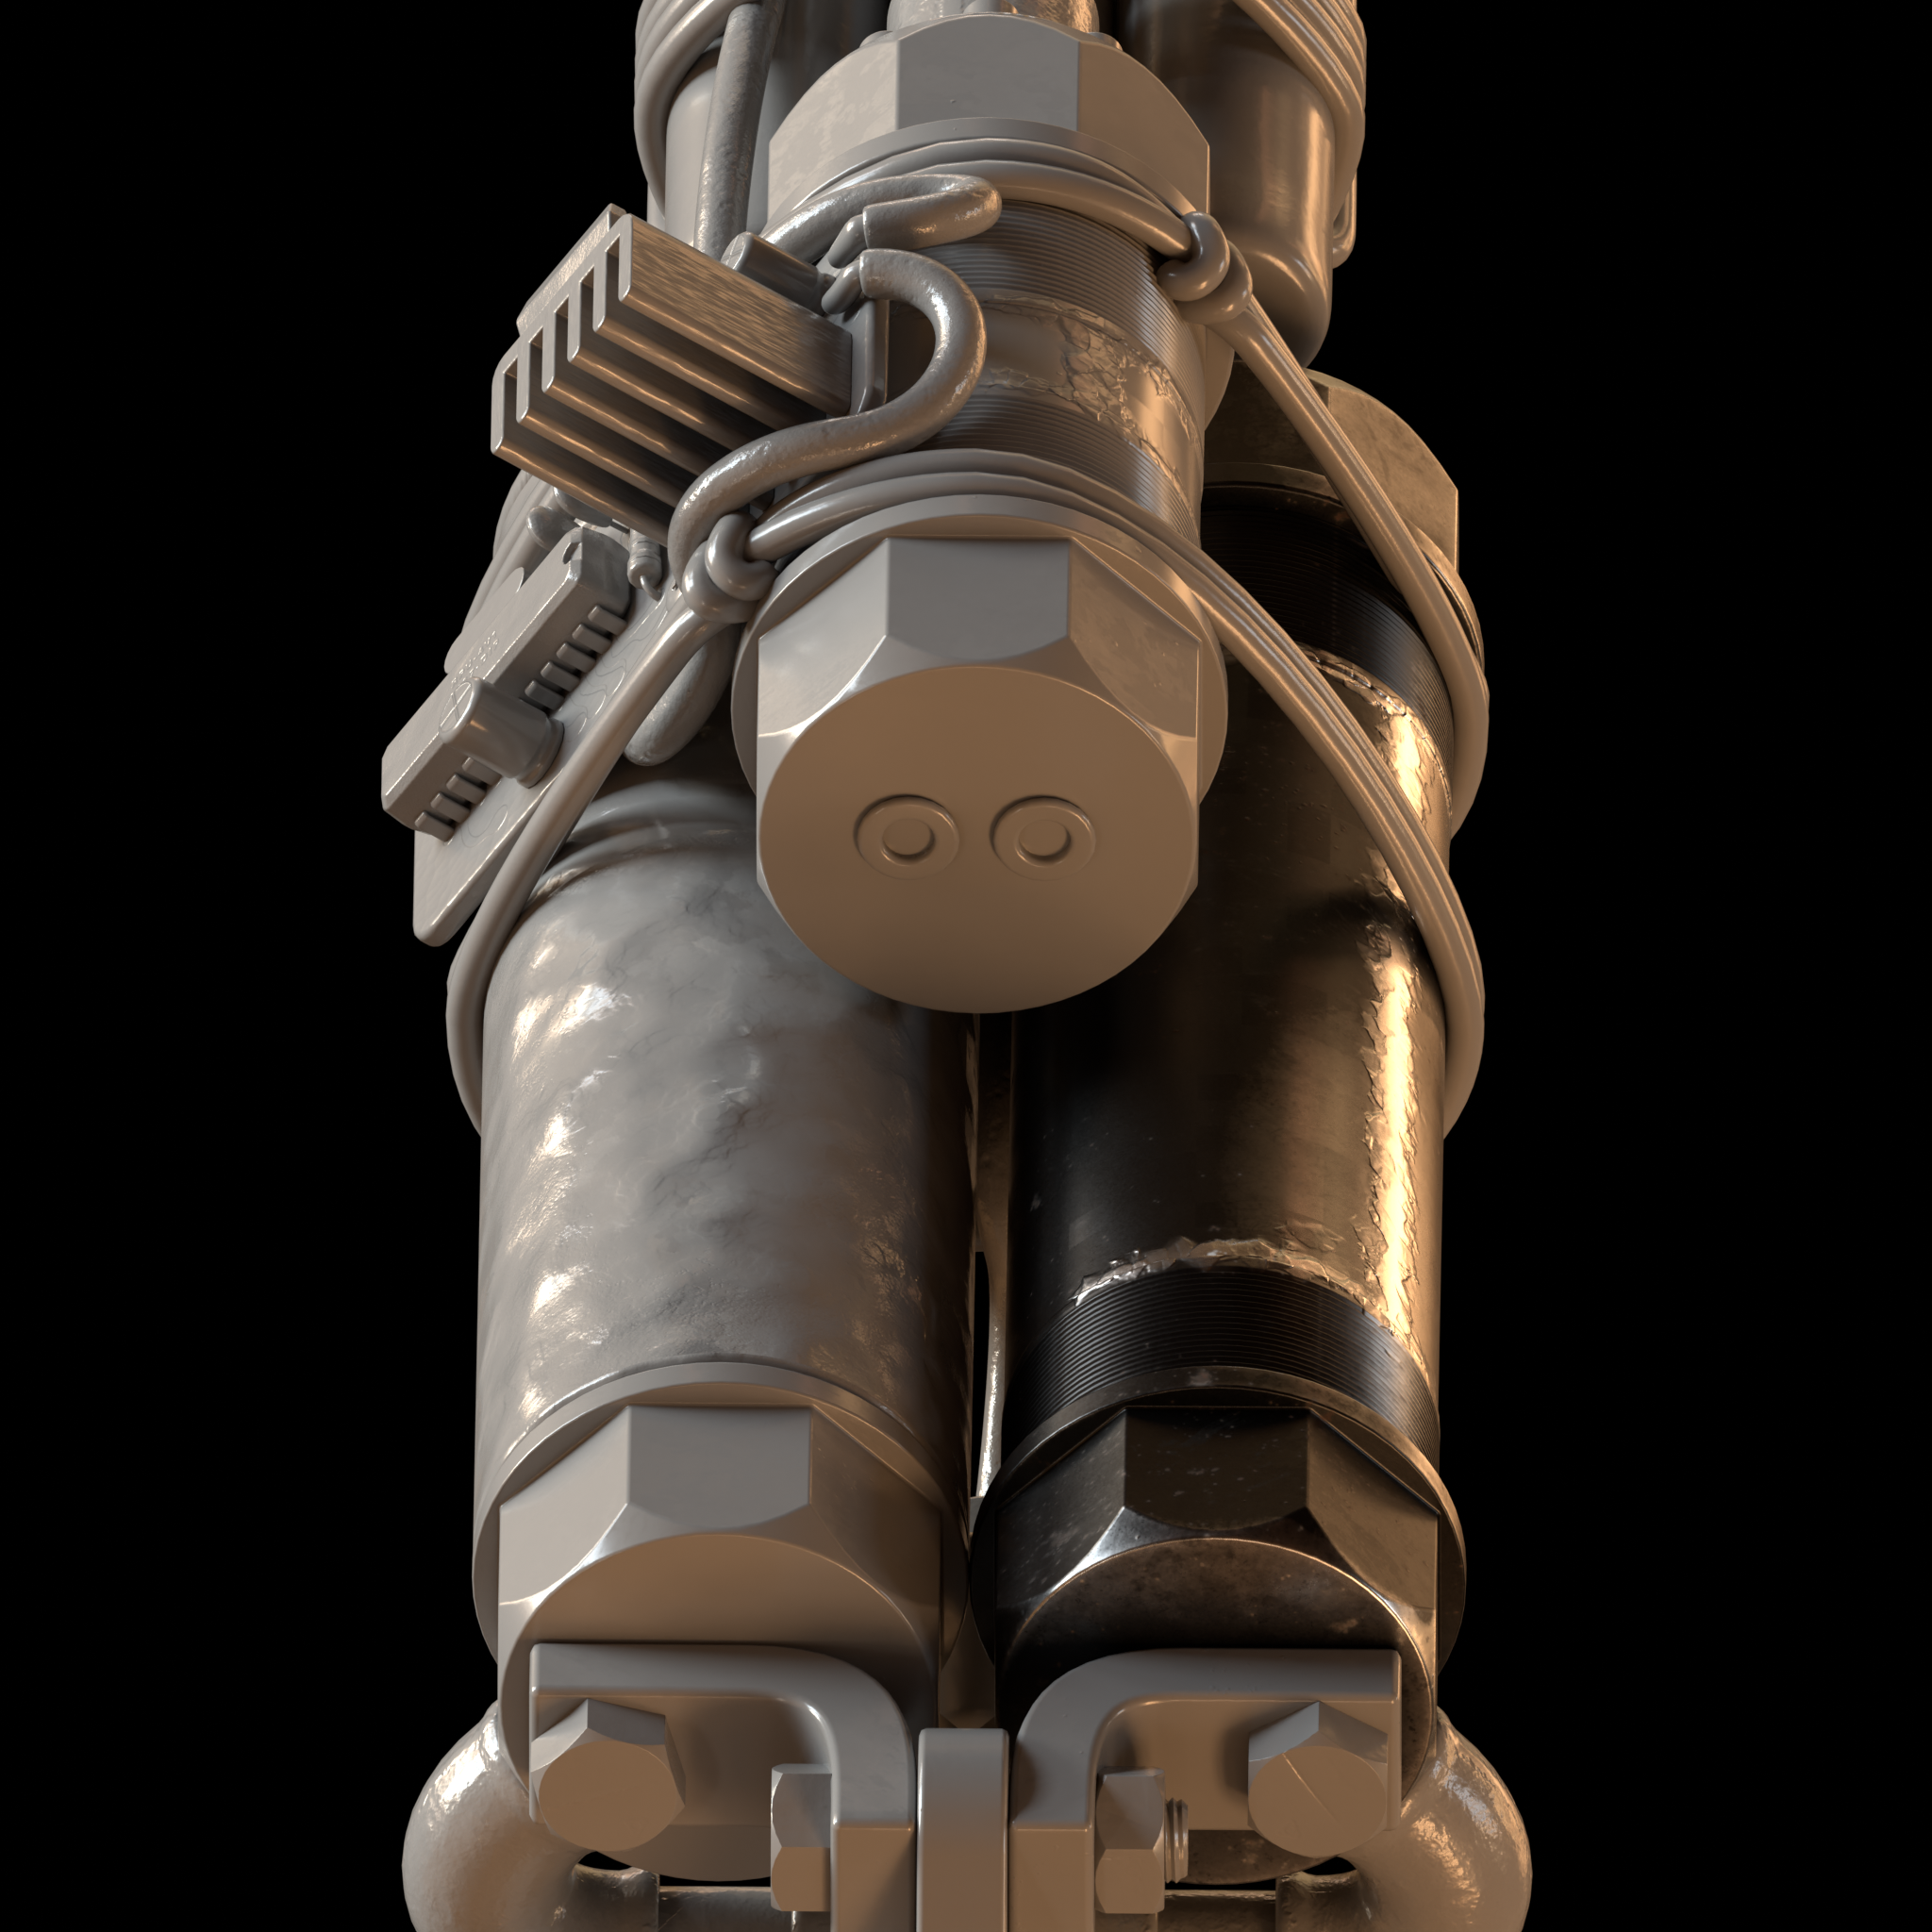
Up front, doubling as a handguard, is the power pack: a 2s5p array of ten 18650 cells, providing around 7.4 volts, 15Ah capacity, and up to 50A of current.
This power is used for the electrolysis, to power the microcontroller board (which we'll talk about later), switch solenoids, and ignite the gas mixture in the chamber.
The pack is held together with brass wiring, tying it to the underside of the barrel.

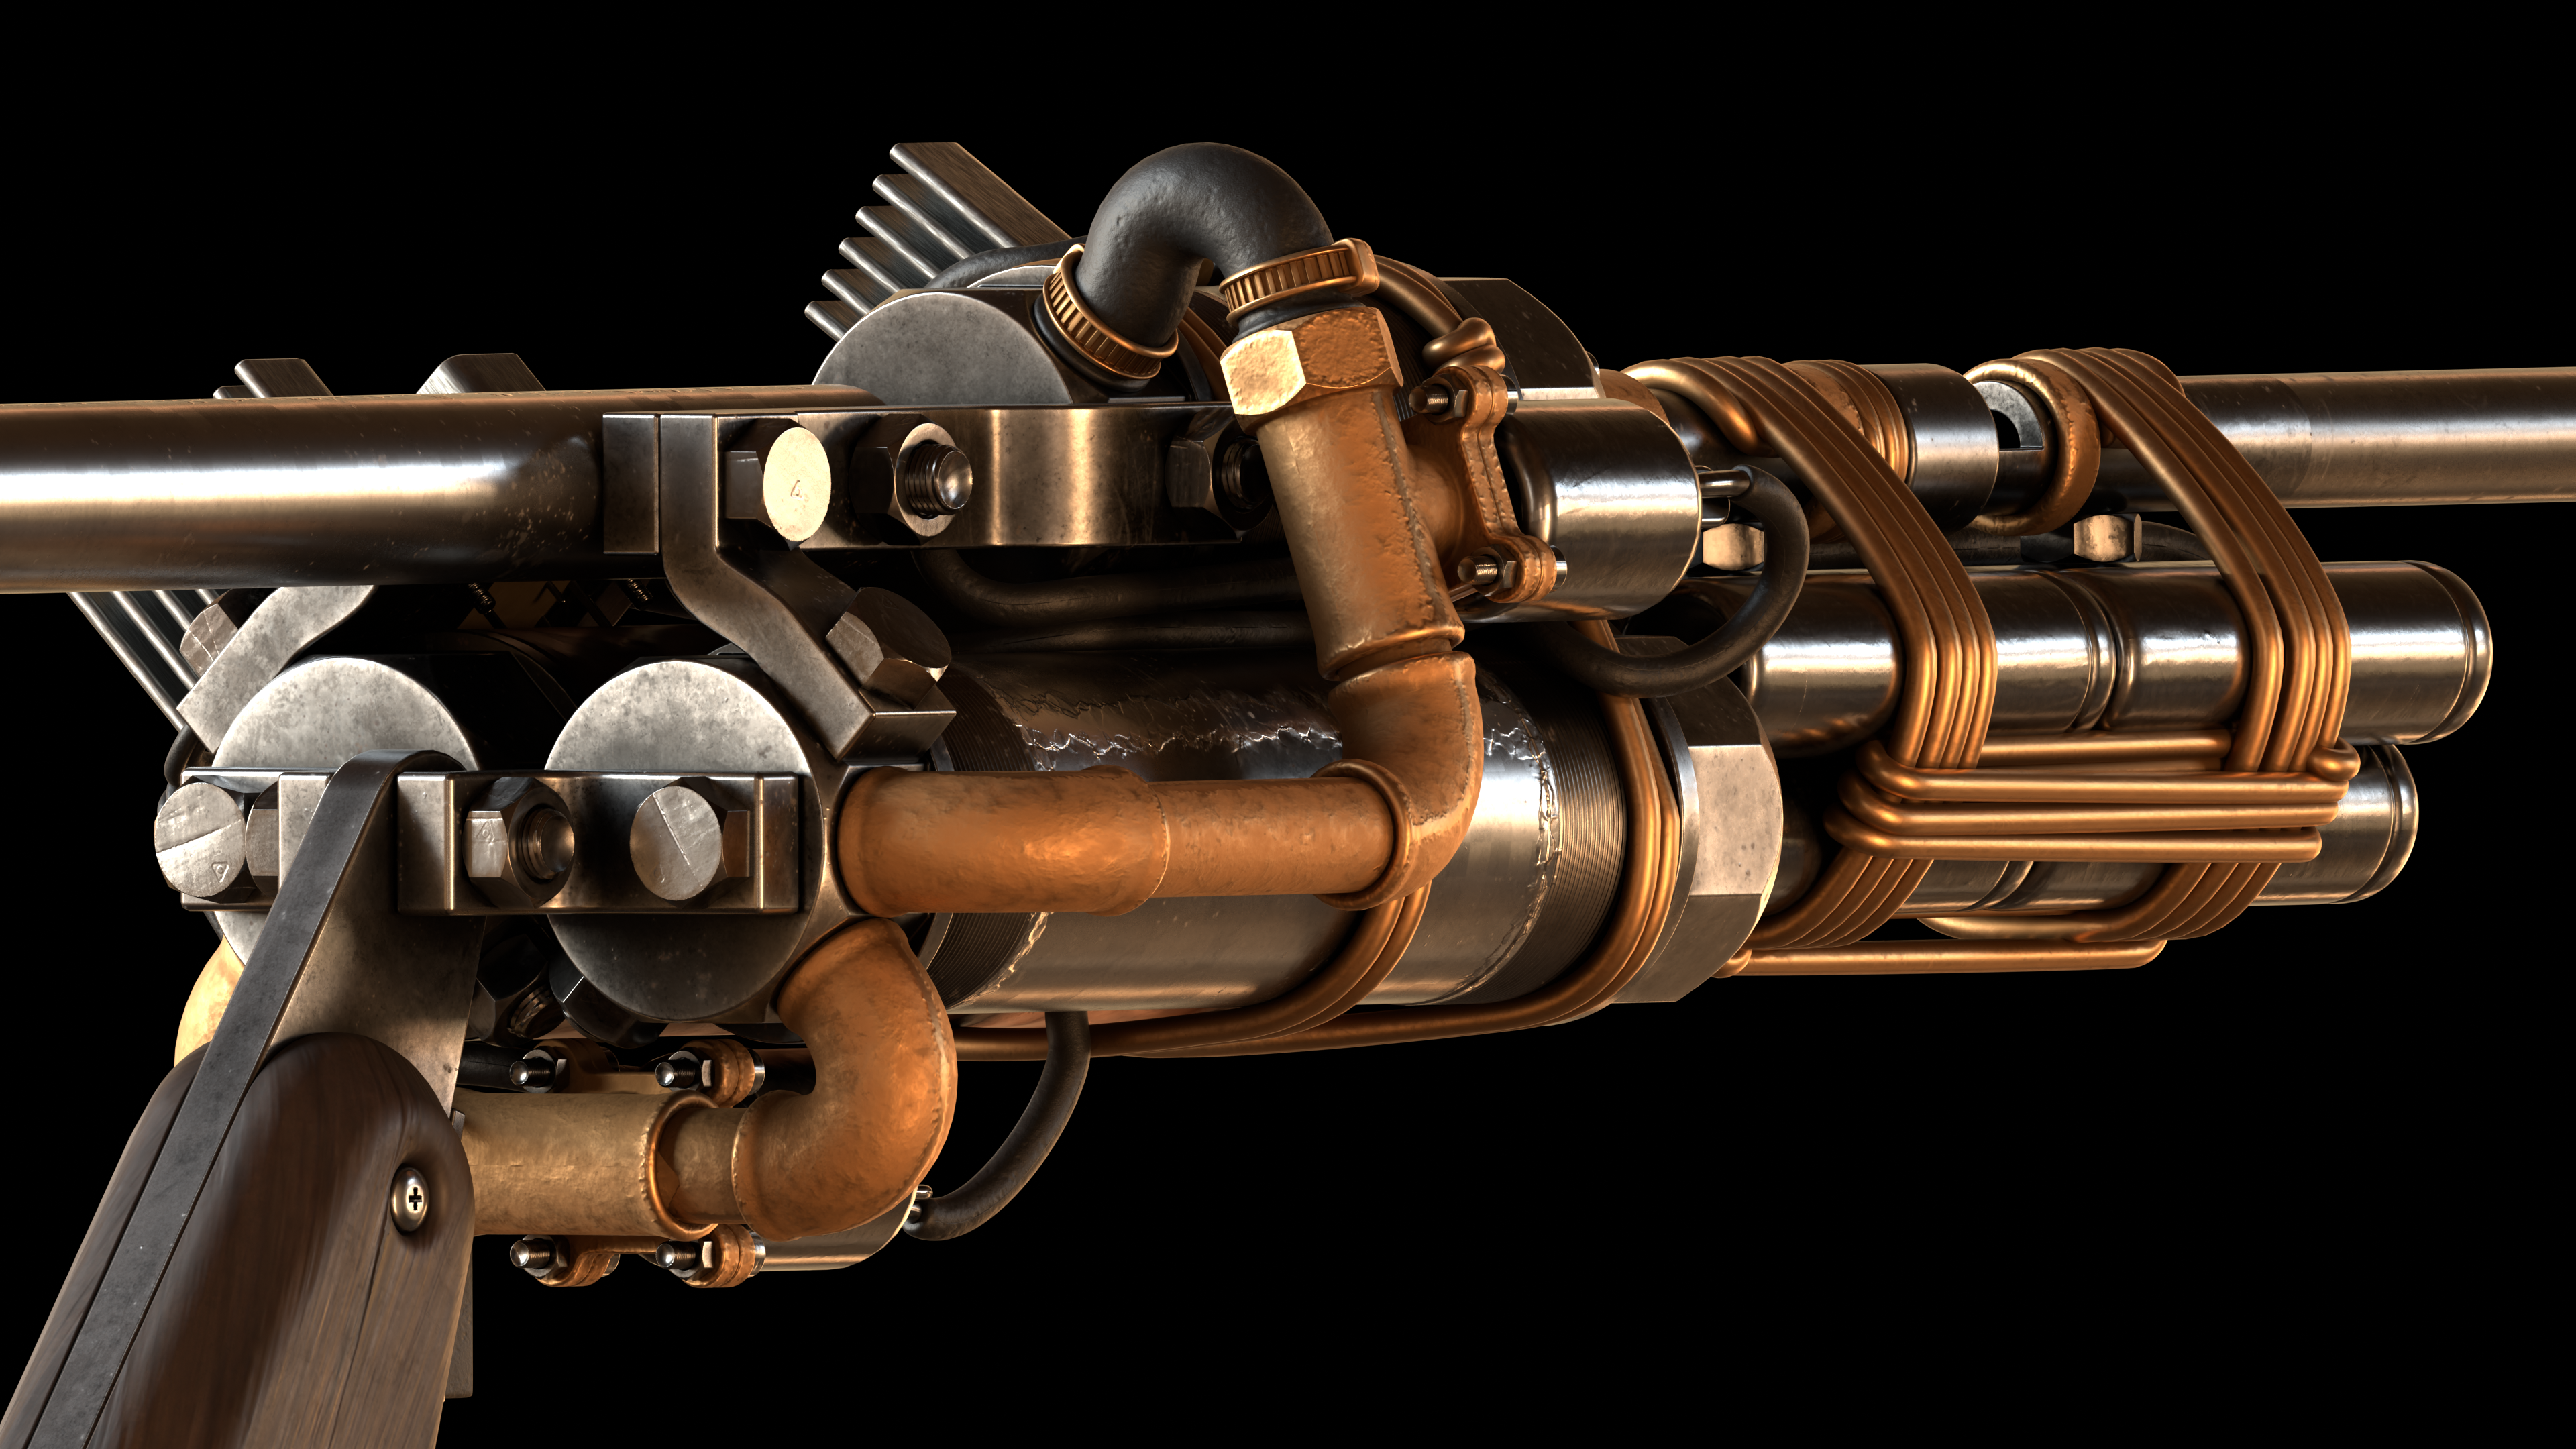
The barrel is mounted with an adapter bracket to the ignition chamber, and includes a simple bolt-operated single-shot bullet slot.
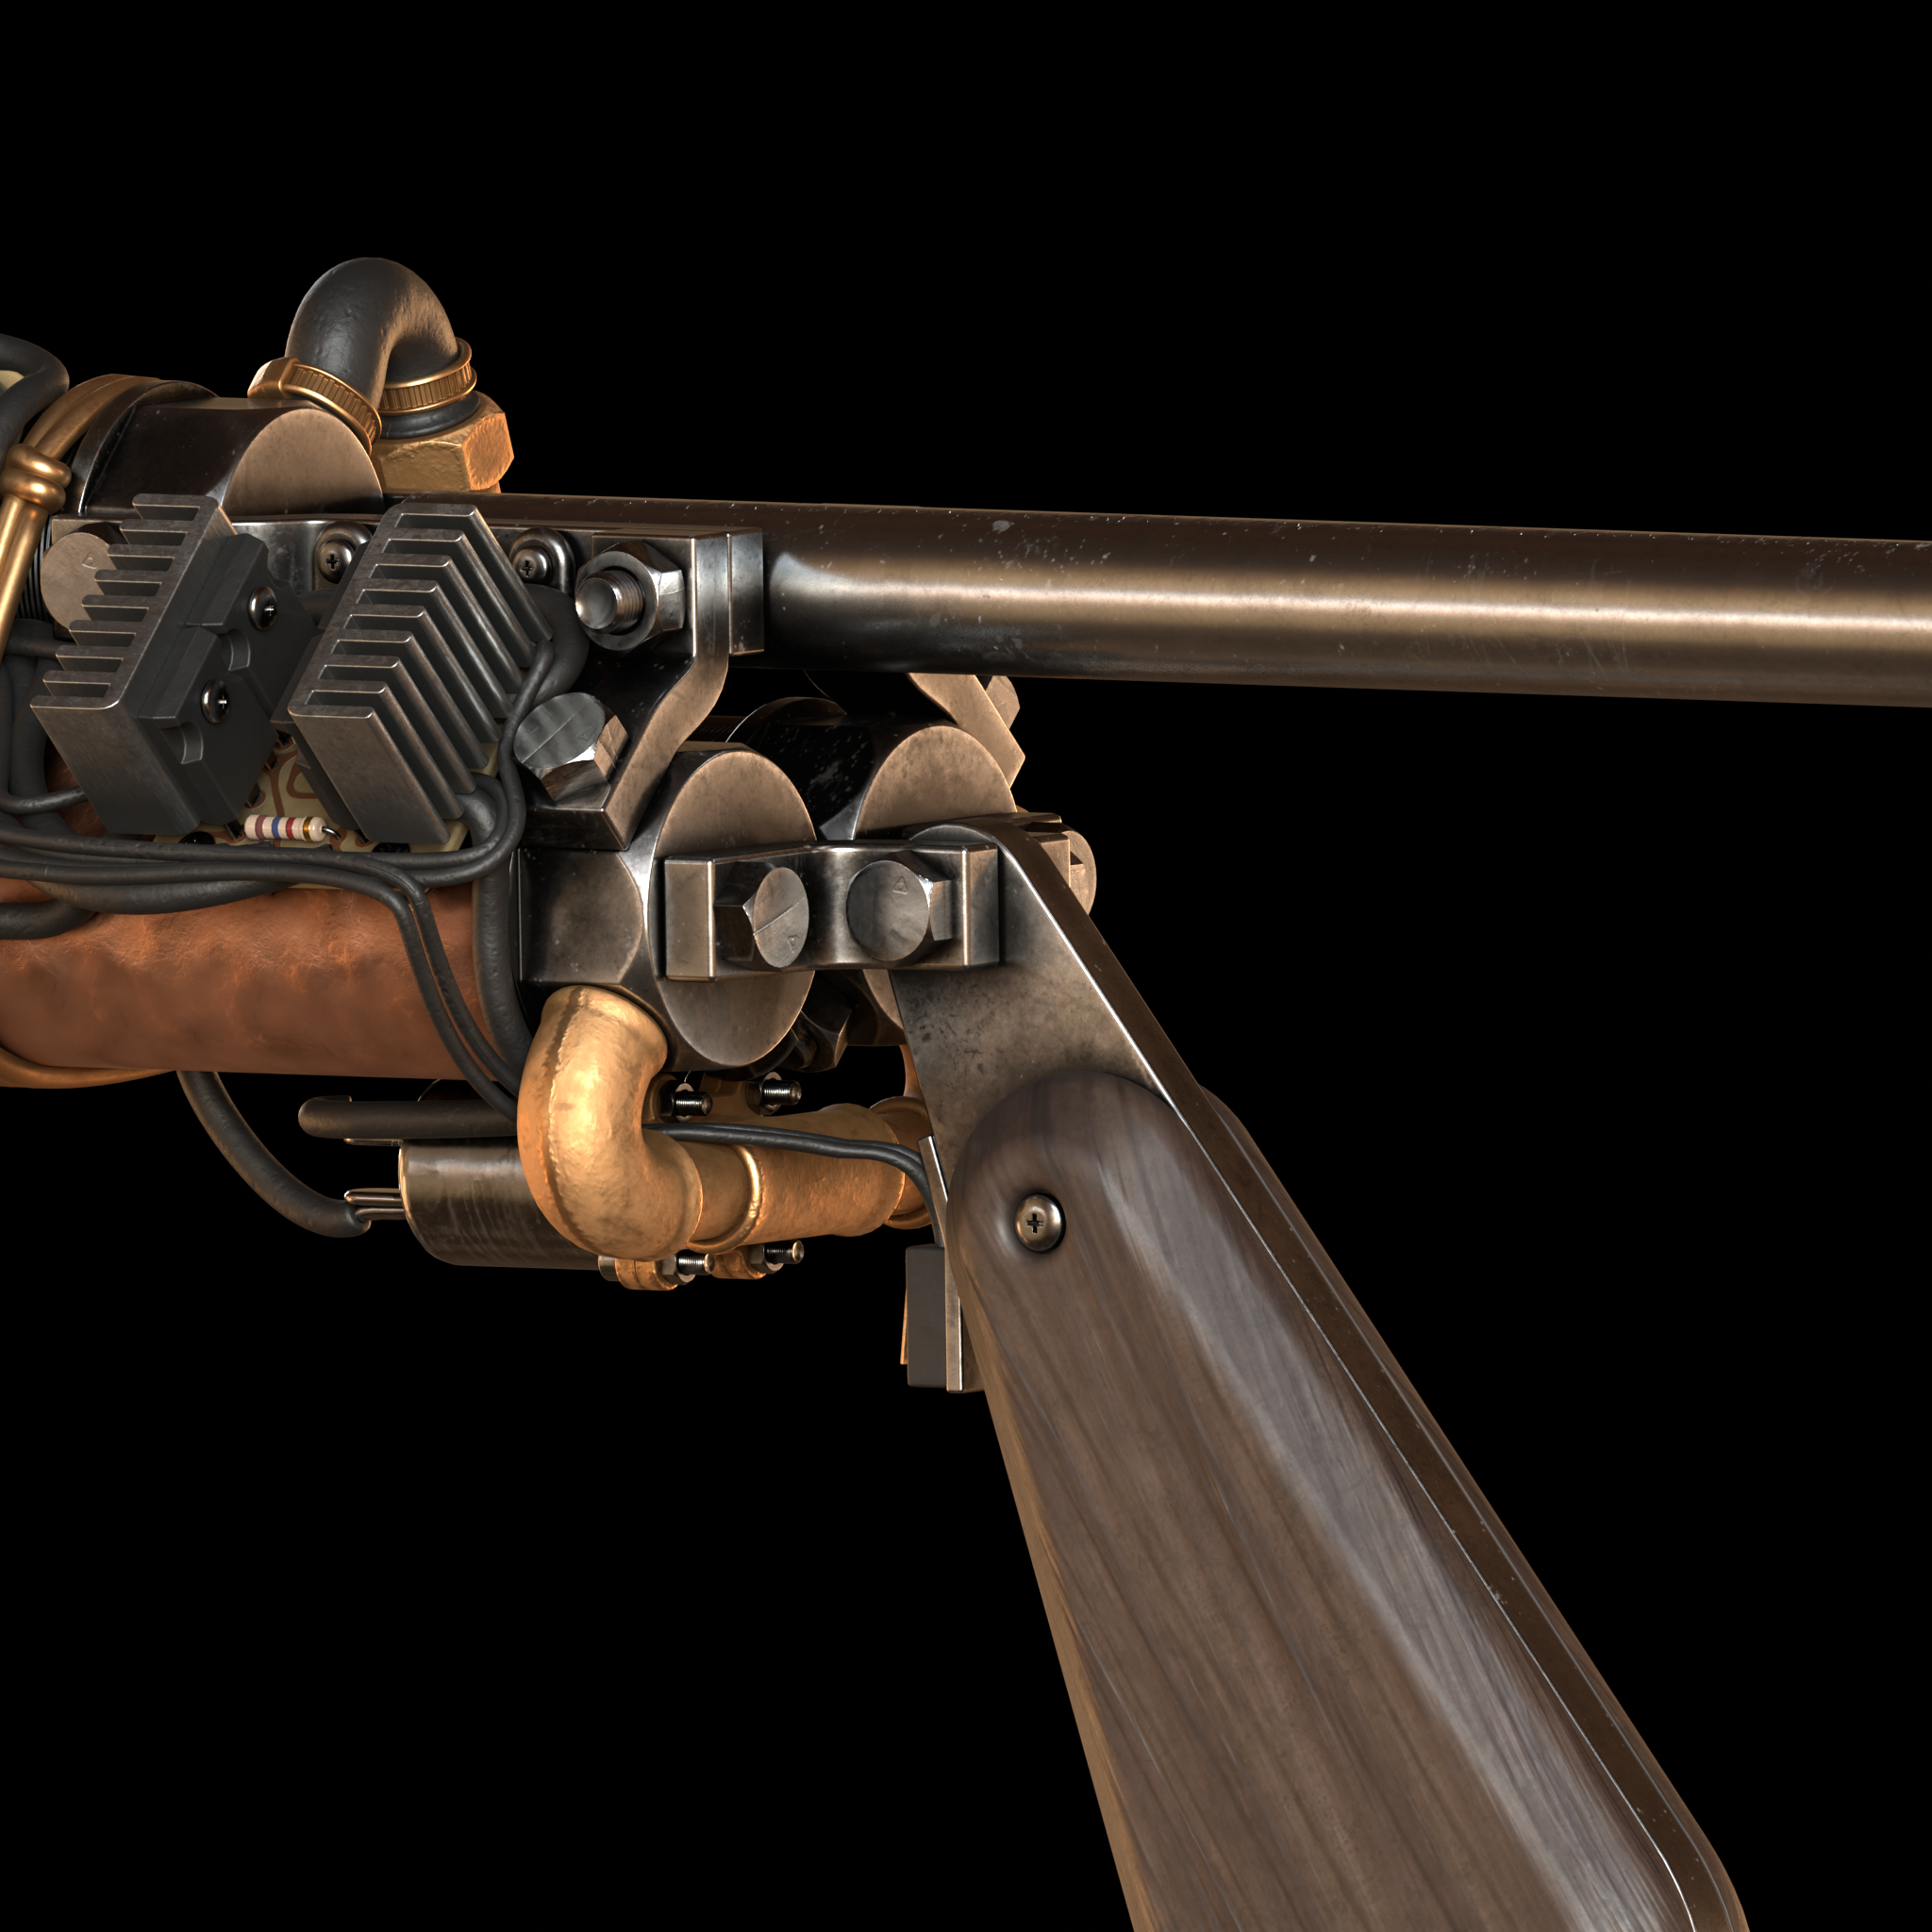
Both the grip and the stock are bolted onto the steel chamber caps, and include wooden padding for comfort.
The piping system is pretty simple. There is one connection between the electrolysis and storage tanks, and another between the storage and ignition tanks.
Both of those connections include a solenoid valve, so they can be turned on and off on demand.
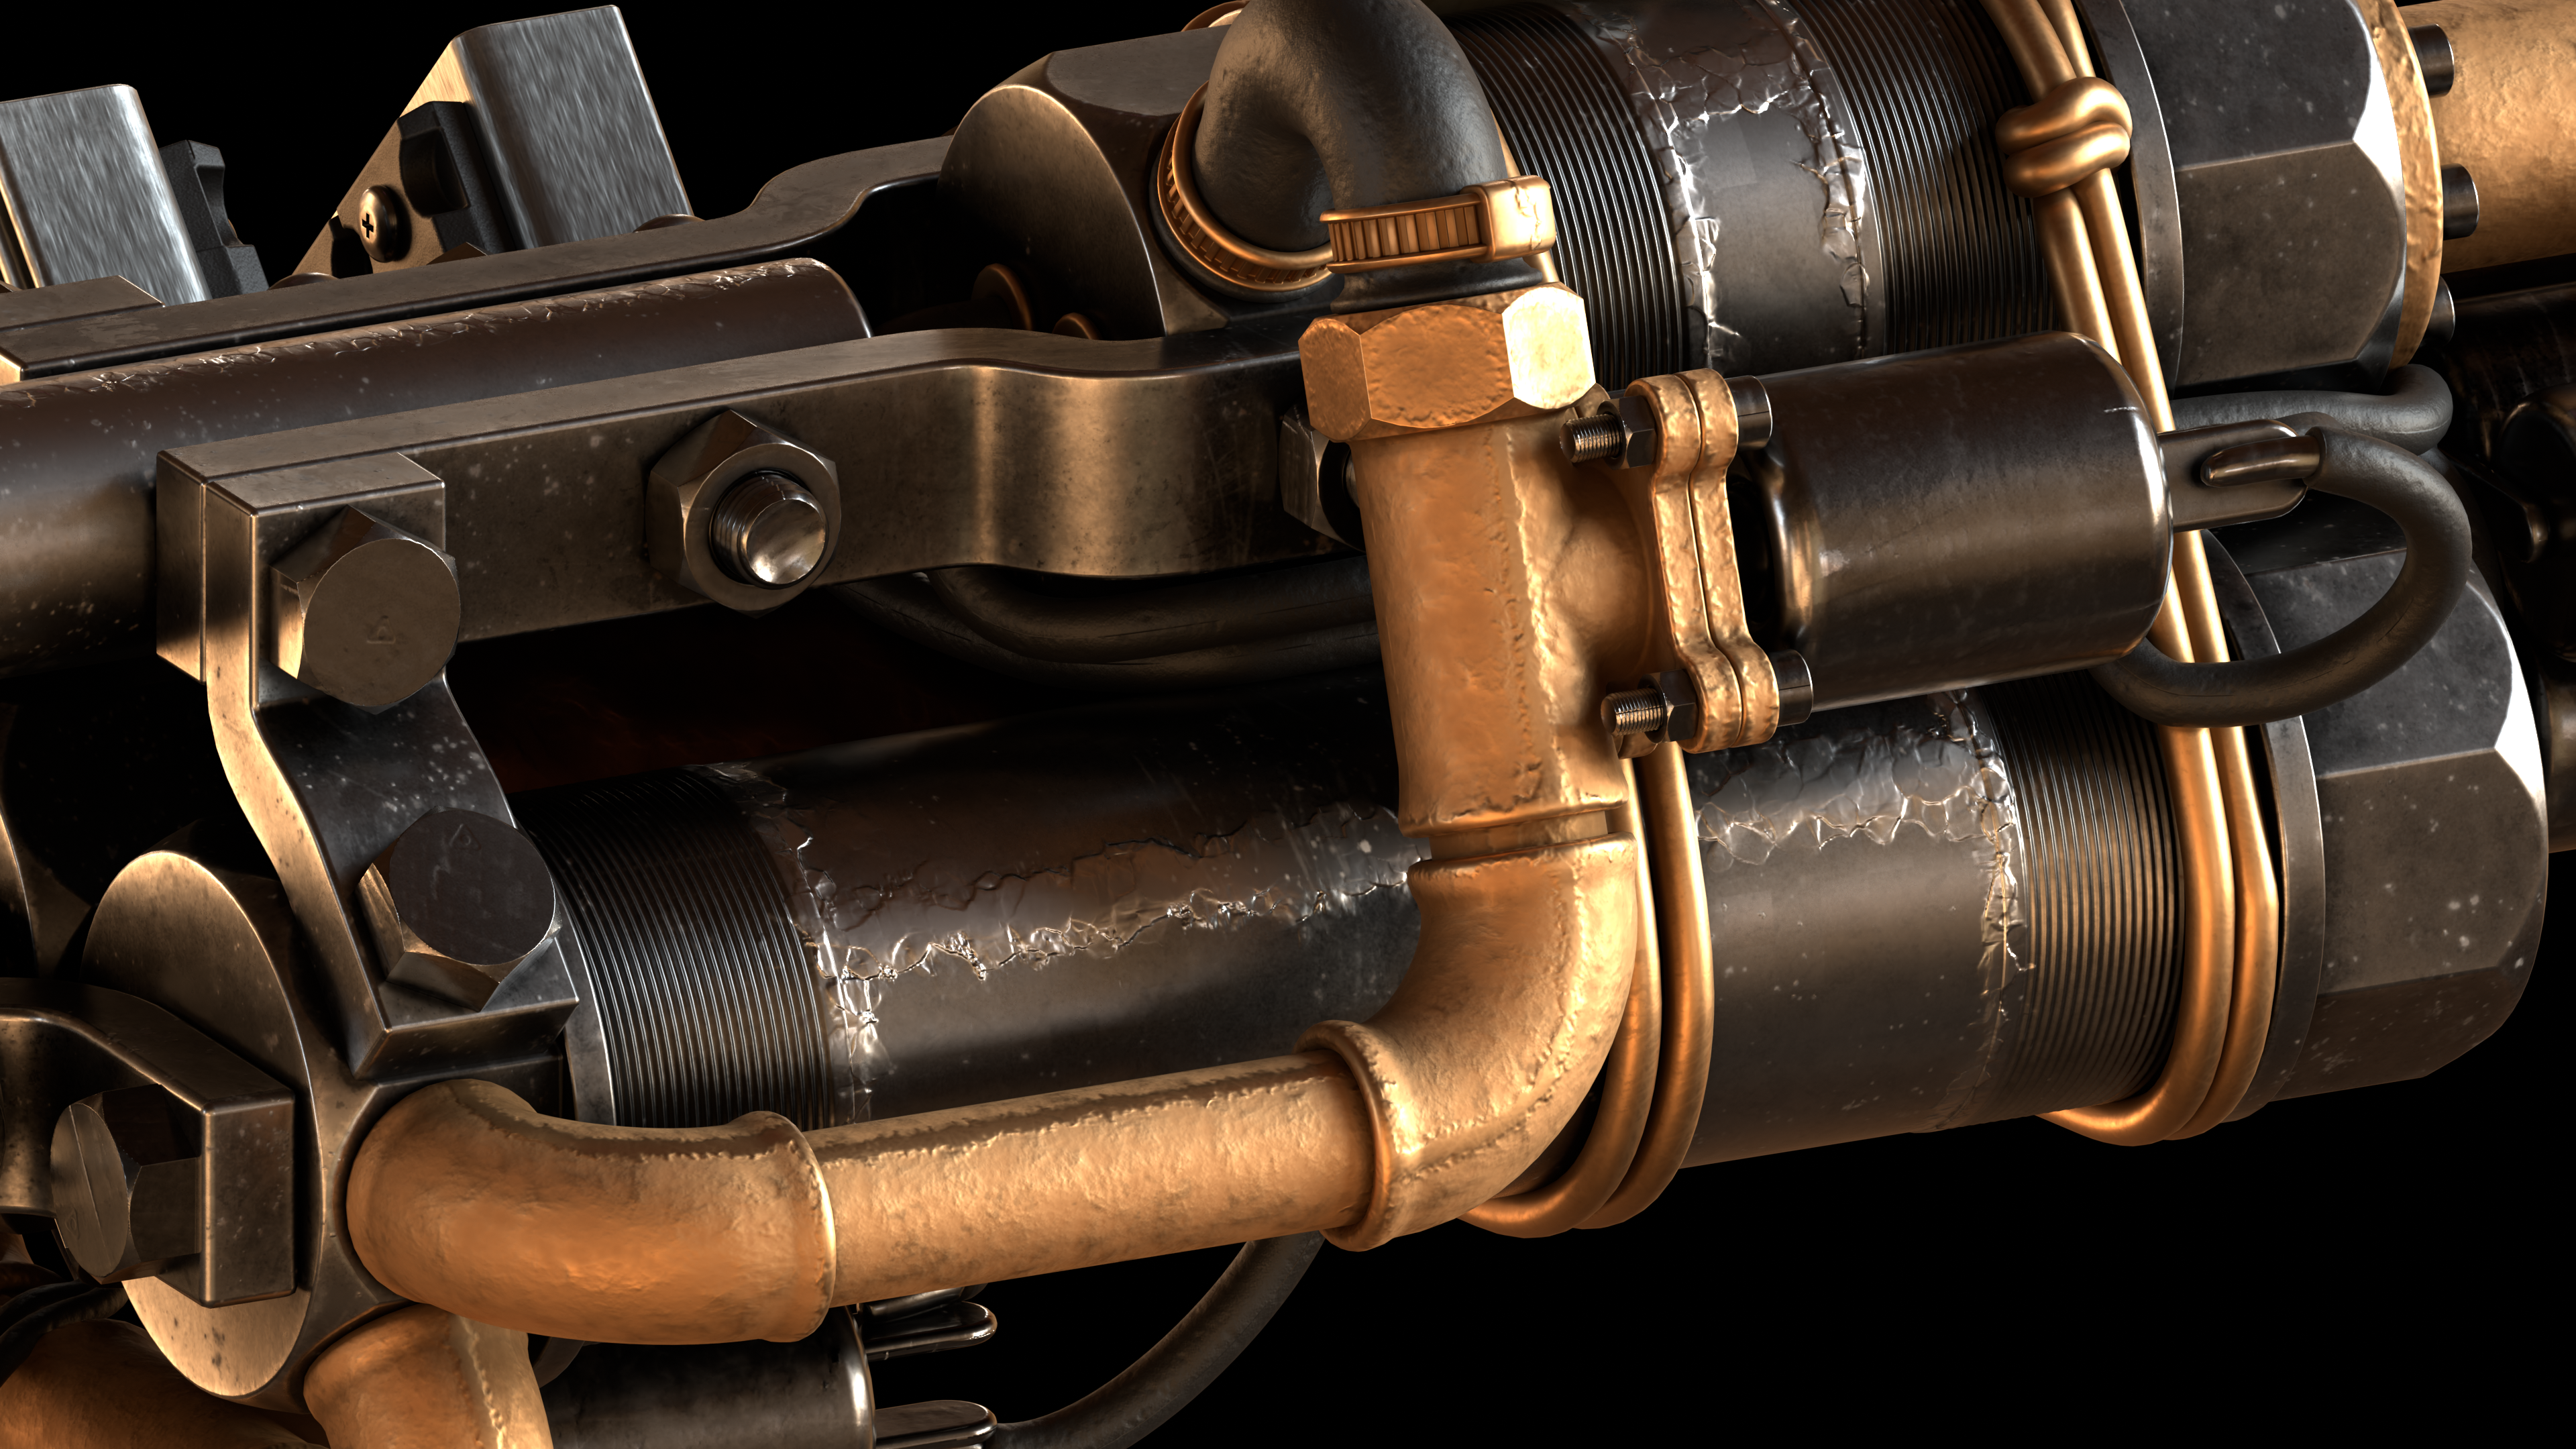
The pipes used are primarily cast brass plumbing pipes. I achieved this look by applying a rough brass material on the entire part, and manually painting in sanded casting seams, which use a smoother and flatter material with an elevated normal map.
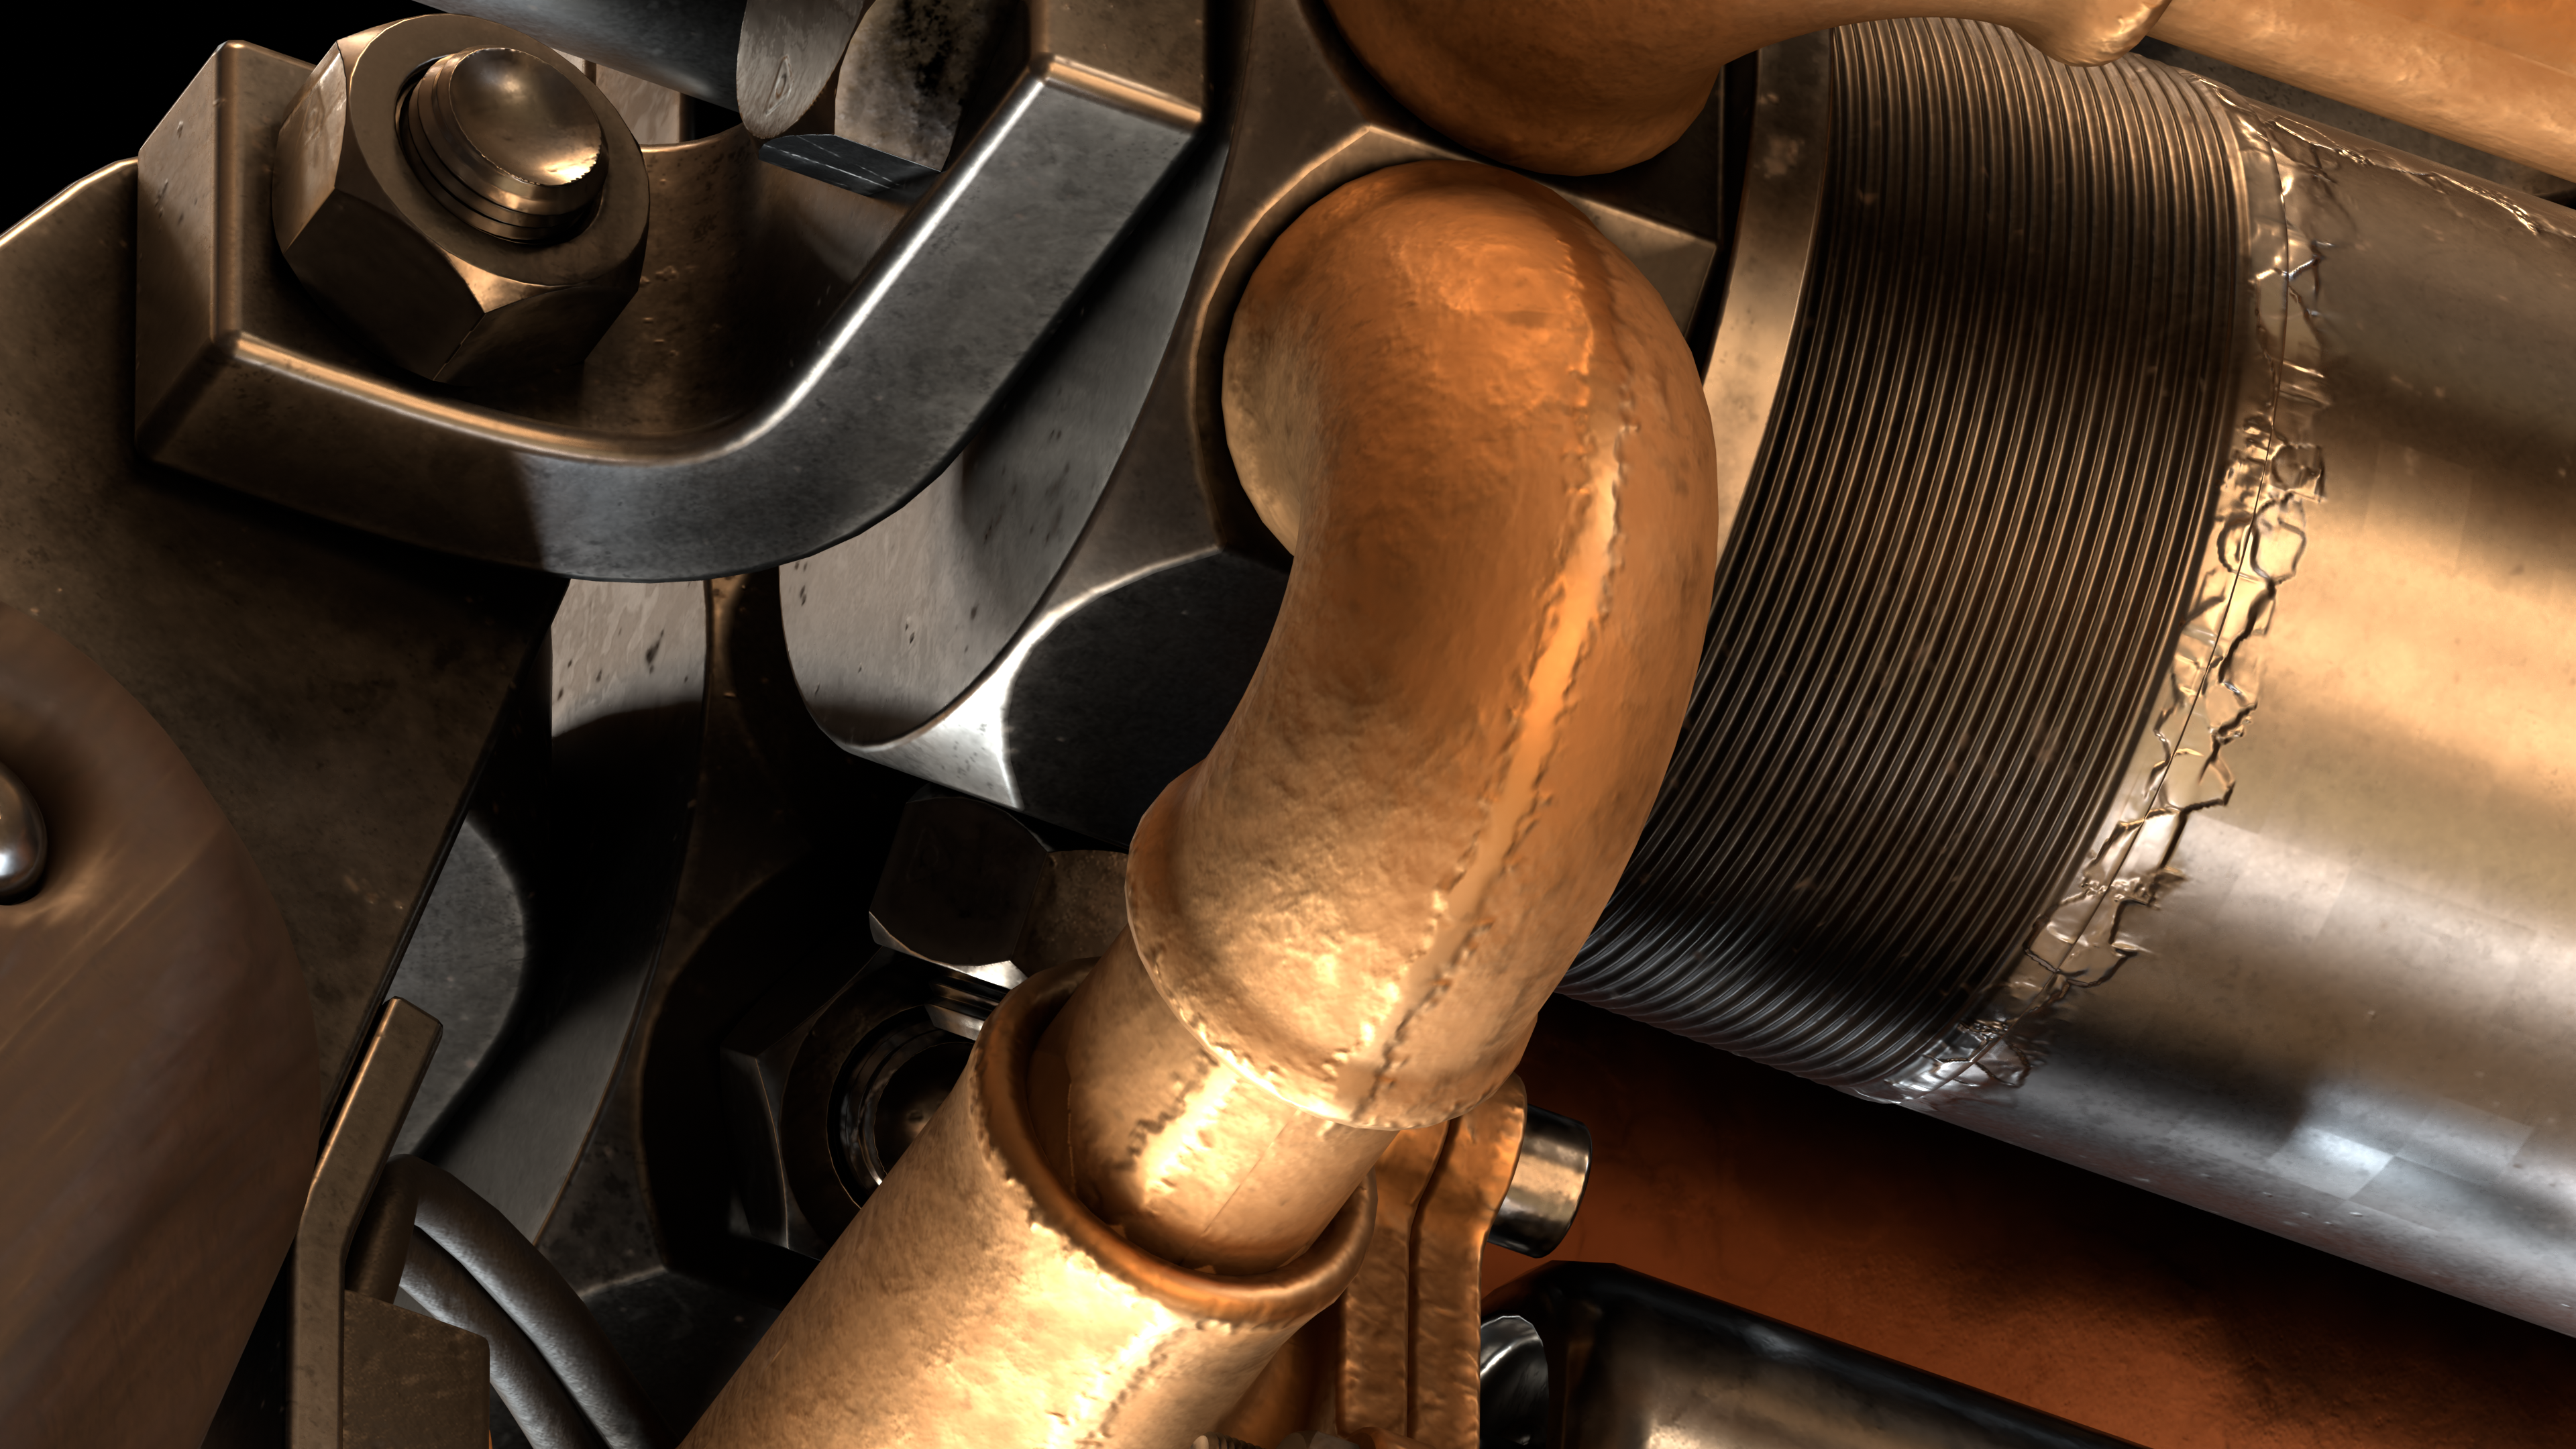
The connection from the storage tank to the ignition chamber also includes a small section of a rubber hose, held in place with brass cable ties.
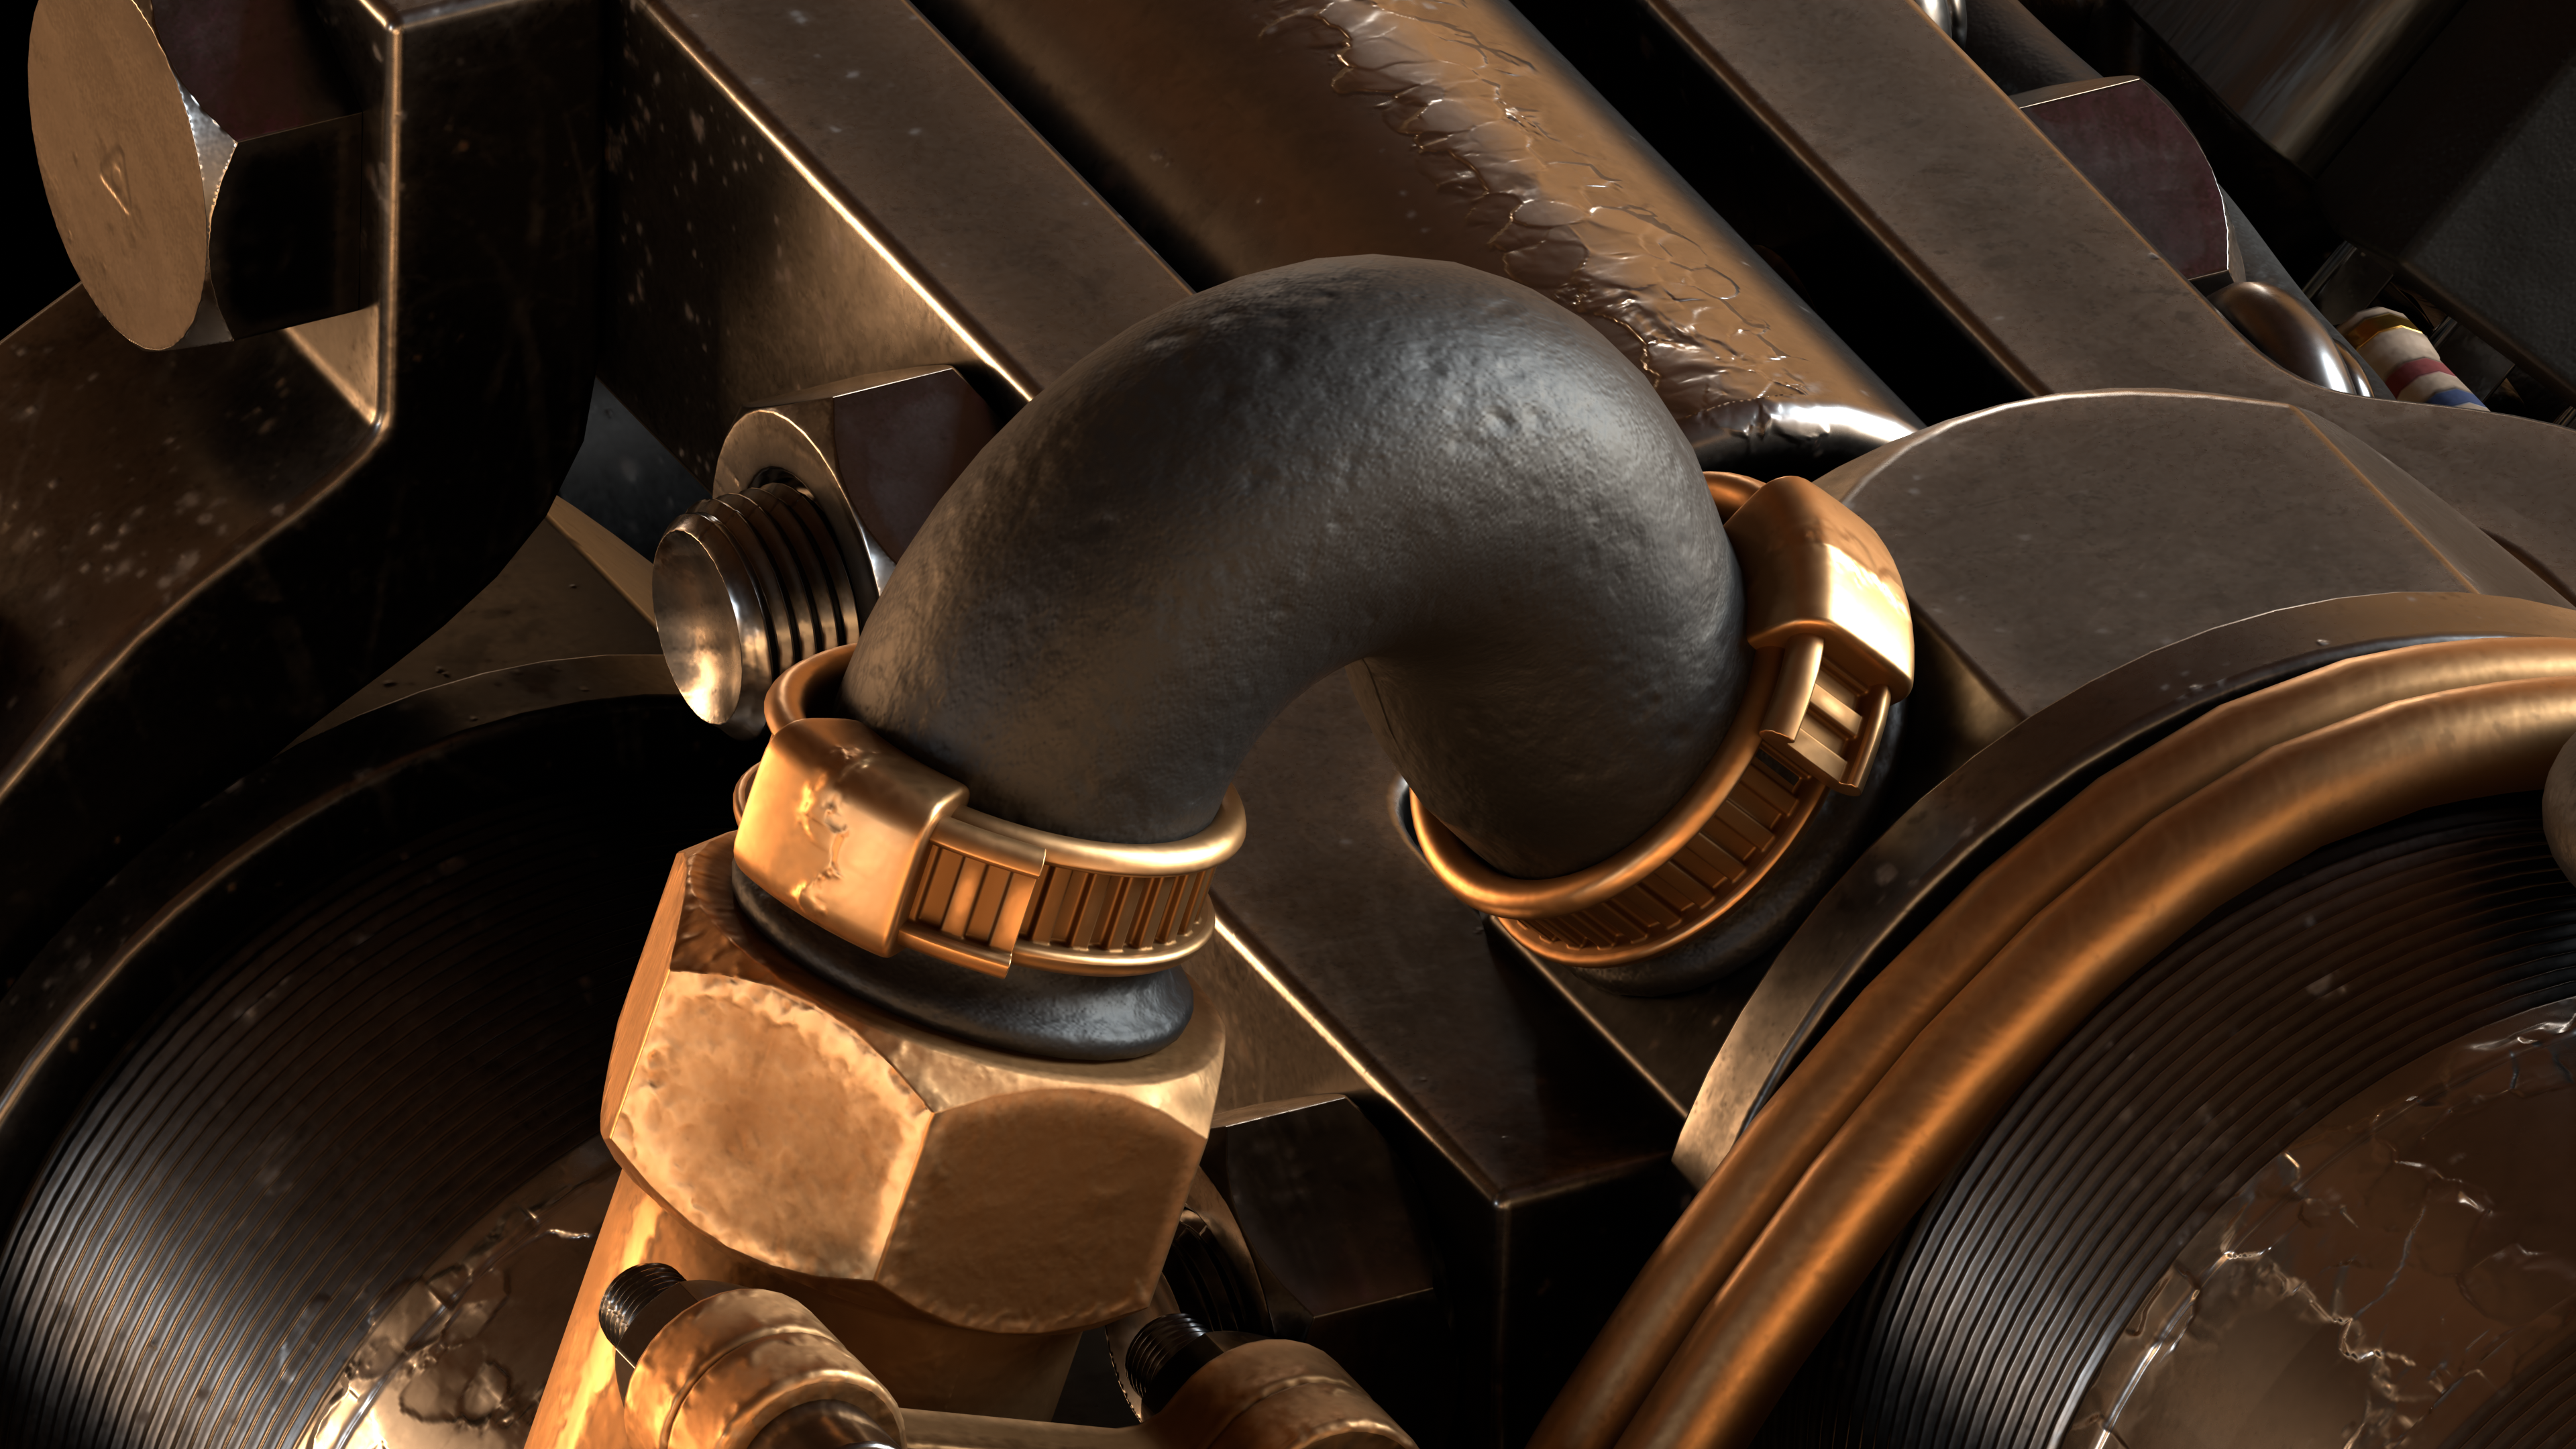
The solenoids themselves have steel casings, and terminals at the back to connect them to the electrical system of the rifle.
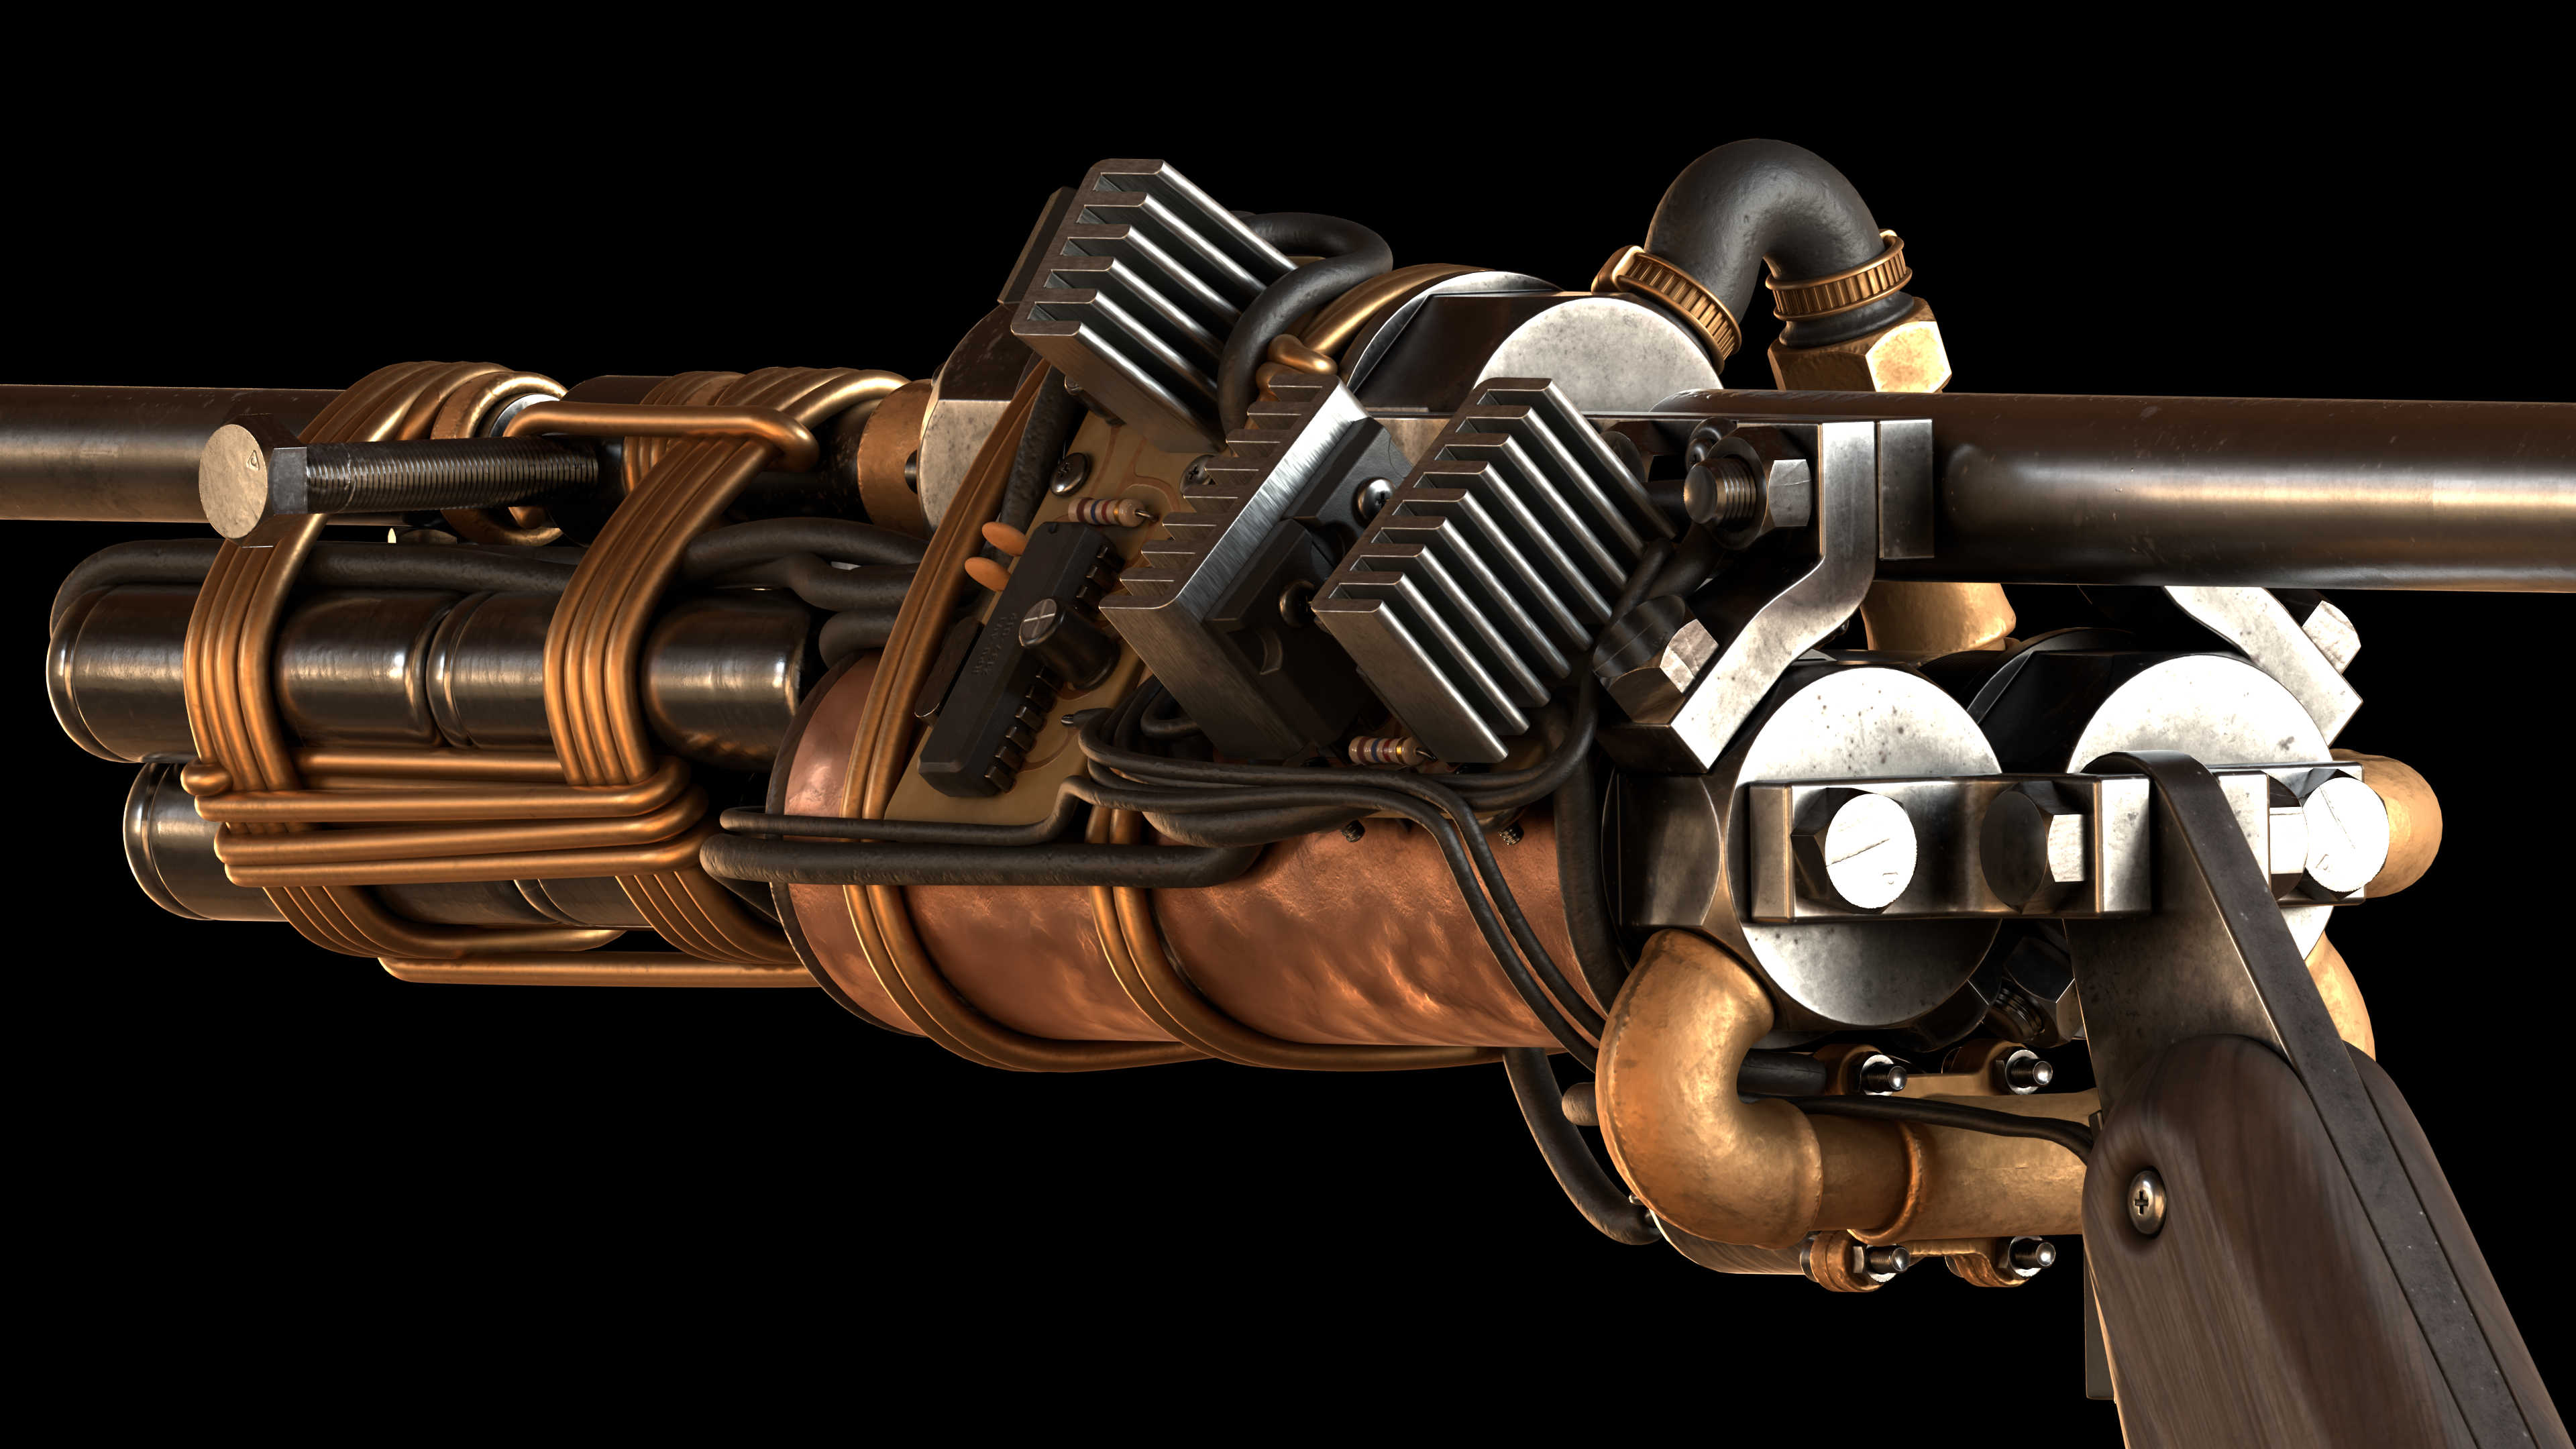
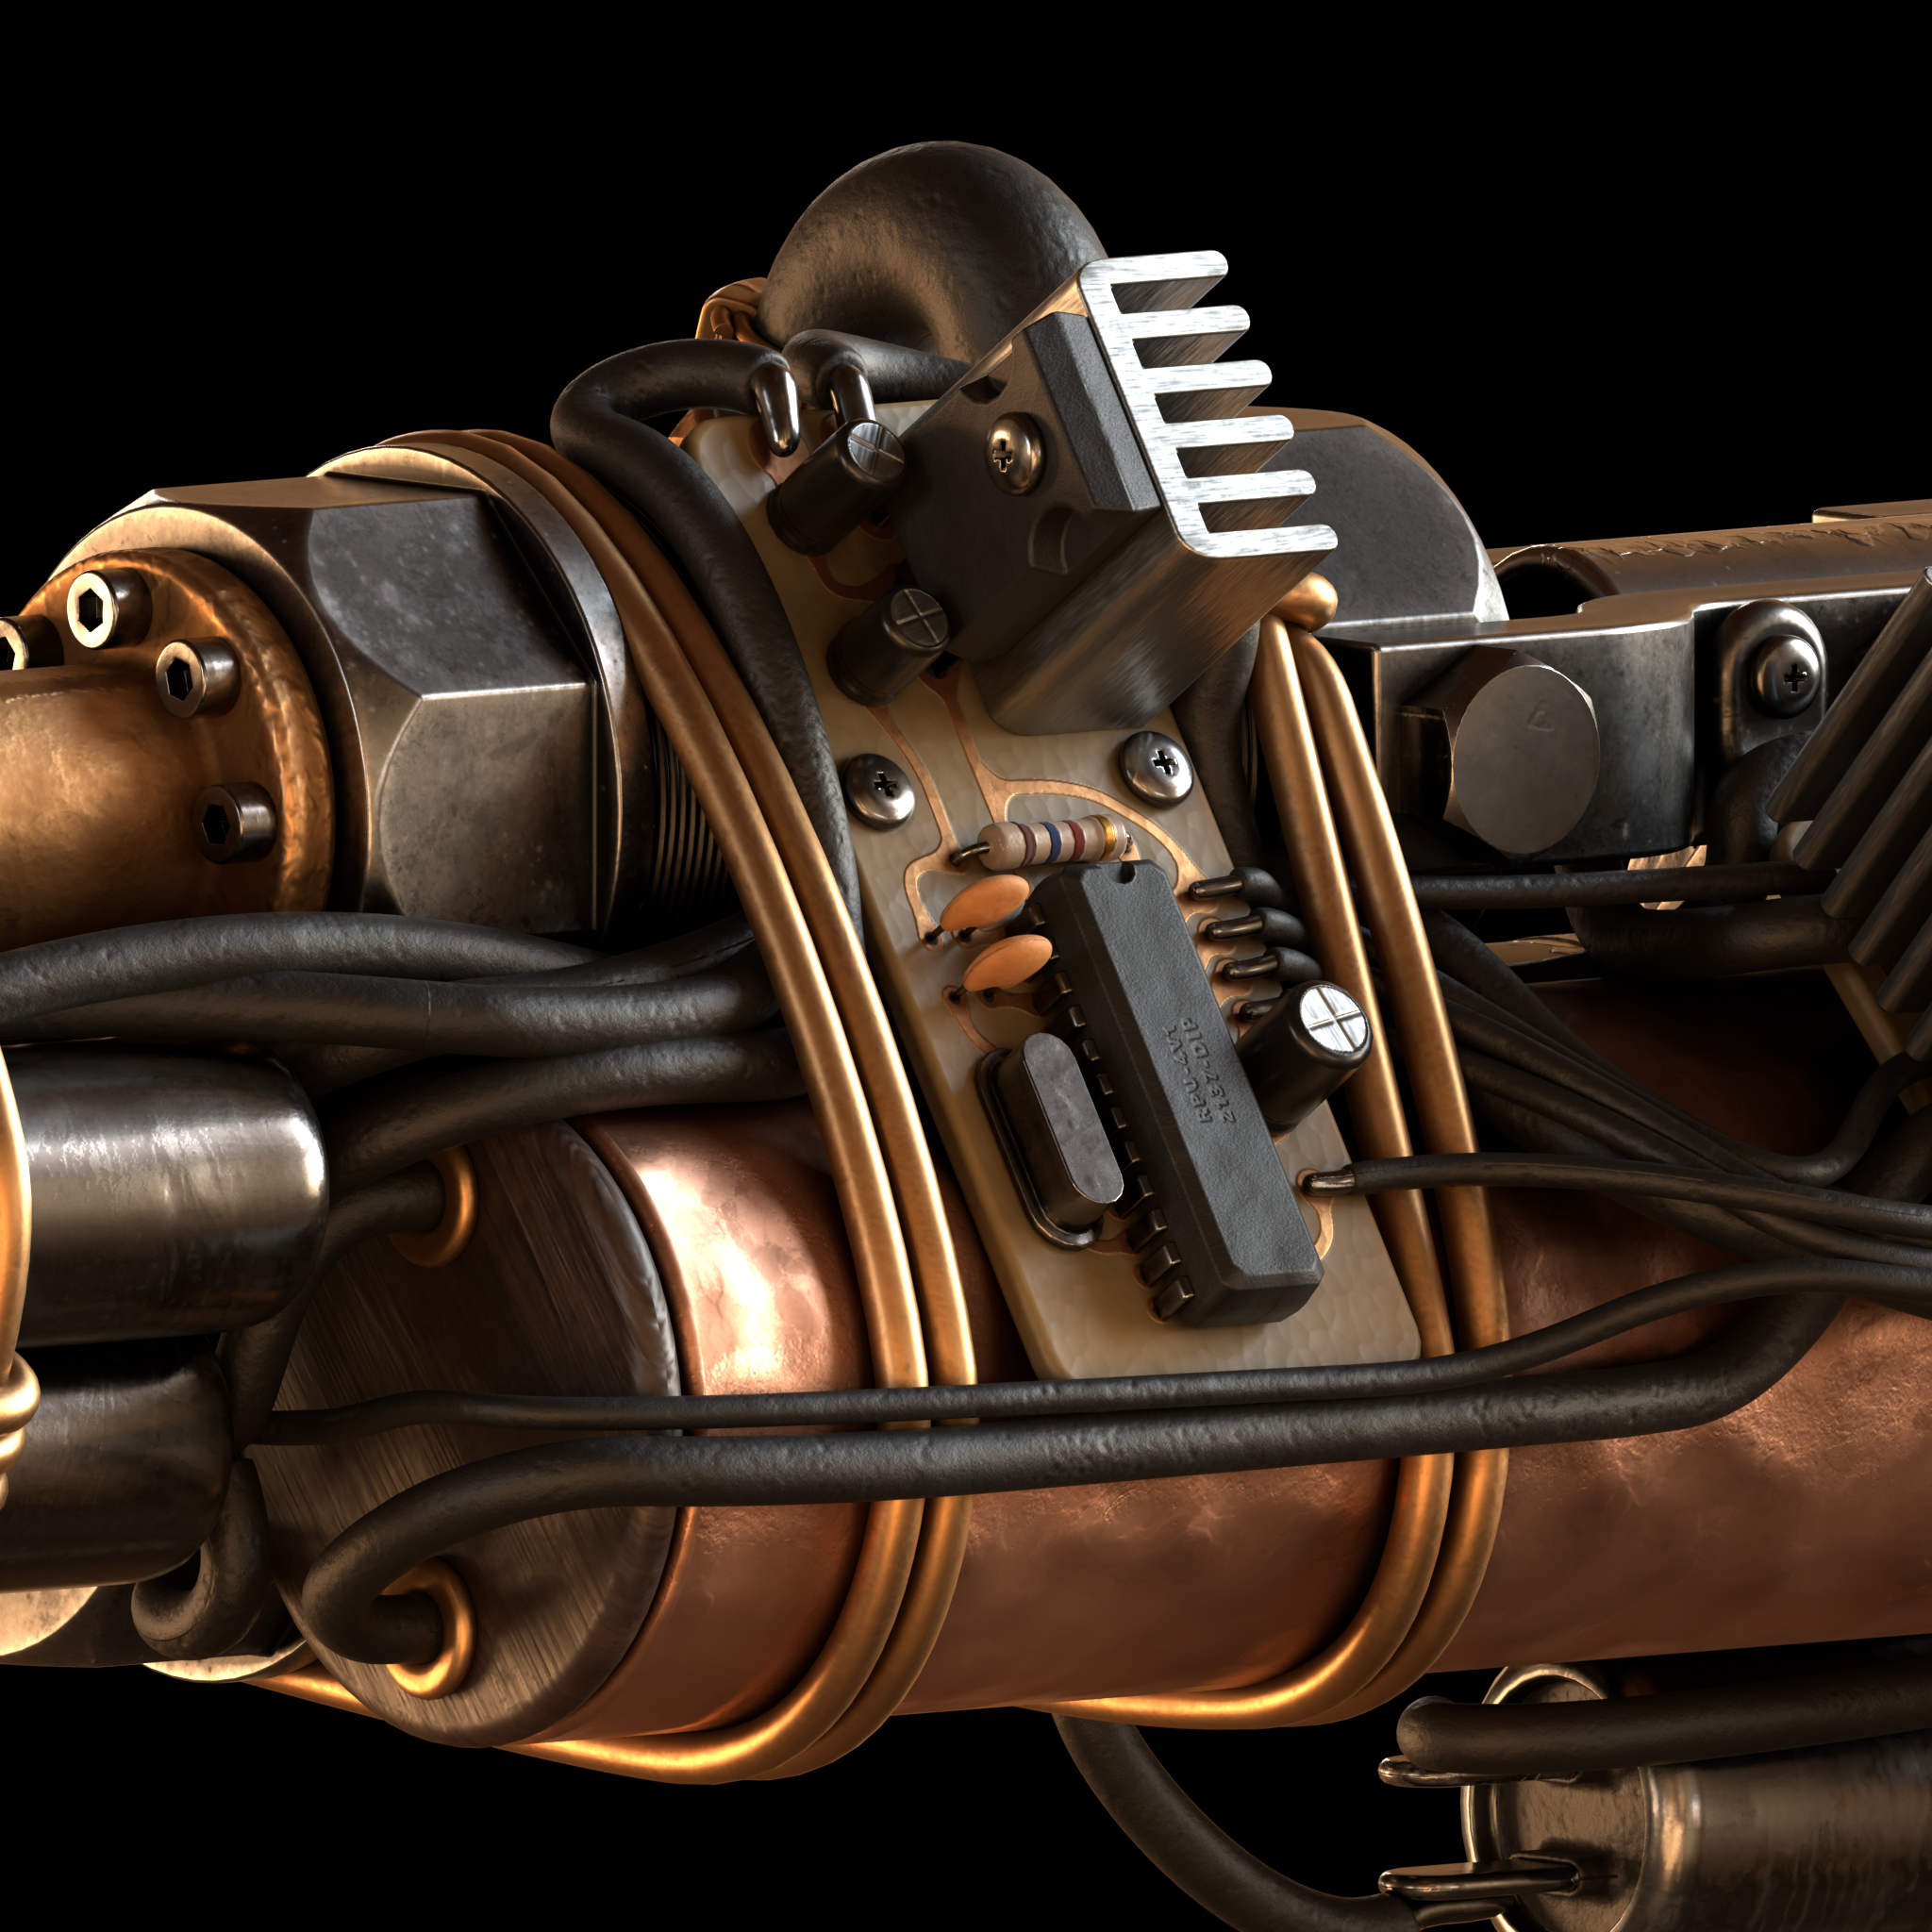
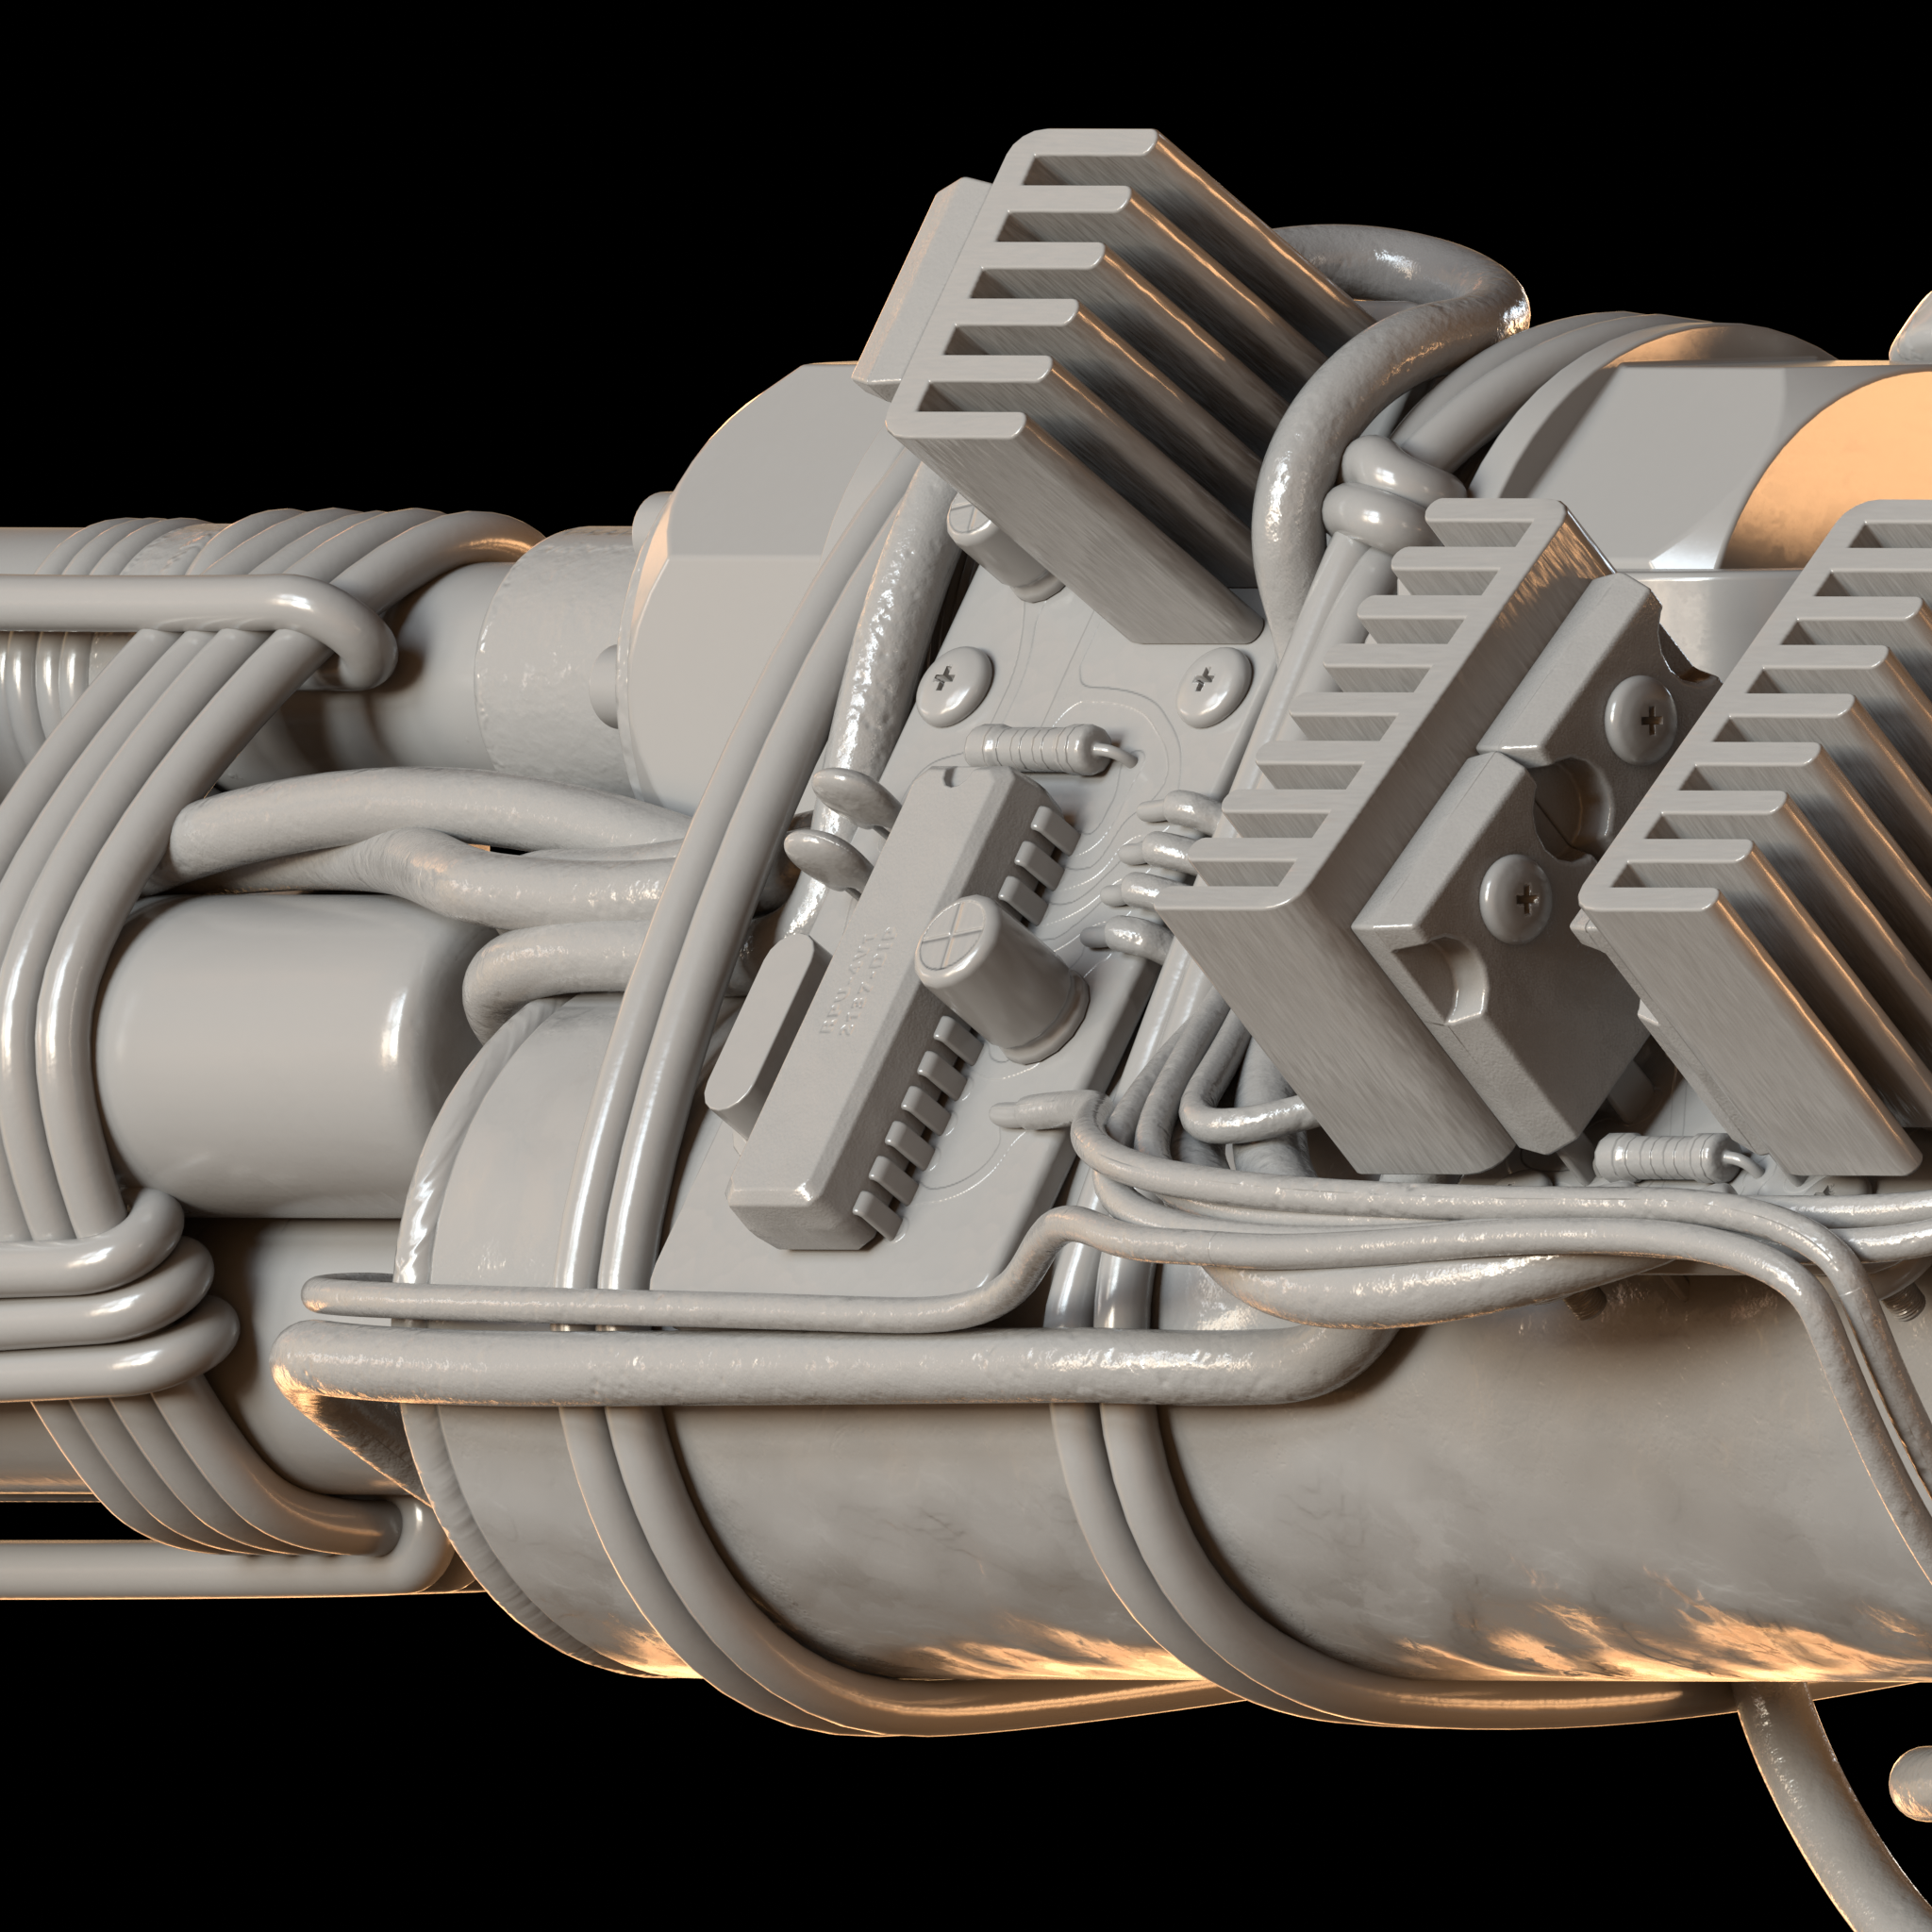
The electronic system of this rifle is pretty convoluted, with dozens of wires running through the entire firearm.
At the heart of it all sits the main MCU board. It includes a chip inspired by the ATmega328P-PU, which is an 8-bit microcontroller, in this case managing the whole firearm's electronic system.
Above it, there is a voltage regulator that takes in the 7.4 volts provided by the battery pack and steps it down to 5VDC, suitable for use with the chip, which is later also stabilized with a pair of ceramic capacitors.
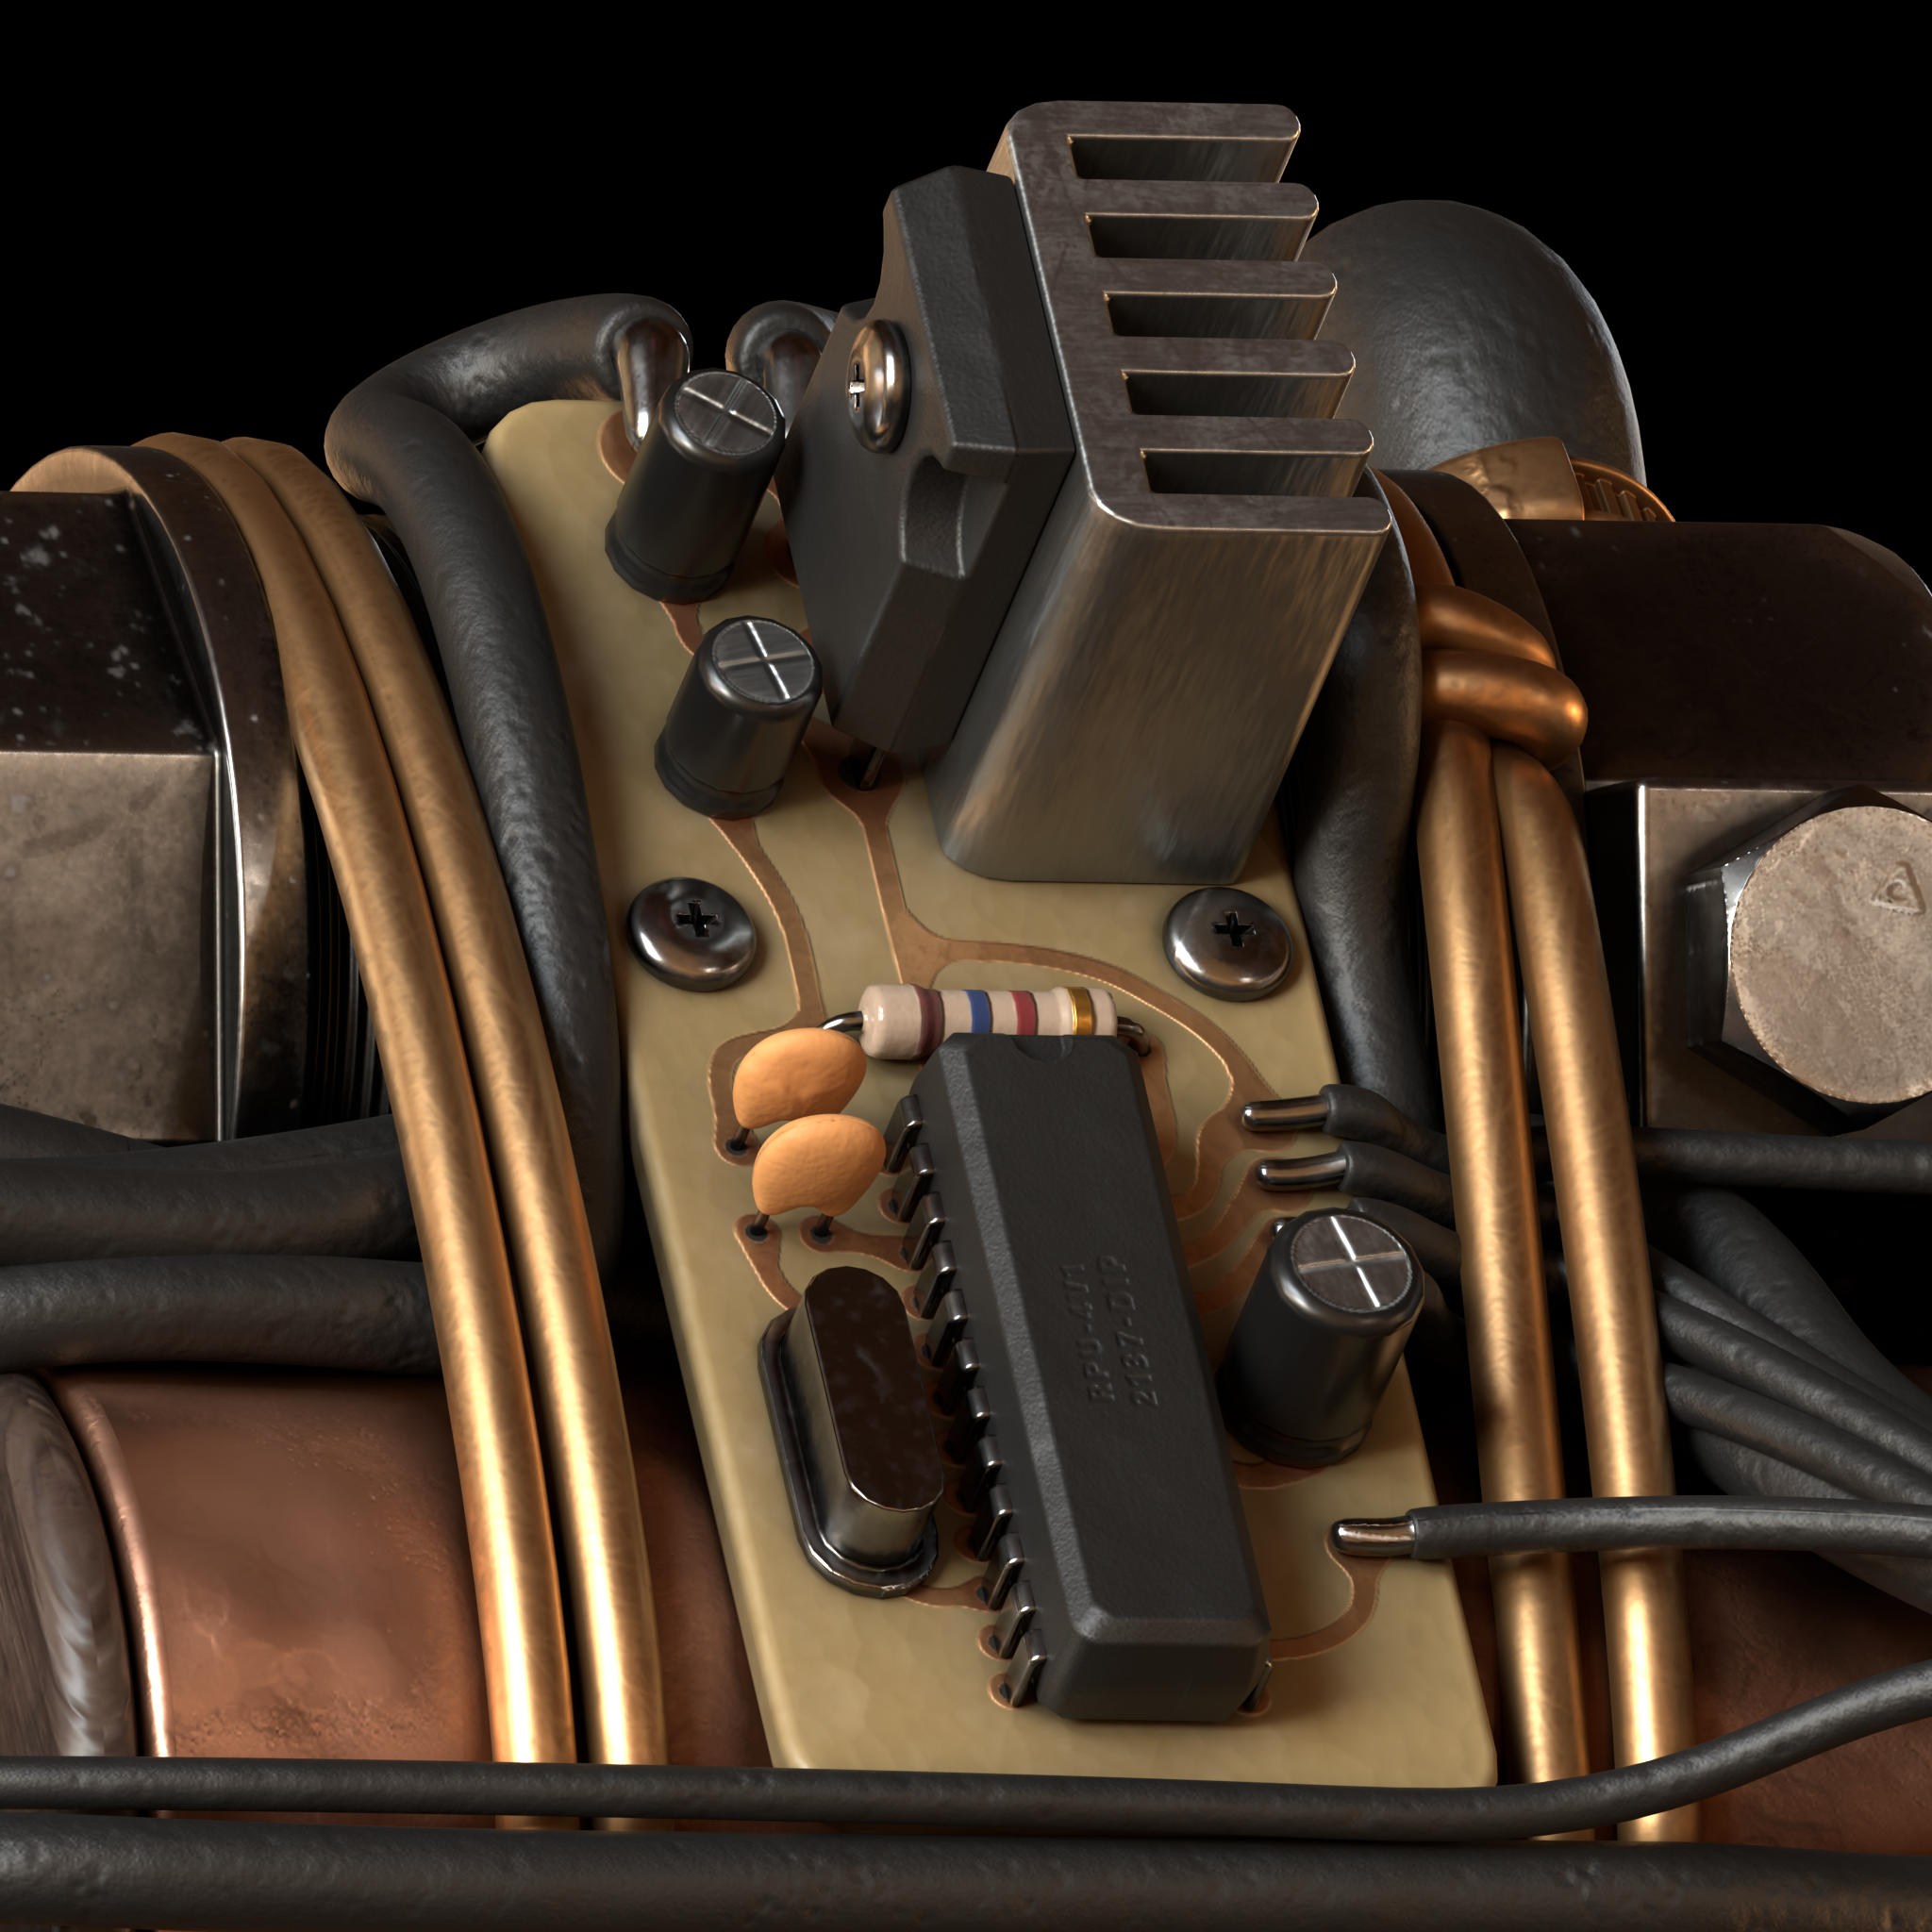

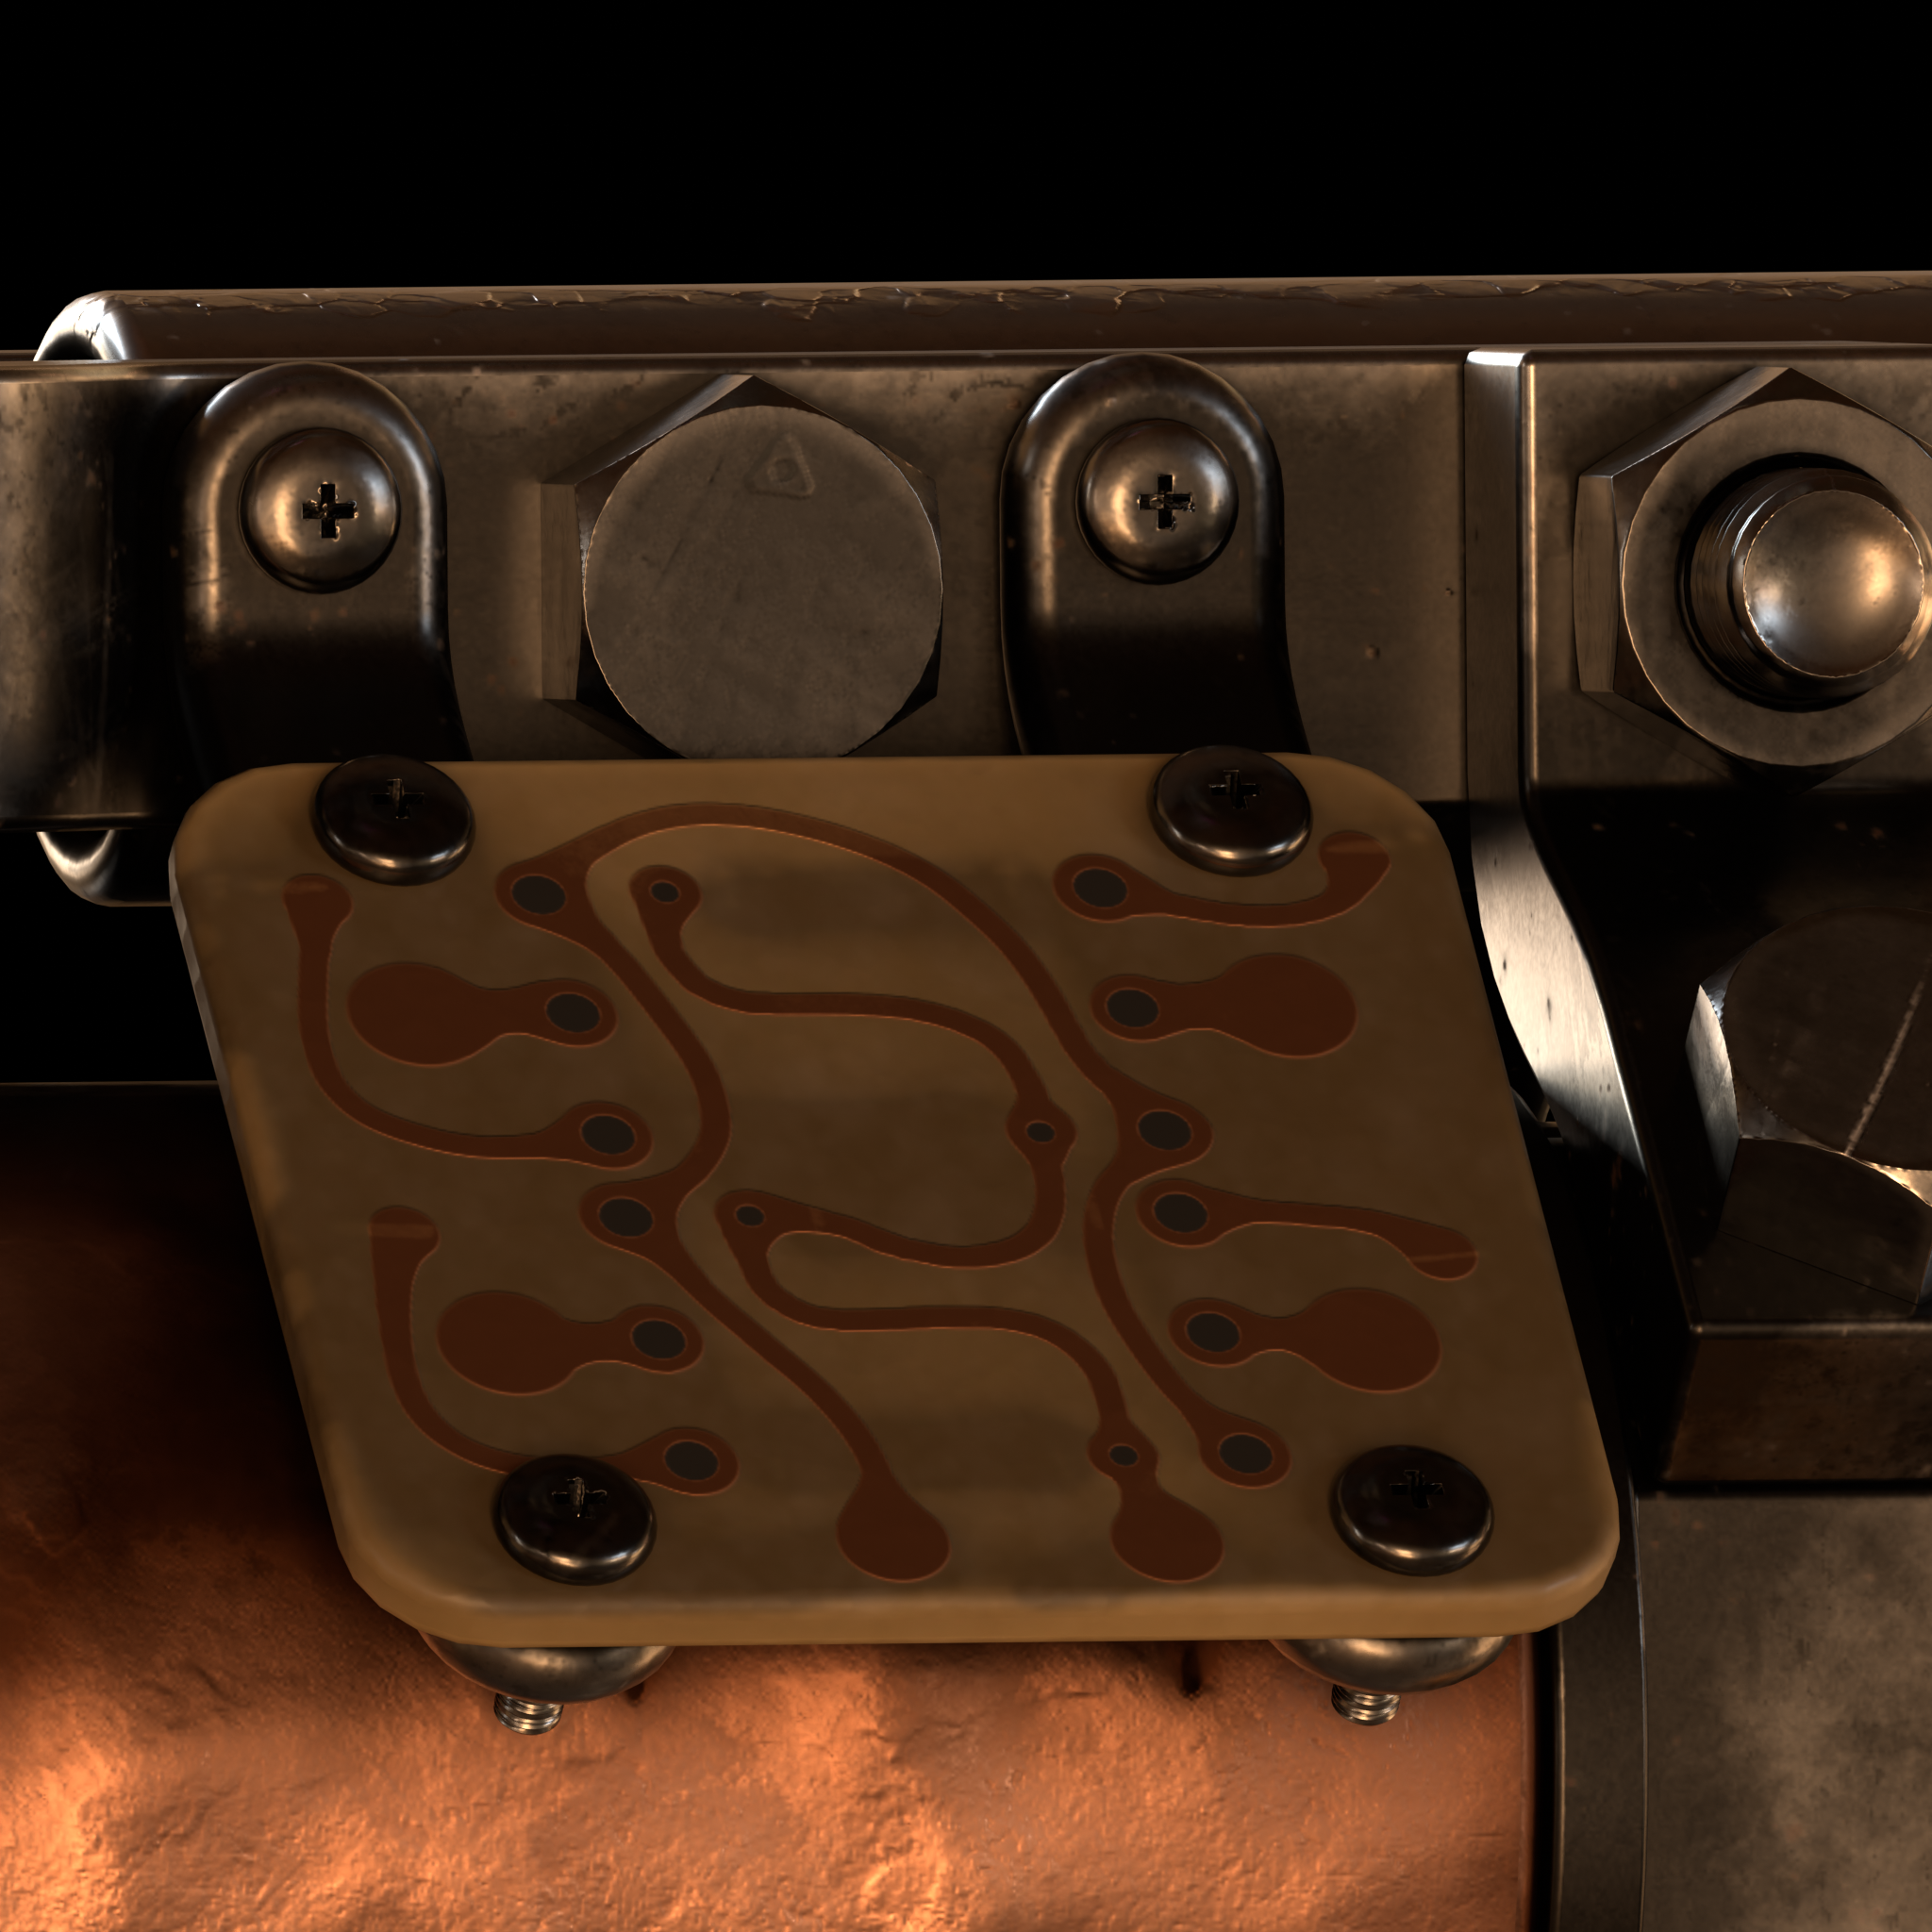
The PCB itself is a home-etched single-sided board. The process of etching such a board often includes hand-painting the traces, and on this one, I've decided to mimic the style of pre-CAD designs from the '70s and '80s that are known for their smooth-flowing traces.
A second, MOSFET-populated PCB is there to help switch high currents and voltages used by the solenoids, electrolysis, and ignition, using the chip's 5 volts.
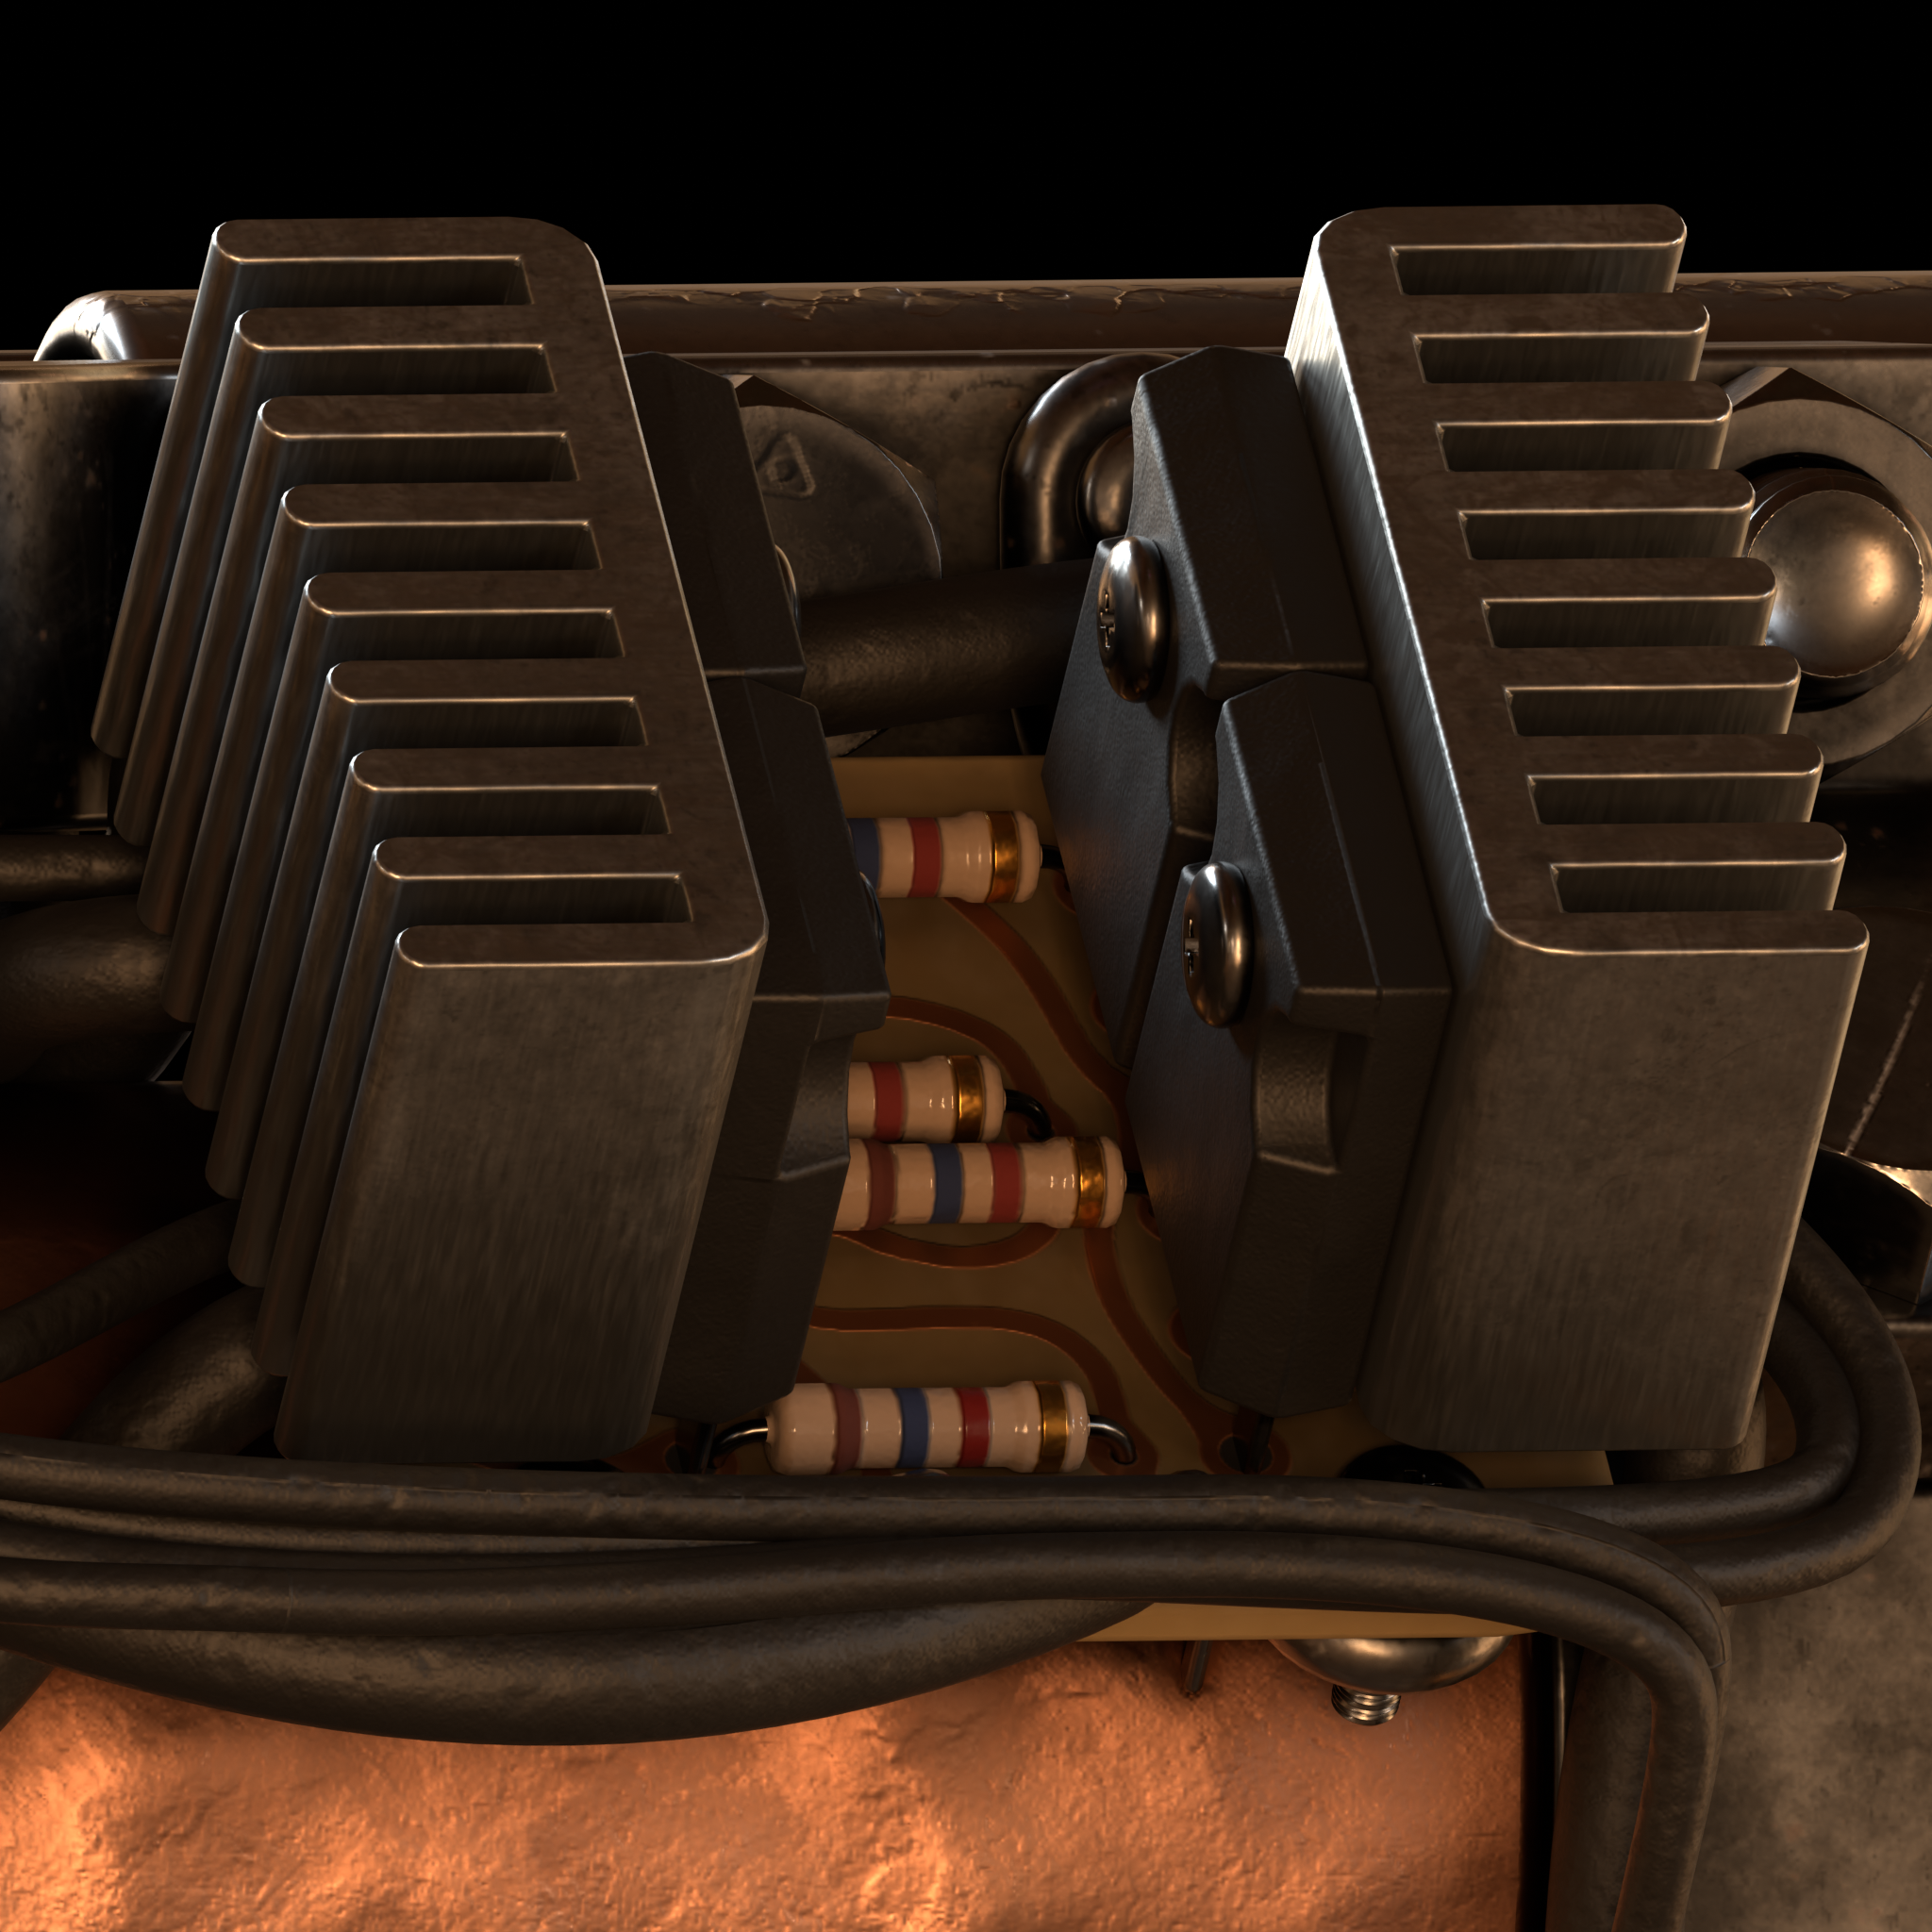
The heatsinks (also visible on the MCU board) are made from brushed aluminum, giving them their characteristic anisotropic look.
There are dozens of wires connecting all the parts together. I manually positioned them using Blender's curve system and later refined.

This project took me literally years to complete.
It's mostly because I've put great attention into accurate wiring, PCB layouts, and piping of the entire rifle, and later into depicting the materials as realistically as possible in Substance Painter.
Because of that, I decided on making this a non-realtime asset, as making a low-poly version would take away too much from the design, which was intended to be viewed up-close.
Overall, I loved the process and I'm glad I didn't abandon it along the way.
Below in the gallery you can see all the renders from this article.
Hope you enjoyed this project, see you in the next one!